Customize your Bicep deployments using azd
Azure Developer CLI, also known as azd, is a powerful command-line tool designed to simplify and streamline the development process for Azure applications and services. With azd, developers can easily manage and automate common tasks, from creating and deploying resources to monitoring and troubleshooting applications.
In this blog post, we’ll take a closer look at azd and explore some of its key features and benefits from an Infrastructure-as-code experience. I will explore also how it can help you customize the Azure resources deployment experience using pre/post scripts to provide the following experience when deployin a bicep template ,so let’s dive in!
Overivew
Azd is built on top of the Azure CLI and provides additional functionality specifically for developers, you can quickly create and manage resources, deploy and configure applications, and automate common tasks using scripts or pipelines.
One of the key benefits of azd is its ability to work with multiple Azure subscriptions and environments. You can easily switch between subscriptions or target different environments, such as development, staging, or production, using azd’s context management commands. This makes it easier to manage and deploy resources across different environments, without having to manually update configuration files or settings.
Azd also includes a number of helpful features for debugging and troubleshooting Azure applications. You can monitor application logs and metrics, view detailed resource information, and even run commands inside Azure VMs using azd’s remote-execution capabilities. This can help you quickly identify and resolve issues, without having to switch back and forth between different Azure portals or tools.
In addition to its core functionality, azd also integrates with a wide range of tools and services, such as GitHub, Jenkins, and Azure DevOps. This makes it easy to incorporate azd into your existing development workflows and toolchains, and to automate tasks using your preferred scripting language or framework.
Overall, Azure Developer CLI (azd) is a powerful and flexible tool that can help simplify and streamline the Azure development process. Whether you’re a solo developer or part of a larger team, azd can help you work more efficiently and effectively, and achieve greater success with your Azure applications and services.
Using Azd to customize a bicep deployment
In this demonstration, I will try to use azd to customize an Azure Web Application bicep deployment to do the following:
- Ask the user interactively to choose a geography
- Based on the geography, prompt for the Azure region to deploy to
- Check and display the current cores usage Vs the cores limit in the selected region
- Prompt for a prefix for the web app
- Prompt for a budget limit to enforce on the resource group
- Deploy the web application and apply the budget
Before we start diving into the code, lets first explore the concept of hooks in azd
Customizing your azd deployment using hooks
Azd supports hooks, which are scripts that can be executed automatically before or after different stages of the deployment. This can be useful for implementing custom workflows or adding additional functionality to existing commands. For example, you could use a pre-command hook to check for the existence of a specific resource before running a command, or a post-command hook to send a notification when a deployment is complete. Azd includes a number of built-in hooks, such as:
- prerestore and postrestore: Run before and after package dependencies are restored.
- preprovision and postprovision: Run before and after Azure resources are created.
- predeploy and postdeploy: Run before and after the application code is deployed to Azure.
- preup and postup: Run before and after the combined deployment pipeline. Up is a shorthand command that runs restore, provision, and deploy sequentially.
- predown and postdown: Run before and after the resources are removed.
- prerestore and postrestore: Run before and after the service packages and dependencies are restored.
- prepackage and postpackage: Run before and after the app is packaged for deployment.
- predeploy and postdeploy: Run before and after the service code is deployed to Azure.
This gives you a great deal of flexibility and control over the behavior of azd, and allows you to customize it to your specific needs and requirements.
In this demonstration, I will use the preprovision and postprovision hooks. Let’s first look at my folder structure for this deployment
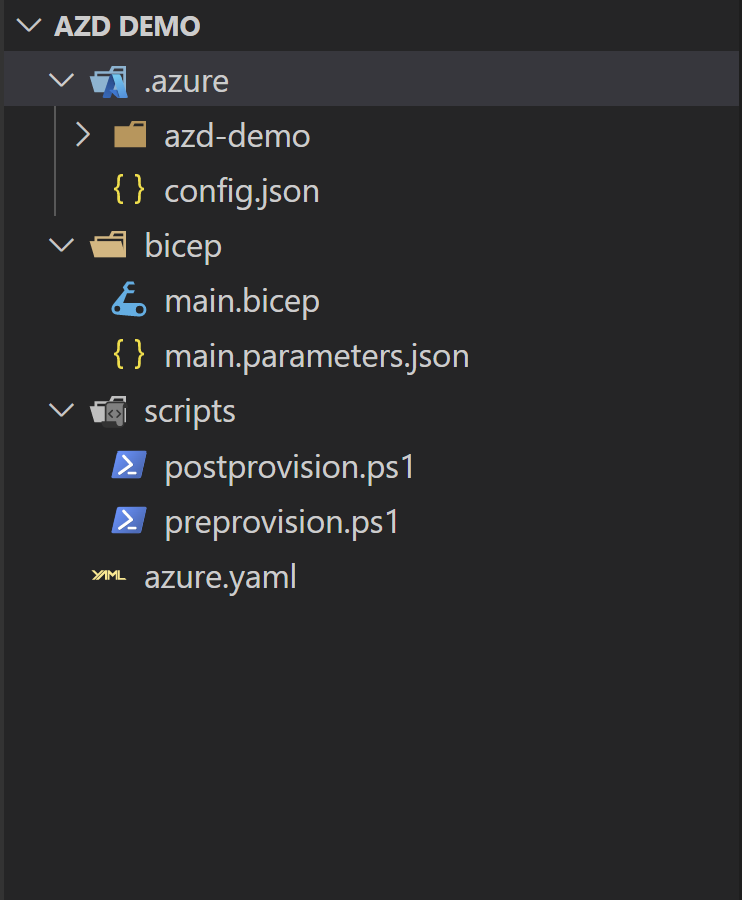
Folder and file structure
Bicep folder hosts the bicep deployment and parameters file.
Outputs in bicep can be passed to the different hooks in azd as environment variables to be able to customize the deployment based on user input.
==> main.bicep
param webappPrefix string
param appServiceSkuname string = 'P1v3'
param appServiceSkutier string = 'PremiumV3'
param appServiceSkusize string = 'P1v3'
param appServiceSkufamily string = 'Pv3'
param location string = resourceGroup().location

var webappName = '${webappPrefix}-${uniqueString(resourceGroup().id)}'
var appServiceName = '${webappPrefix}-${uniqueString(resourceGroup().id)}'

resource appServicePlan 'Microsoft.Web/serverfarms@2022-09-01' = {
  name: appServiceName
  location: location
  sku: {
    name: appServiceSkuname
    tier: appServiceSkutier
    size: appServiceSkusize
    family: appServiceSkufamily
    capacity: 1
  }
}

resource webApp 'Microsoft.Web/sites@2022-09-01' = {
  name: webappName
  location: location
  properties: {
    serverFarmId: appServicePlan.id
  }
}

output AZURE_RESOURCE_GROUP string = resourceGroup().name
==> main.parameters.json
You can see that I’m referencing environment variables in the parameters file. Those variables will be generated from the preprovision script using azd
{
  "$schema": "https://schema.management.azure.com/schemas/2015-01-01/deploymentParameters.json#",
  "contentVersion": "1.0.0.0",
  "parameters": {
    "webappPrefix": {
      "value": "${WEBAPP_PREFIX}"
    },
    "location": {
      "value": "${AZURE_LOCATION}"
    }
  }
}
Azure.yaml is the main manifest for azd where we define where our files are
name: azd_test
metadata:
    template: azd_test@0.0.1-beta
infra:
  provider: "bicep"
  path: "bicep"
  module: "main"
hooks:
  preprovision:
    shell: pwsh
    run: ./scripts/preprovision.ps1
    continueOnError: false
    interactive: true
  postprovision:
    shell: pwsh
    run: ./scripts/postprovision.ps1
    continueOnError: false
    interactive: true
Scripts folder is the folder where our preprovision and postprovision scripts are located
==> preprovision.ps1
You can see I’m using azd env which allows me to set environment variables that can be used across this deployment
# Install InteractiveMenu module
$module = Get-Module -Name "InteractiveMenu" -ListAvailable
if ($module) {
    Update-Module -Name "InteractiveMenu" -Force
}
else {
    Install-Module -Name InteractiveMenu
}

Import-Module InteractiveMenu

###################
## Select region
###################

$geograhpyMenuItem = @()
$geograhpyLocations = Get-AzLocation | Where-Object geographyGroup -ne $null | Select-Object -Unique geographyGroup | Sort-Object geographyGroup
for ($i = 0; $i -lt $geograhpyLocations.Count; $i++) {
    $geographyGroup = $geograhpyLocations[$i].geographyGroup
    $geograhpyMenuItem += Get-InteractiveChooseMenuOption `
        -Value $geographyGroup `
        -Label $geographyGroup `
        -Info $geographyGroup
    }

$geographyQuestion = "Which Geography are you deploying to ?"

$options = @{
    MenuInfoColor = [ConsoleColor]::DarkYellow
    QuestionColor = [ConsoleColor]::Magenta
    HelpColor = [ConsoleColor]::Cyan
    ErrorColor = [ConsoleColor]::DarkRed
    HighlightColor = [ConsoleColor]::DarkGreen
    OptionSeparator = "`n"
}

$selectedGeography = Get-InteractiveMenuChooseUserSelection -Question $geographyQuestion -Answers $geograhpyMenuItem

###################
## Select location
###################

$locationMenuItem = @()
$azureLocations = Get-AzLocation | Where-Object geographyGroup -eq $selectedGeography | Sort-Object Location
foreach ($azureLocation in $azureLocations){
    $locationMenuItem += Get-InteractiveChooseMenuOption `
        -Value $azureLocation.Location `
        -Label $azureLocation.Location `
        -Info $azureLocation.Location
}

$locationQuestion = "Which location are you deploying to ?"
$selectedlocation = Get-InteractiveMenuChooseUserSelection -Question $locationQuestion -Answers $locationMenuItem -Options $options
$env:AZURE_LOCATION = $selectedlocation

#####################
## Show region usage
#####################

$usage = (az vm list-usage --location $selectedlocation --output json --only-show-errors) | ConvertFrom-Json
$usage = $usage | Where-Object {$_.localname -eq "Total Regional vCPUs"}

$usageObj = New-Object PSObject -Property @{
    CurrentUsage = $usage.currentValue
    Limit = $usage.limit
}

Write-Host "`n💻 Total Regional vCPUs utilization in $selectedlocation is:" -ForegroundColor Green
$usageObj | Format-Table CurrentUsage, Limit

#####################
## Web App prefix
#####################

$WEBAPP_PREFIX = Read-Host -Prompt "`n🌐 Enter the Web Application prefix: "
azd env set WEBAPP_PREFIX $WEBAPP_PREFIX

################################
## Prompt for the budget amount
################################

$budgetAmount = Read-Host -Prompt "`n💳 Enter the budget amount"
$budgetNotificationContact = Read-Host -Prompt "`n📧 Enter the email address to receive budget notifications"

azd env set BUDGET $budgetAmount
azd env set budgetNotificationContact $budgetNotificationContact
==> postprovision.ps1
########################################
## Deploy a budget amount using ARM API
########################################

$subscription = $env:AZURE_SUBSCRIPTION_ID
$resourceGroup = $env:AZURE_RESOURCE_GROUP
$budgetAmount = $env:BUDGET
$budgetNotificationContact = $env:budgetNotificationContact

$startDate = (get-date -Day 1).ToUniversalTime().ToString("yyyy-MM-ddTHH:mm:ssZ")
$startDateObj = [DateTime]::ParseExact($startDate, 'yyyy-MM-ddTHH:mm:ssZ', $null)
$endDate = $startDateObj.AddYears(1).ToString('yyyy-MM-ddTHH:mm:ssZ')

$body = @{
    "properties" = @{
        "category"      = "Cost"
        "amount"        = $budgetAmount
        "timeGrain"     = "Monthly"
        "timePeriod"    = @{
            "startDate" = "$startDate"
            "endDate"   = "$endDate"
        }
        "notifications" = @{
            "Forecasted_GreaterThan_80_Percent" = @{
                "enabled"       = $true
                "operator"      = "GreaterThan"
                "threshold"     = 80
                "locale"        = "en-us"
                "contactEmails" = @("$budgetNotificationContact")
                "thresholdType" = "Actual"
            }
        }
    }
}
$token = (Get-AzAccessToken).token
Invoke-RestMethod `
    -Method Put `
    -Headers @{"Authorization" = "Bearer $token" } `
    -ContentType "application/json; charset=utf-8" `
    -Body (ConvertTo-Json $body -Depth 10) `
    -Uri "https://management.azure.com/subscriptions/$subscription/resourceGroups/$resourceGroup/providers/Microsoft.Consumption/budgets/Budget1?api-version=2021-10-01"
Azd Up ⬆️
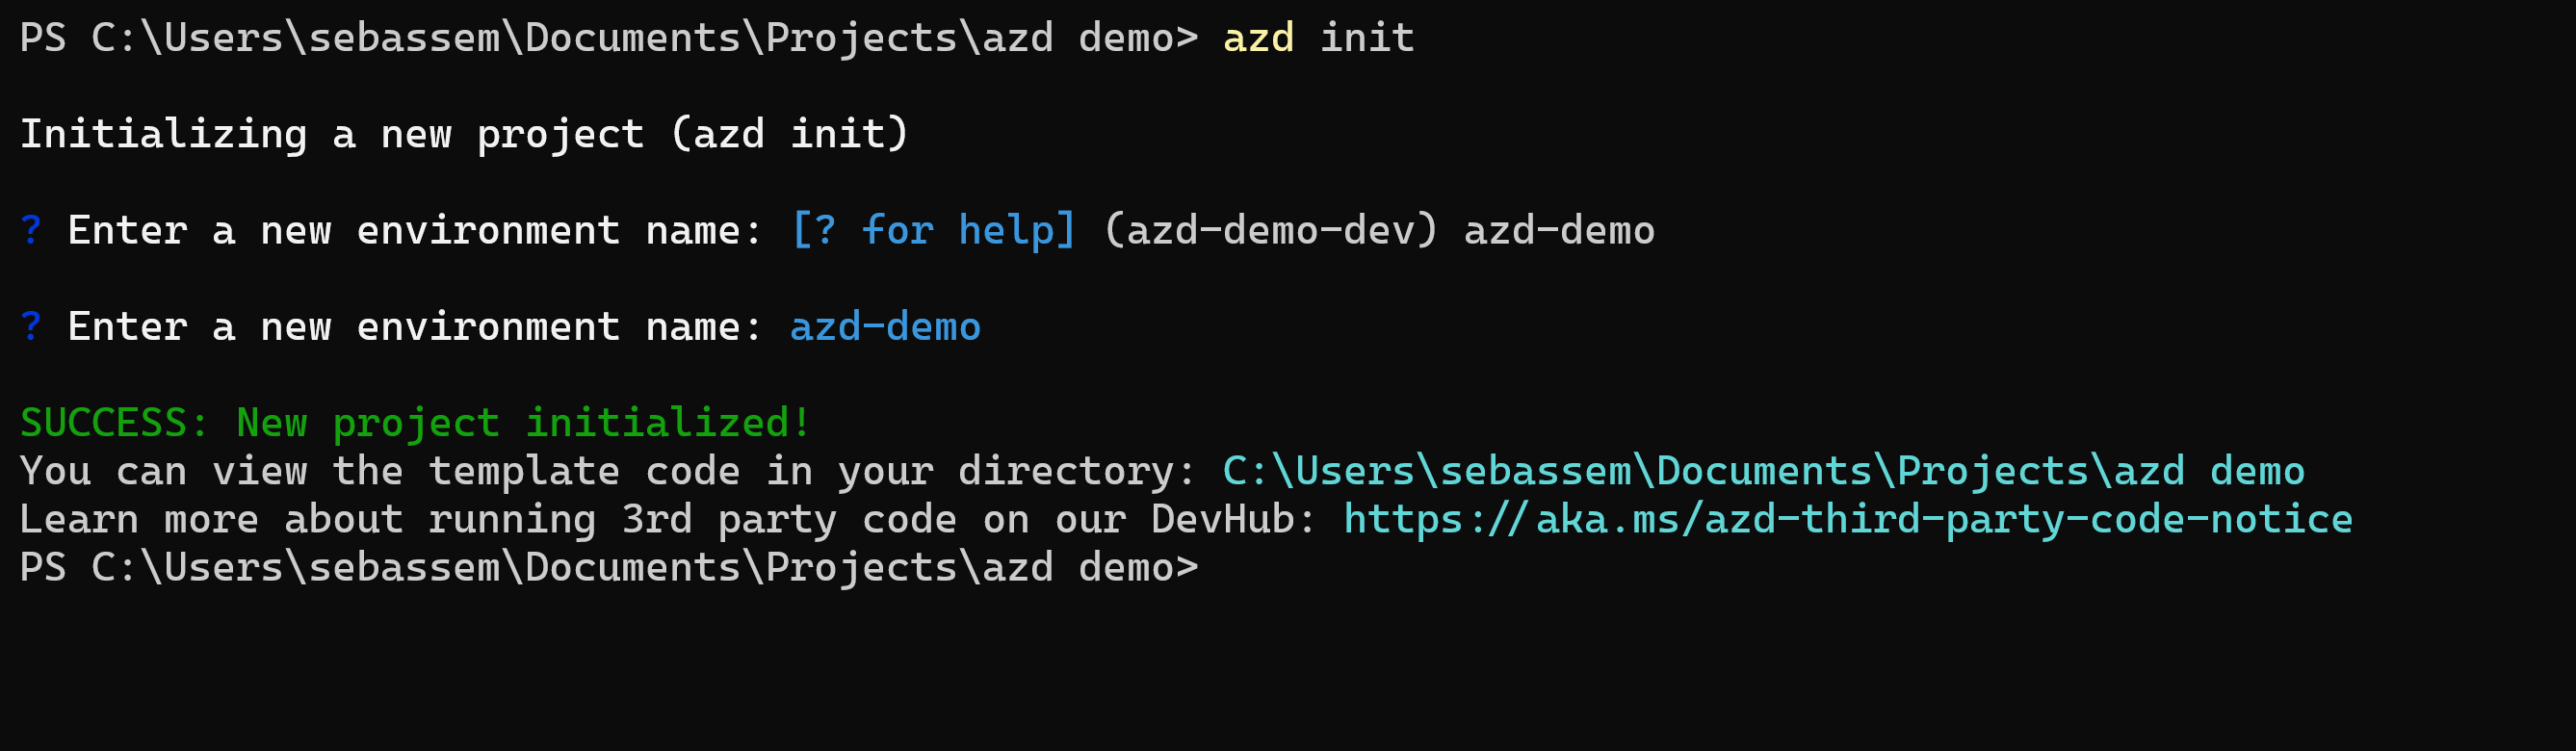
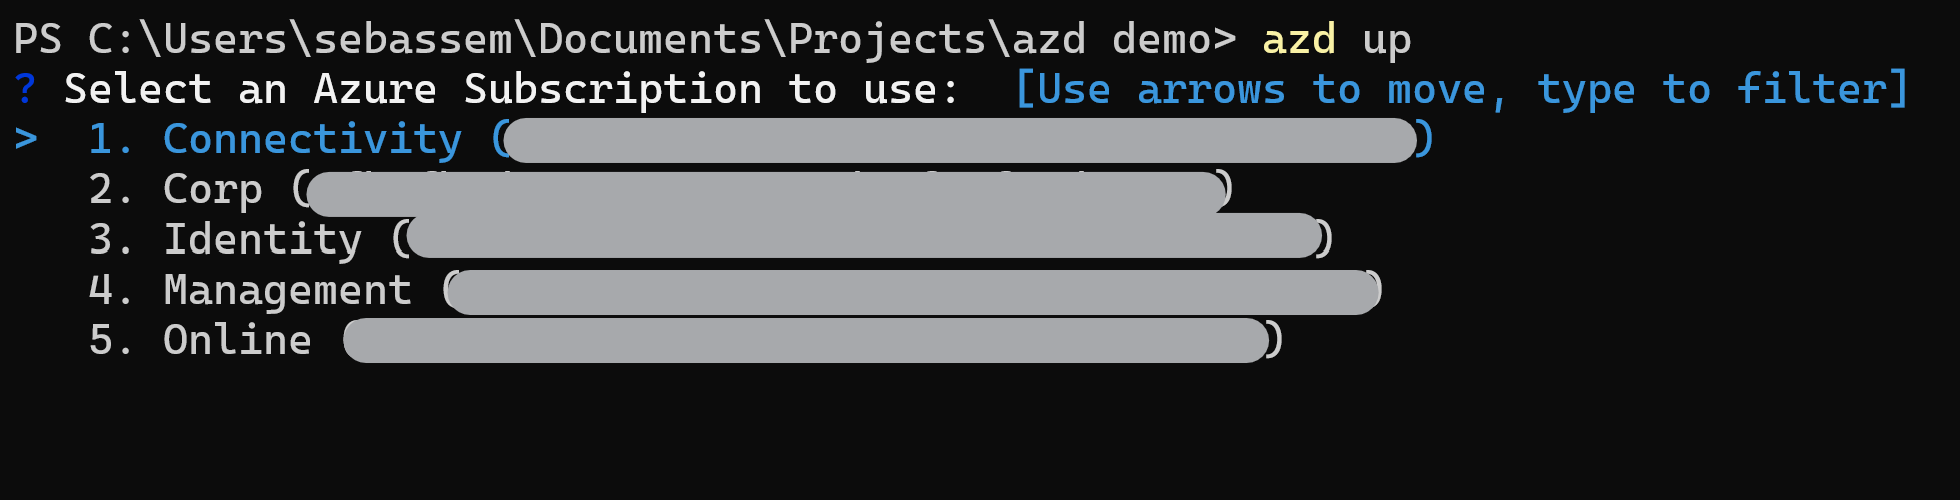
To start this deployment, all you need to do is initialize the folder using azd init and then run azd up
You are prompted to choose a subscription from the list of available subscriptions.
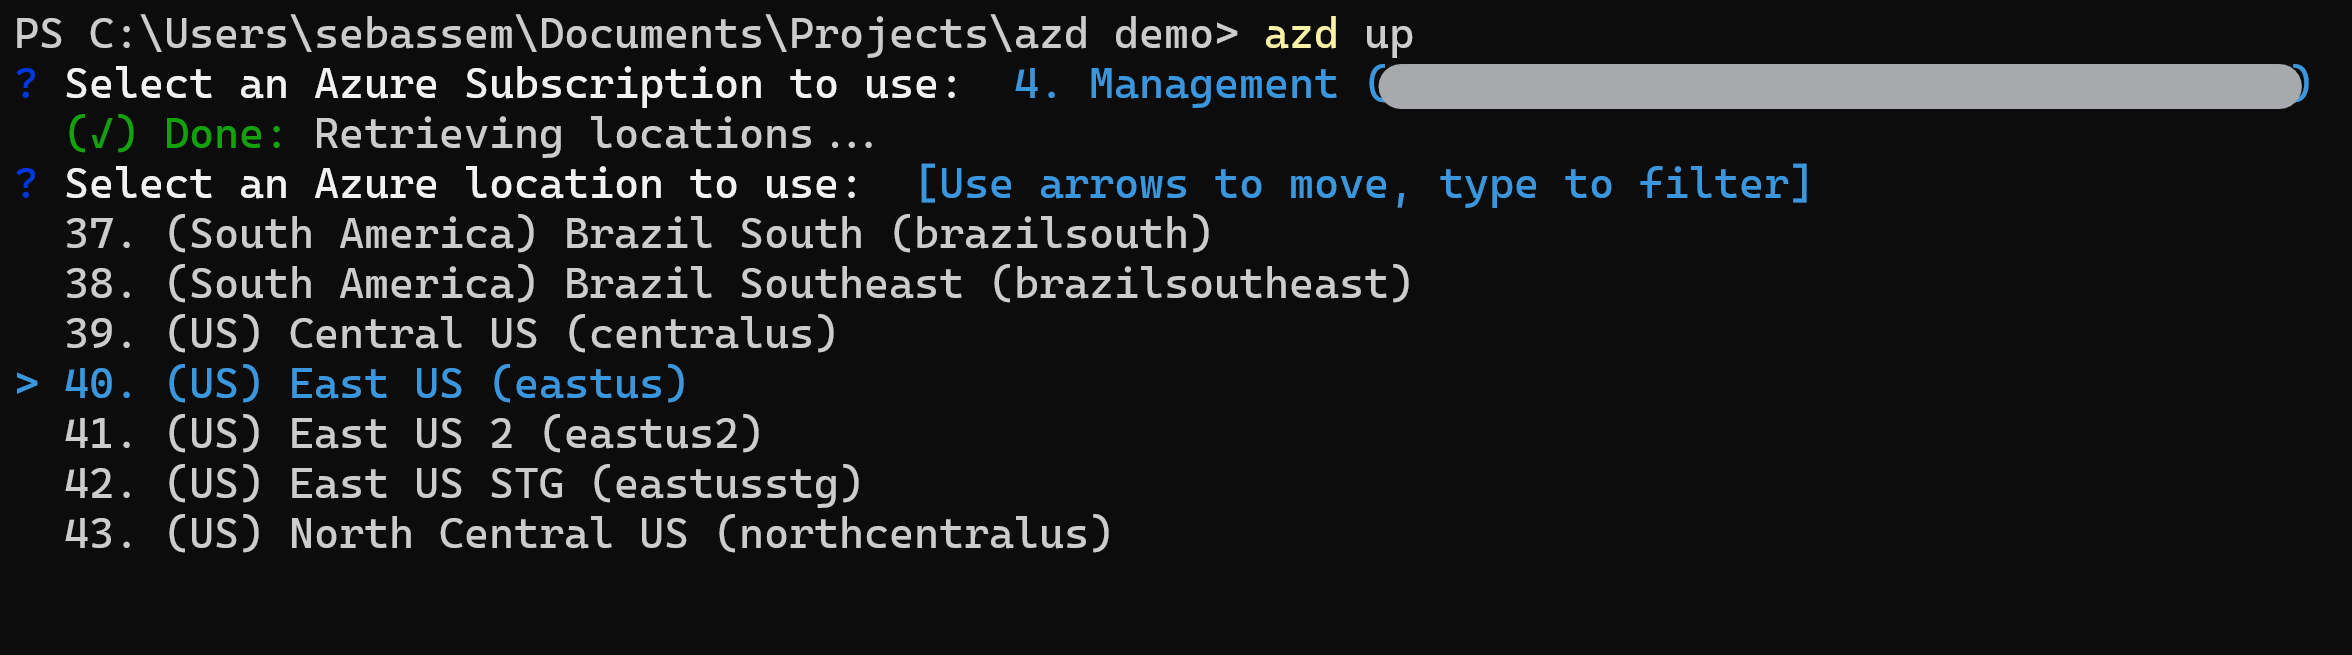
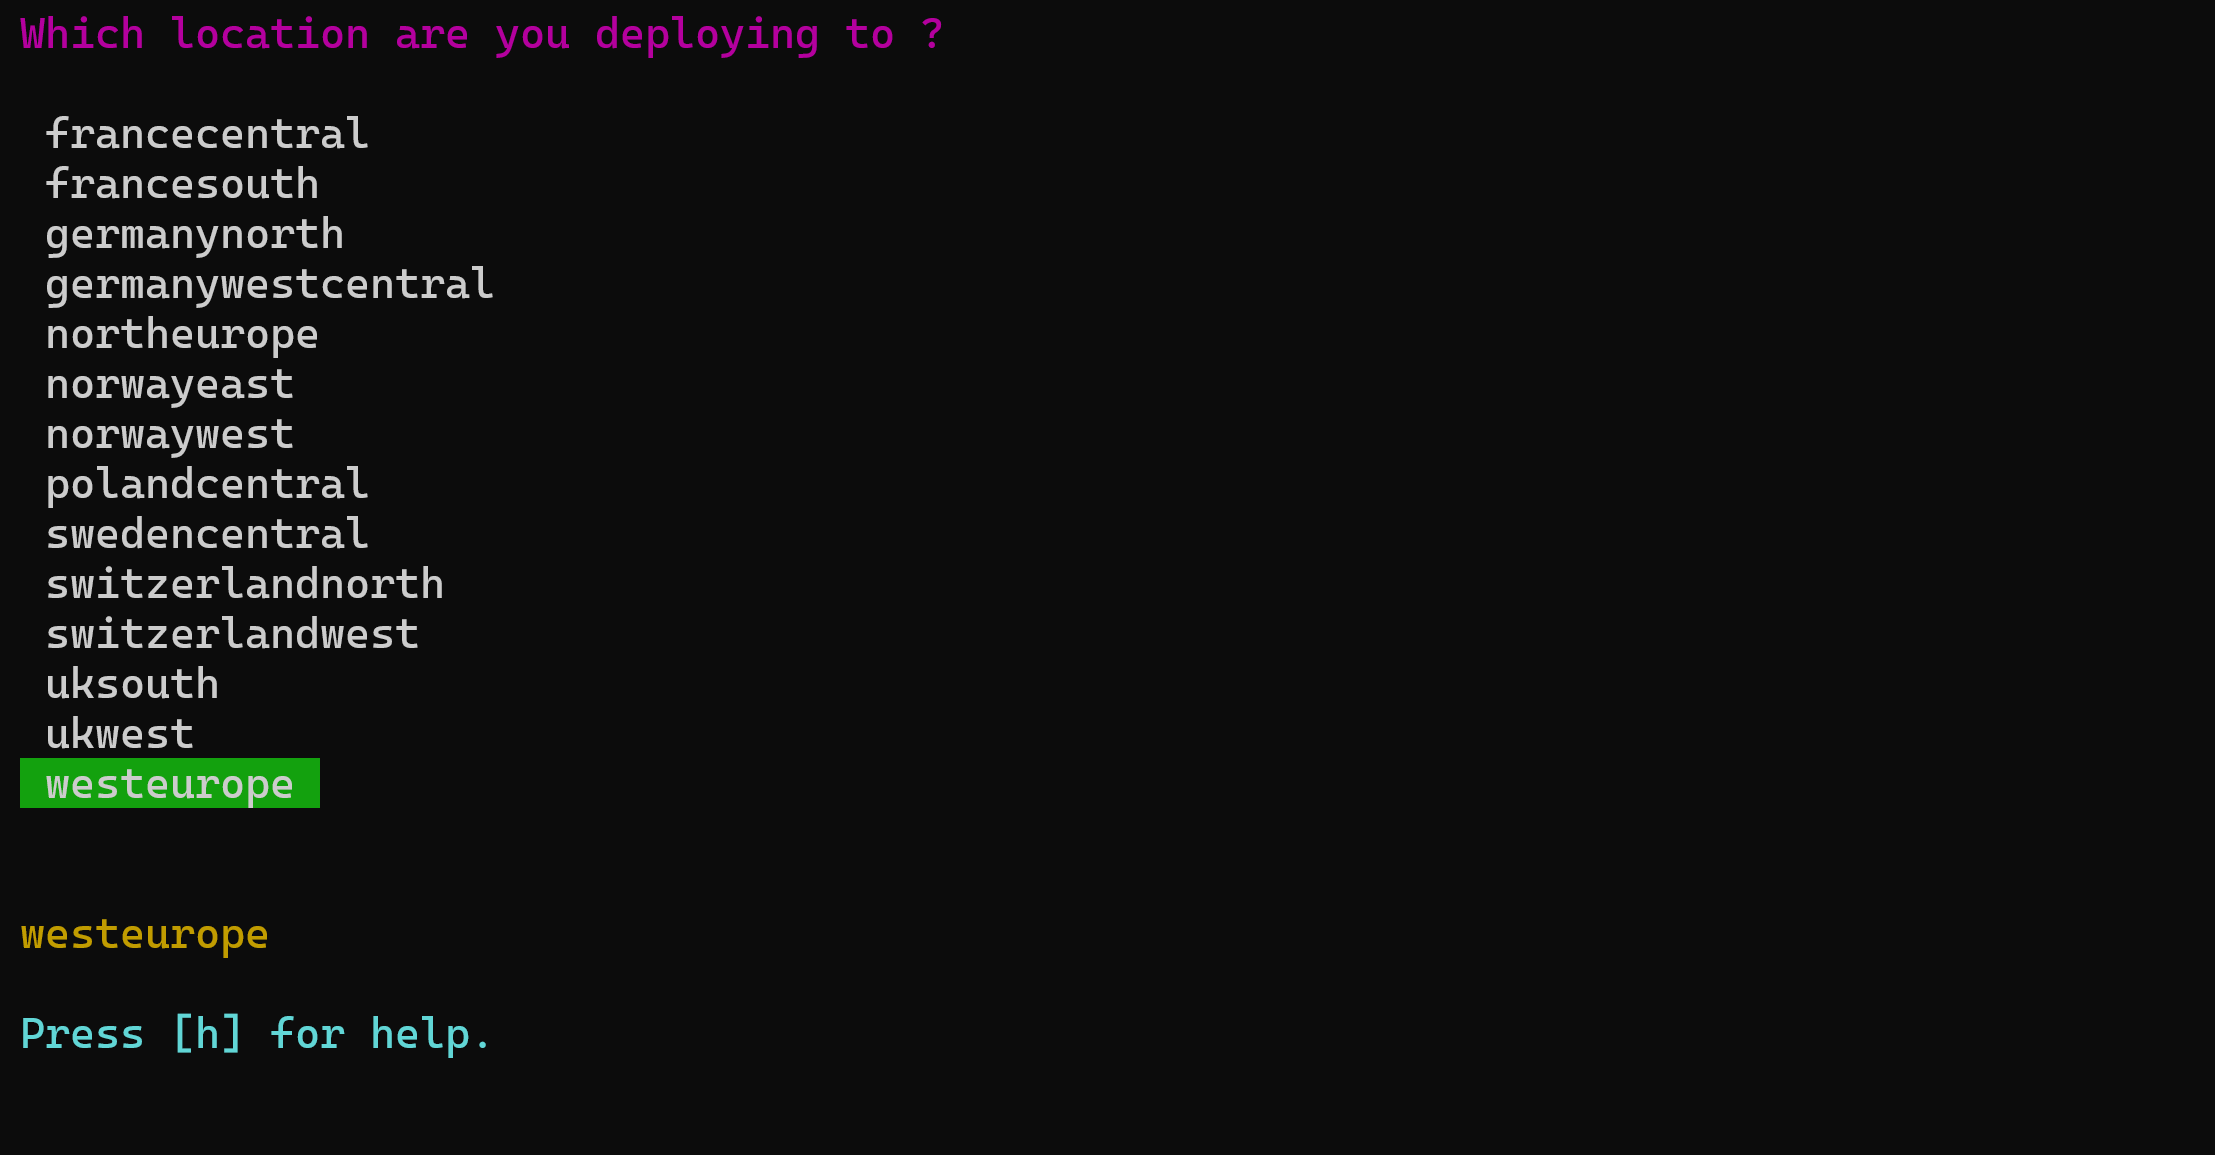
Then, you are prompted to select a region for this deployment (we will use the region we select in the preprovision script).
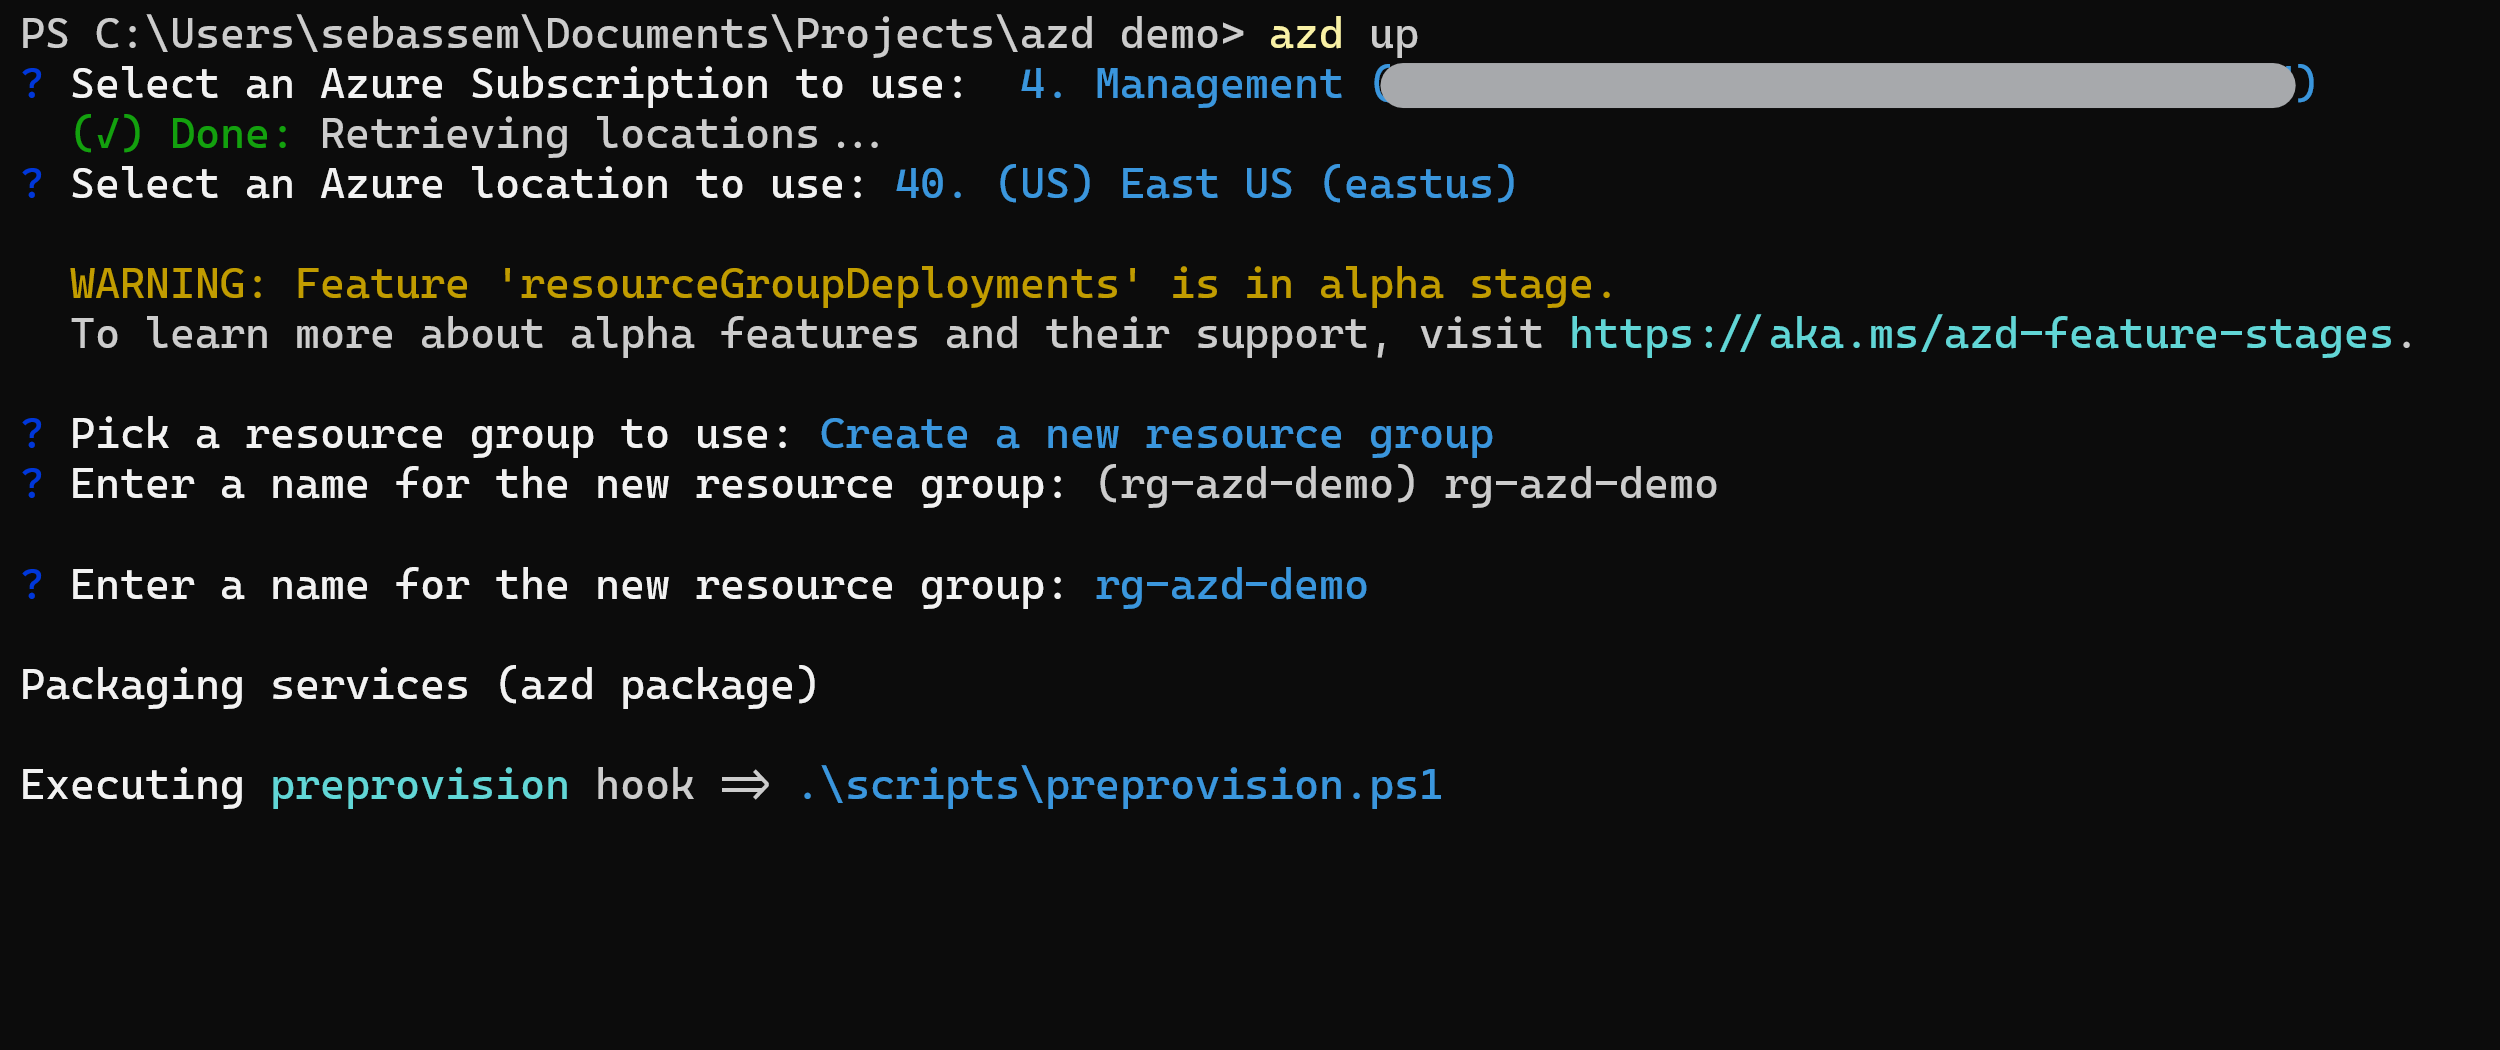
Since we have a preprovision hook, the preprovision script will run before our bicep deployment is executed.
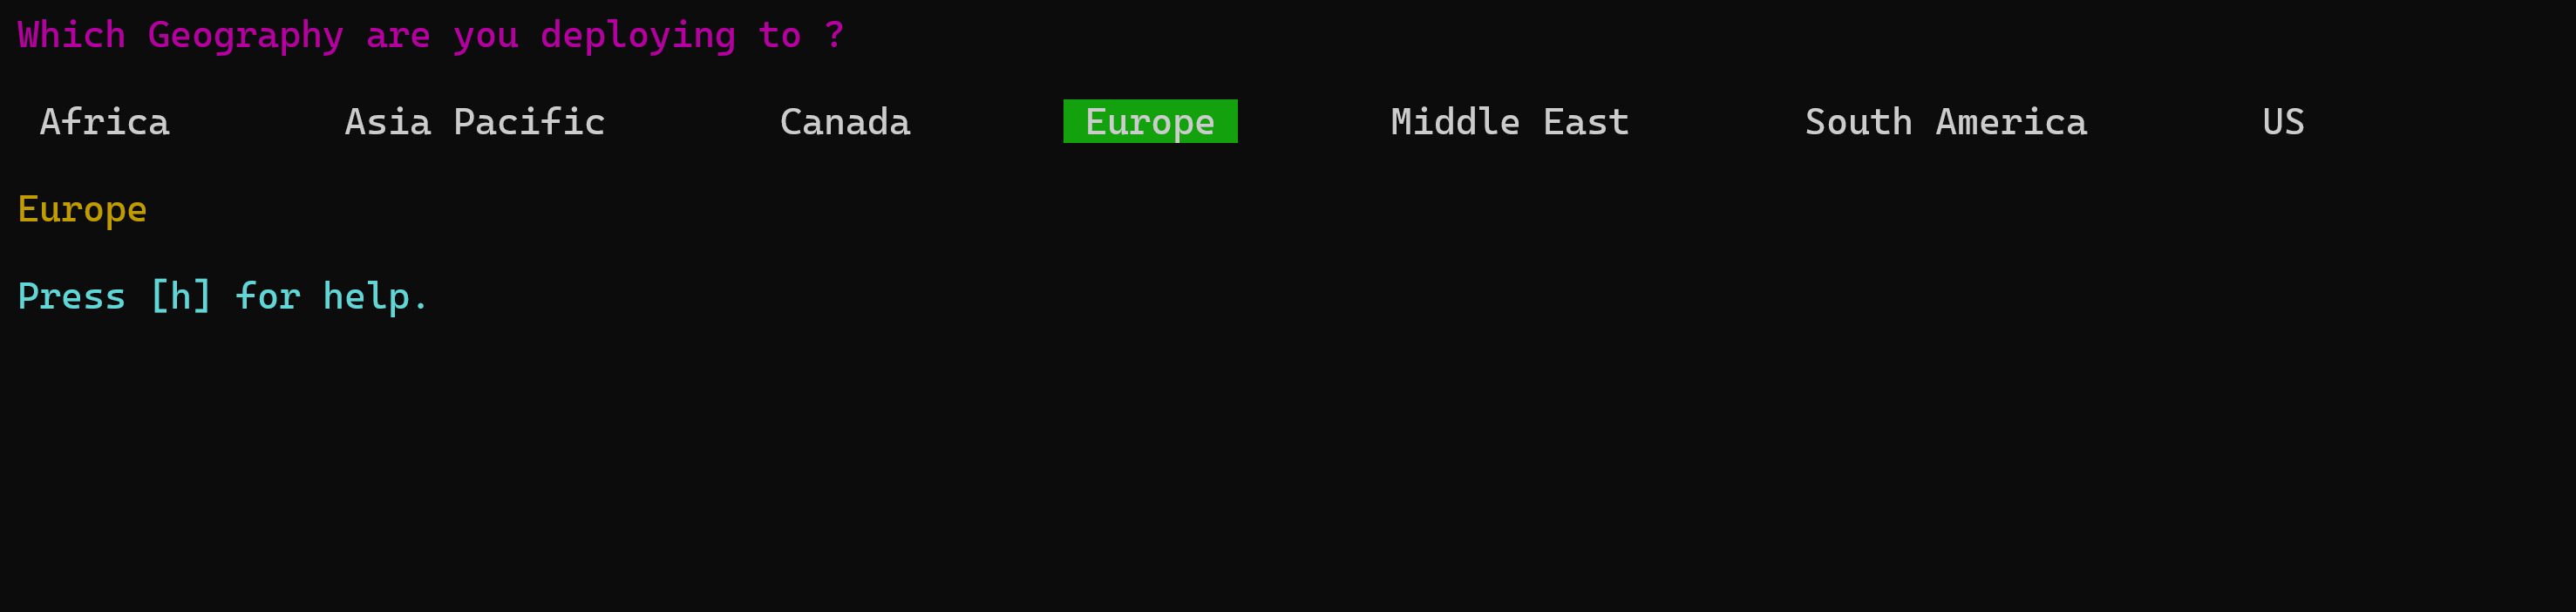
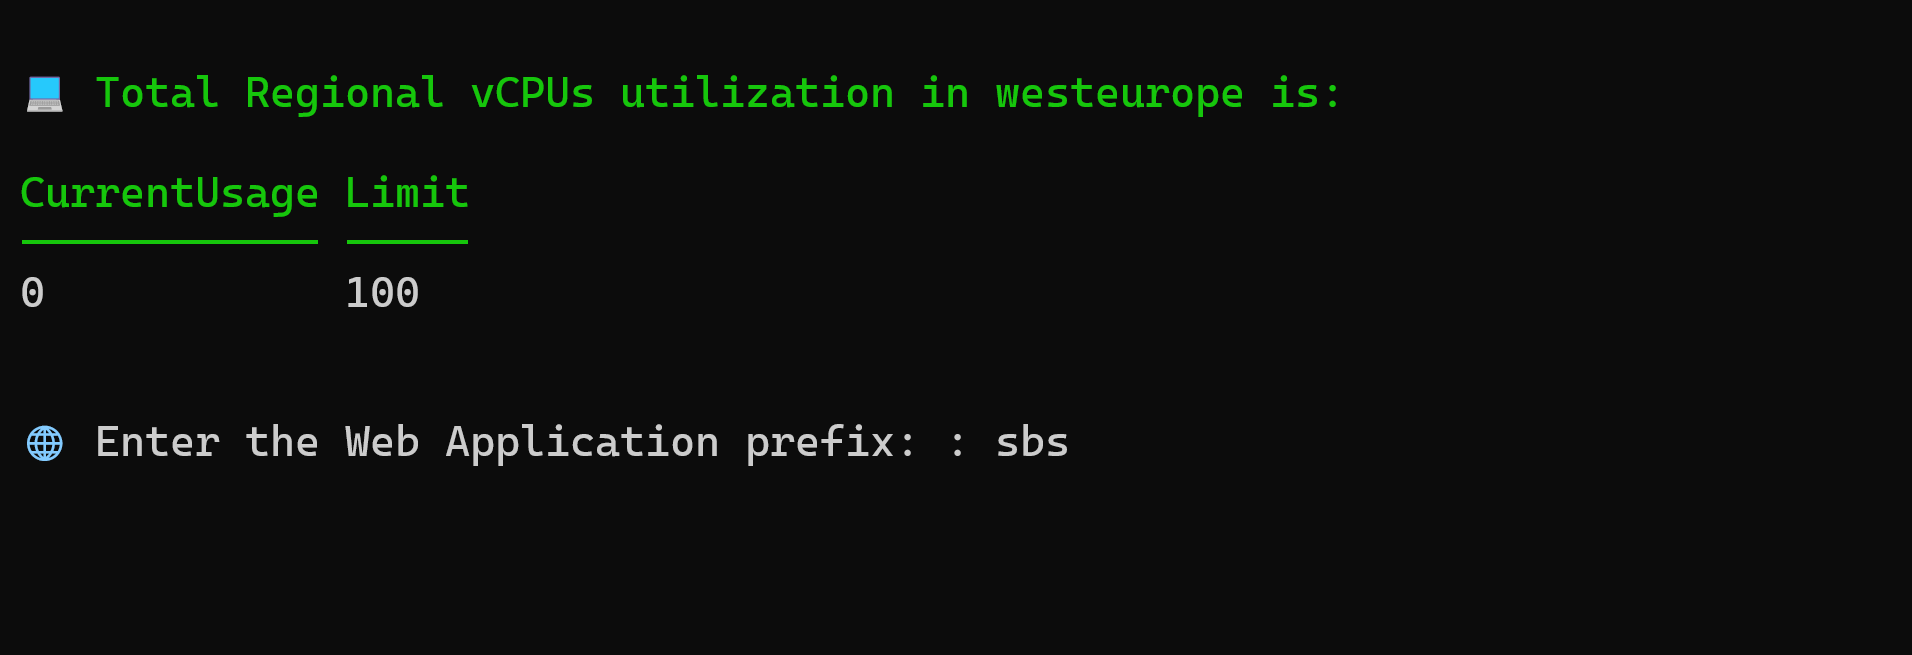
As the preprovision script runs, we will be prompted for the geography, region, web app prefix and budget amount.
The preprovision script will display the current cores usage and limit in the selected region.
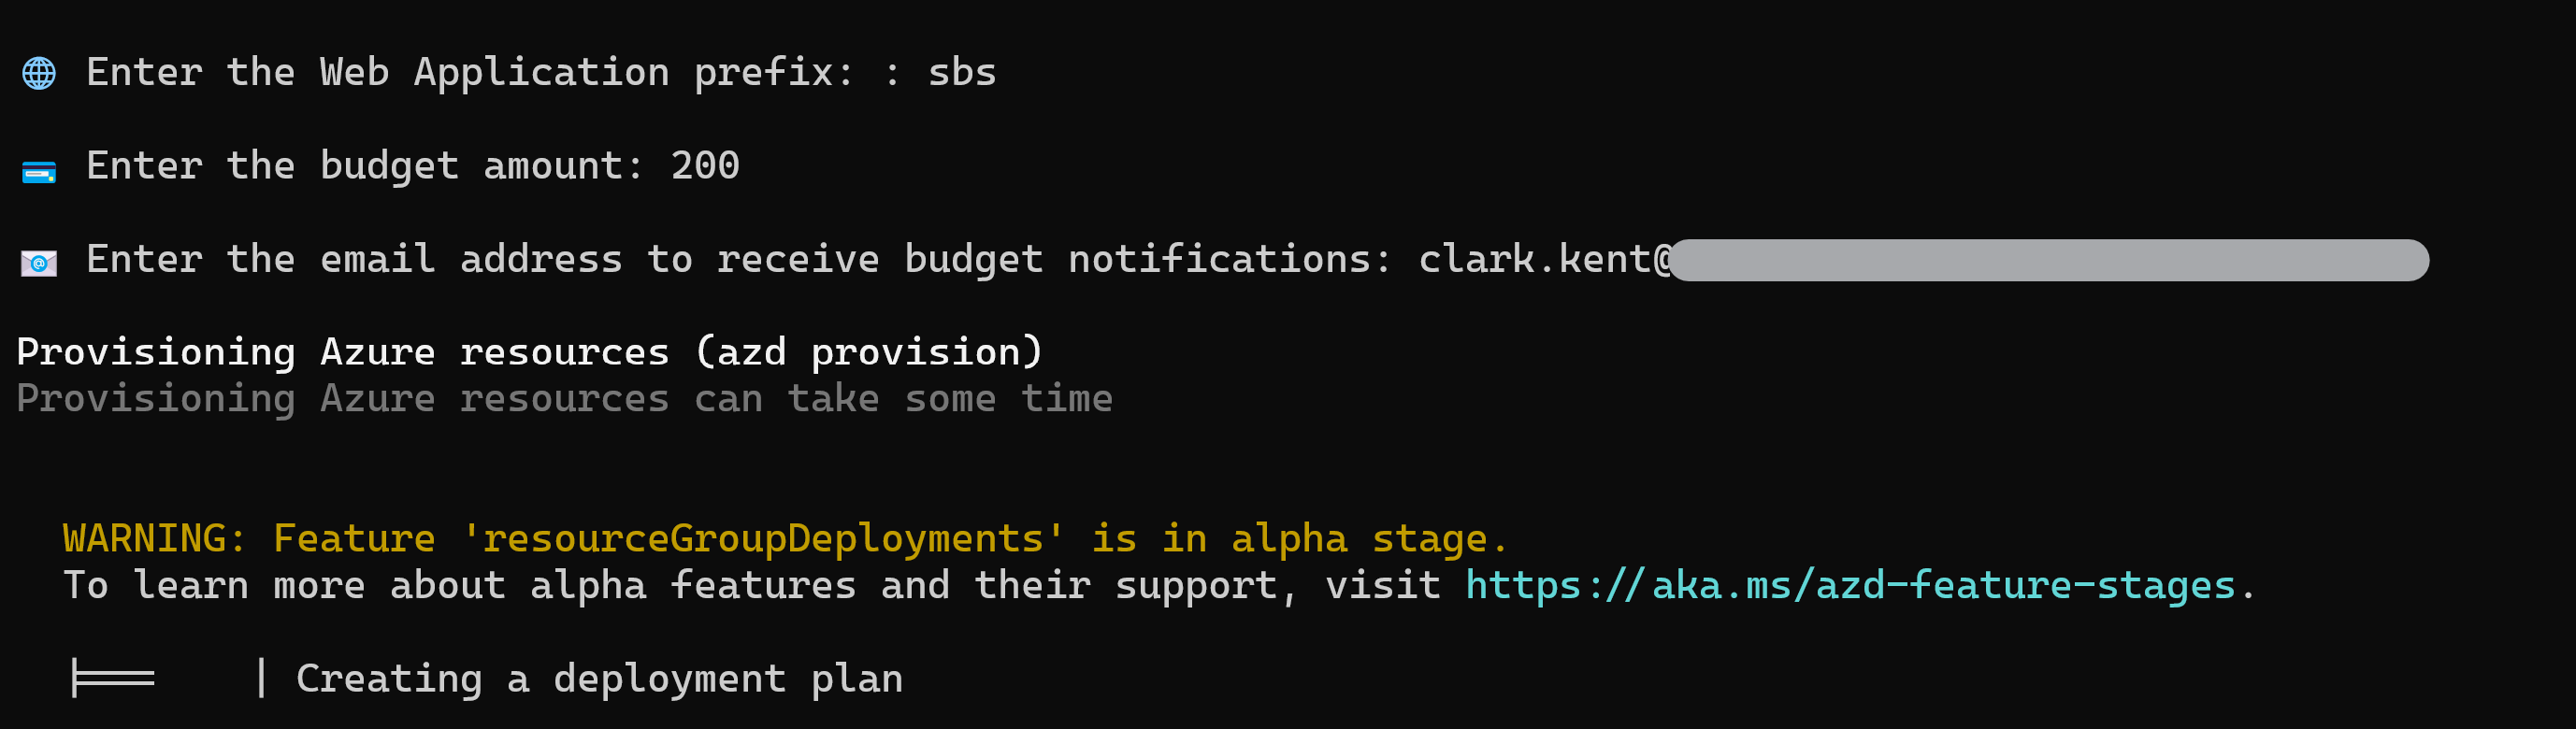
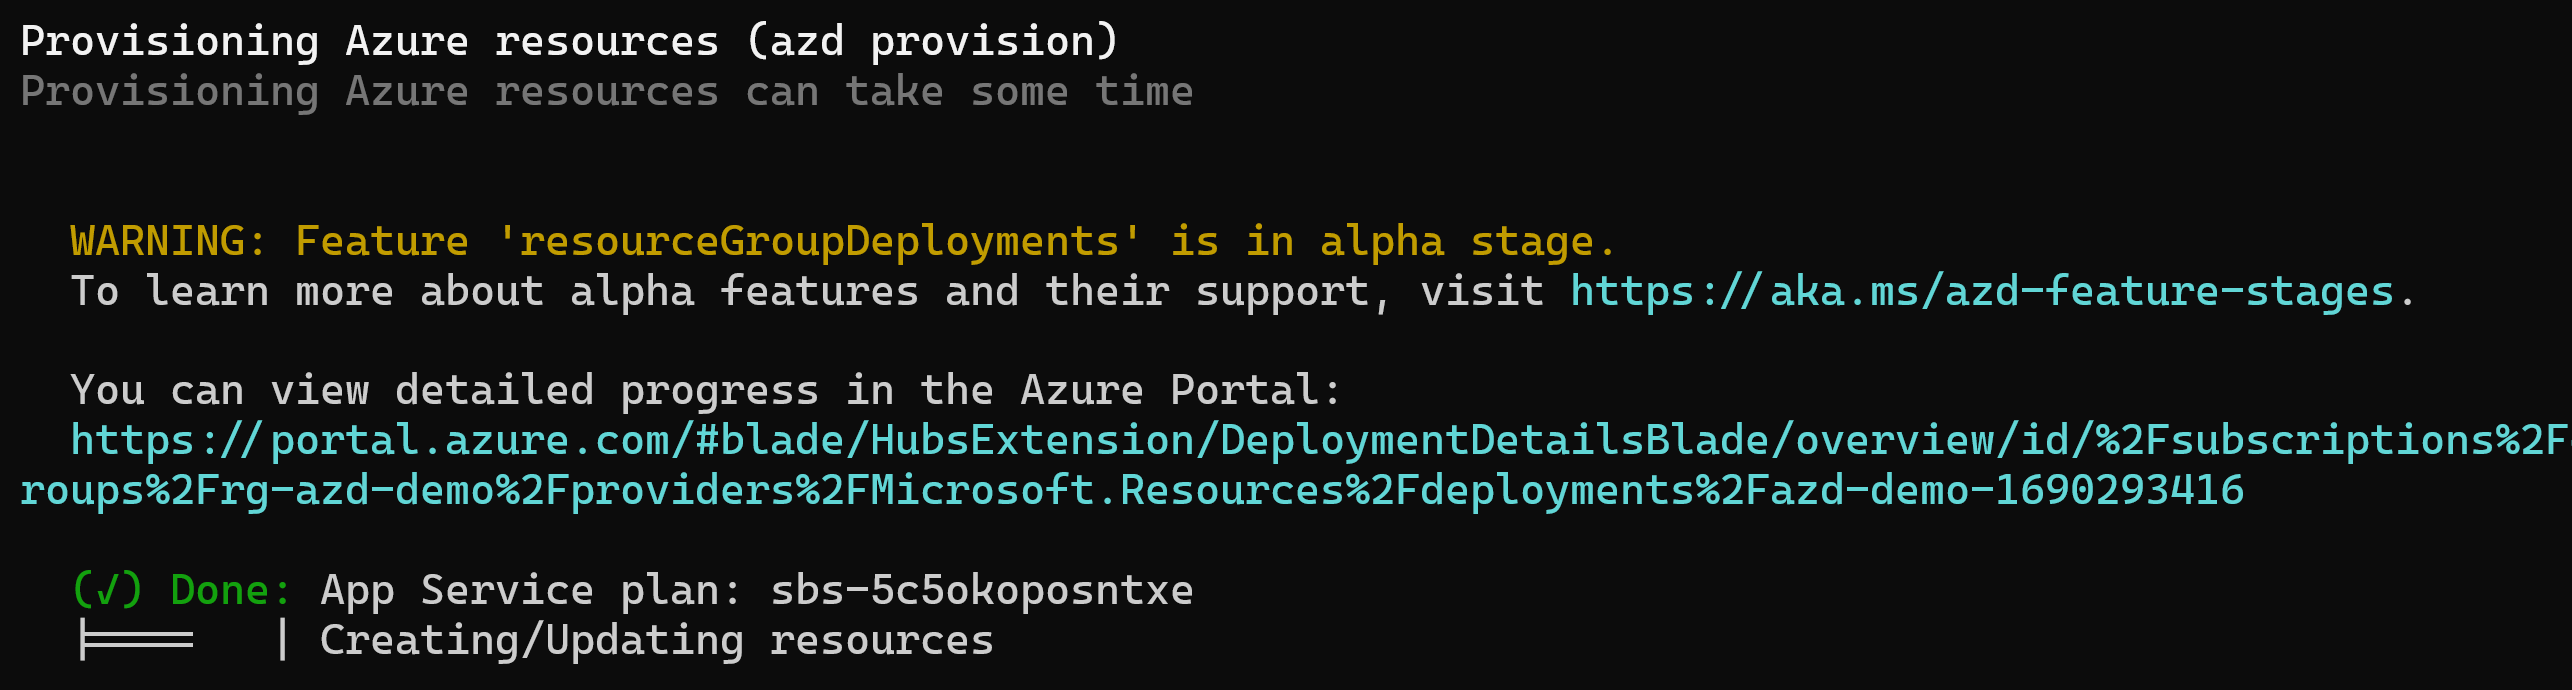
After the script has concluded, the bicep template will start getting deployed.
The postprovision scripts kicks in after the bicep deployment has completed to create the budget on the created resource group.

We can see that indeed our Azure Web App has been deployed successfully.
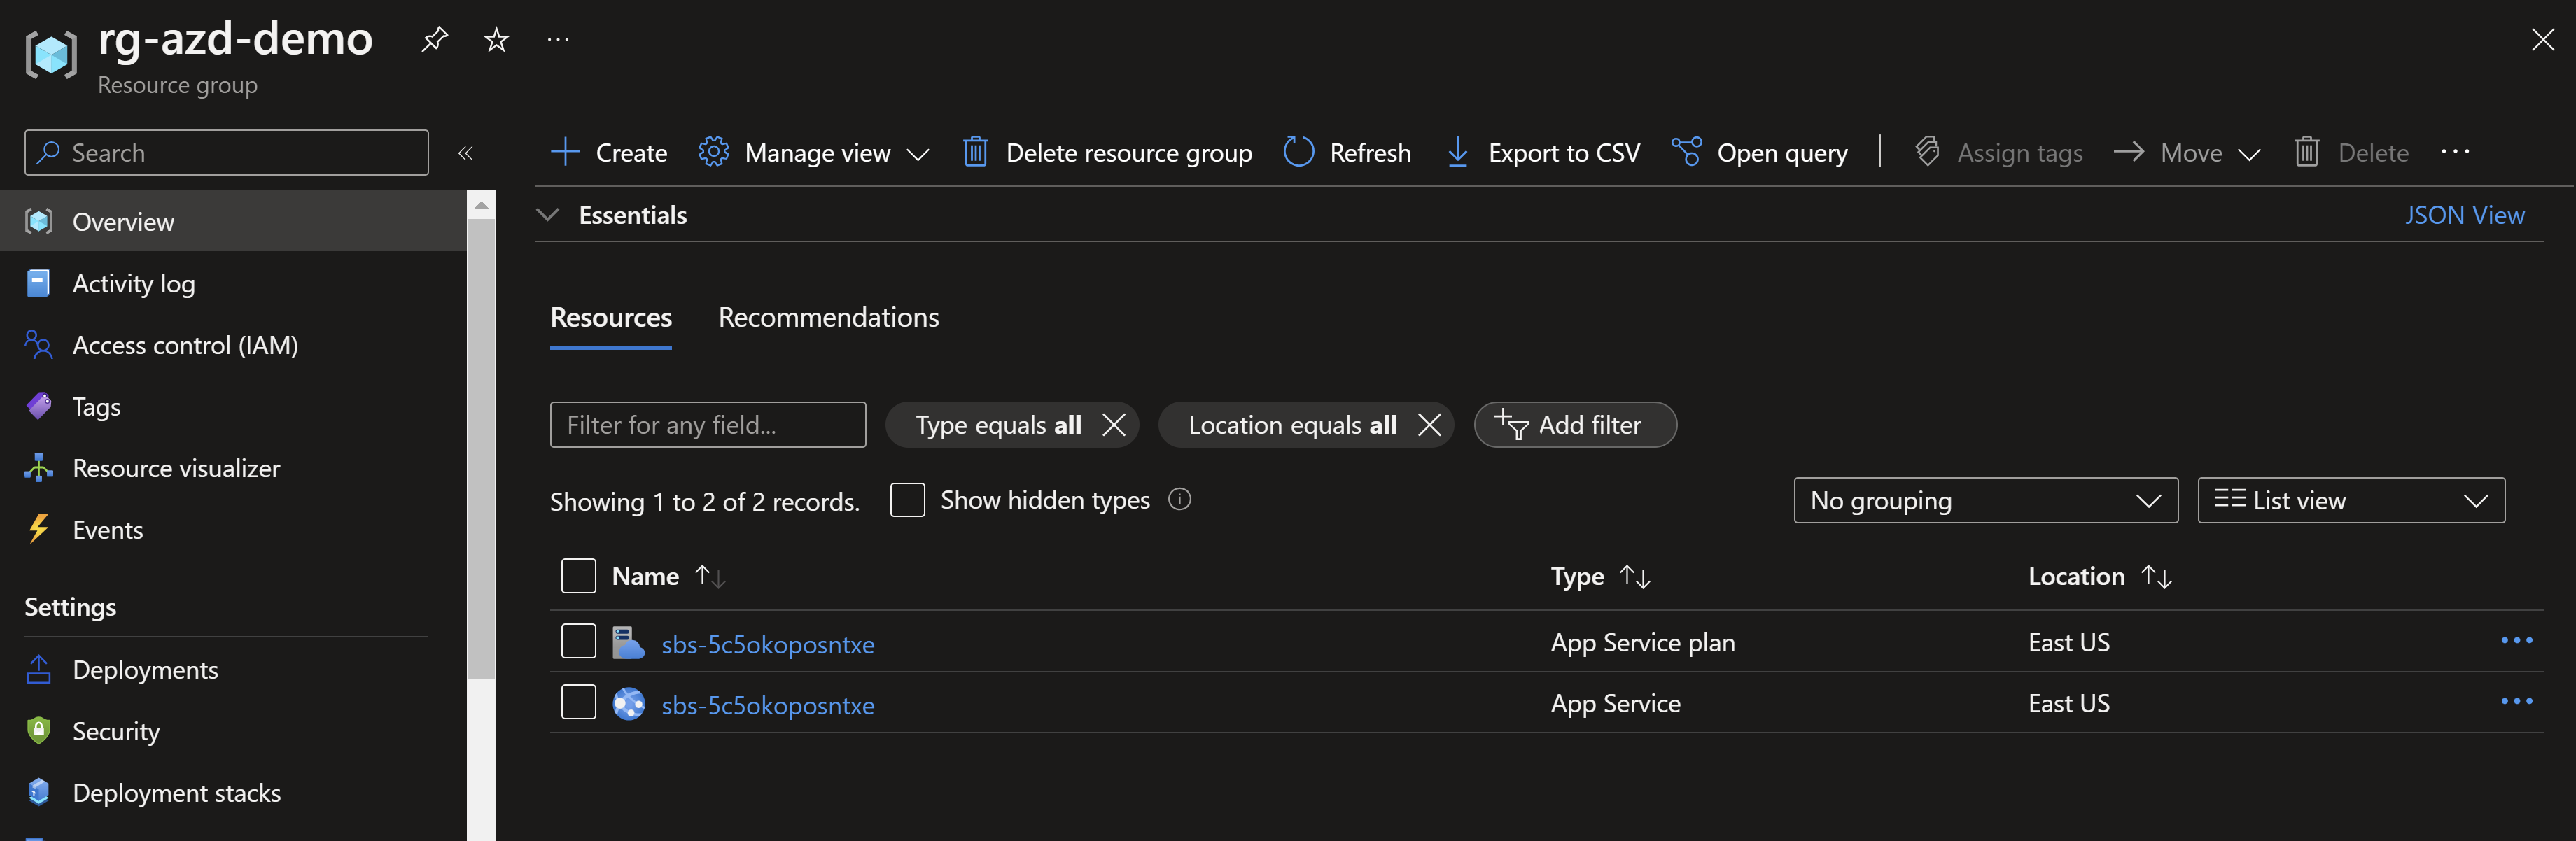
The budget as well has been assigned on the resource group.

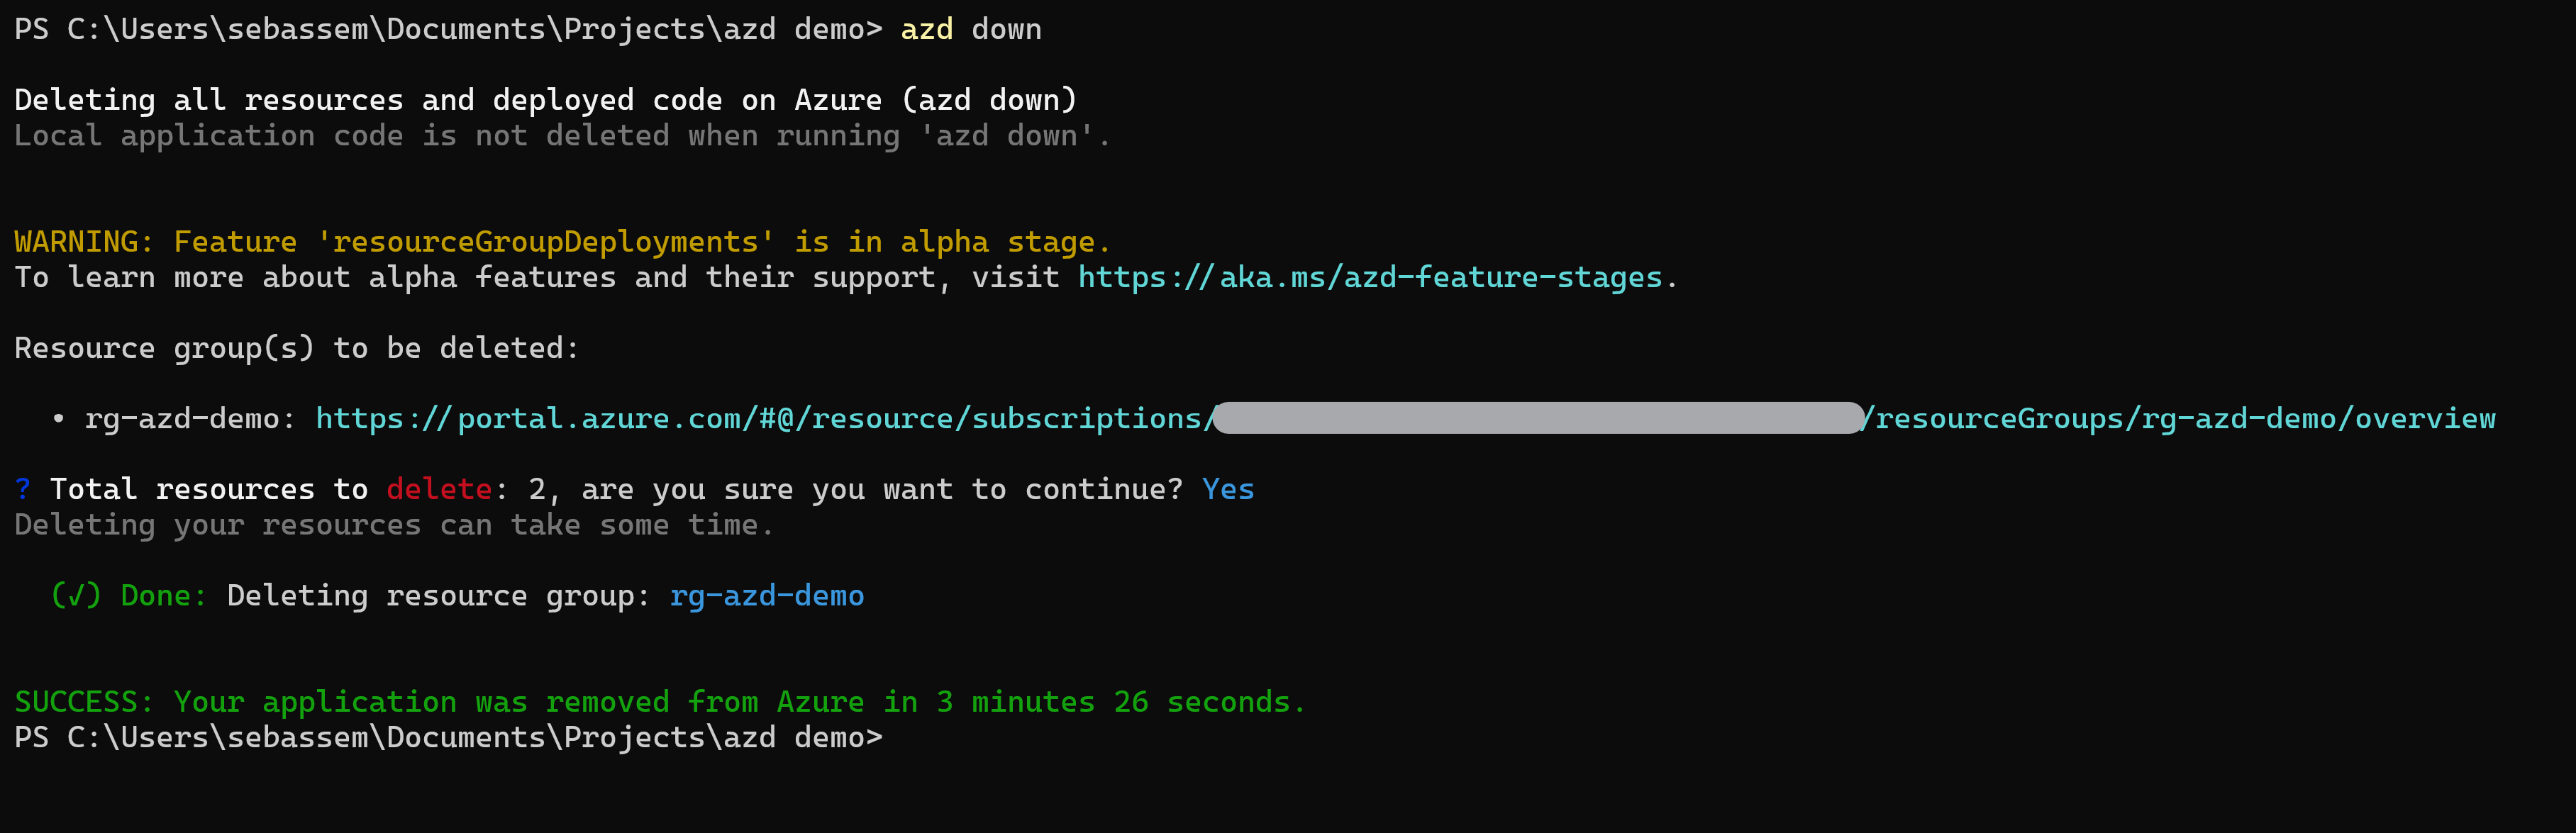
Azd Down ⬇️
Now, after testing has completed, we can take down everything we deployed by just running azd down
Next steps
Azd can do much more, where you can also deploy applications on top of the deployed Azure resources, in addition to GitHub or Azure DevOps pipelines. You can also search for and create templates which are available for a wide range of Azure services, and can be customized to suit your specific needs and requirements.
Using templates can save you a significant amount of time and effort, as you don’t have to manually configure resources or write complex scripts from scratch. Templates are also highly repeatable, which means you can use them to create consistent, standardized environments across multiple subscriptions or environments. Additionally, templates are versioned and can be stored in source control, which makes it easy to track changes and collaborate with other developers on your team.
Resources
- Intro to azd
- Azd documentation
- The PowerShell menus module I used to create multi-select menus can be found here

My name is
Seif Bassem
You May Also Like
Azure Governance Visualizer Accelerator
The Azure Governance Visualizer ((AzGovViz)) is a PowerShell script …
Run GitHub Actions on your Kubernetes cluster
If you are working with GitHub Actions, you are re probably already …
Find service principals with privileged roles
As more and more organizations adopt cloud computing, the use of Azure …