Self-Hosting LLMs on Kubernetes: Serving LLMs using vLLM
Series map
- Introduction
- How LLMs and GPUs work?
- GPU optimization
- Serving LLMs using vLLM
The inference dilemma
Continuing our discussion on large language models (LLMs), we discussed that the two main phases of LLMs which are training and inference. In this post, we will focus mainly on inference and how to do it efficiently at scale using vLLM.
Unlike training, which is performed once, inference involves serving potentially millions of user requests, making throughput (requests per second) and latency (response time) critical metrics. The core challenge lies in the sheer size of LLMs, which demand substantial GPU memory and compute power for every generated token. Traditional serving methods often struggle to keep GPUs fully utilized when handling traffic, a mix of short, prompt-based requests alongside long, conversational threads, leading to high operational costs and inconsistent performance.
The most persistent bottleneck during LLM inference is the management of the KV Cache, which consumes memory proportional to the length of the input and output sequences. Standard serving systems typically reserve large, contiguous memory blocks for this cache, resulting in extensive memory fragmentation and waste when dealing with many short requests. Furthermore, request scheduling often fails to optimize the GPU’s parallel capabilities; long-running requests can monopolize resources, forcing shorter, interactive requests to queue up, dramatically increasing their perceived latency. This trade-off between maximizing GPU utilization and ensuring low latency for diverse workloads defines the complexity of modern LLM serving.
This is where vLLM comes in. By introducing smart techniques like Paged Attention, continuous batching, speculative decoding and other advanced scheduling, vLLM directly addresses the memory and scheduling inefficiencies that plague LLM inference. It is an open-source library designed to dramatically improve the throughput and reduce the latency of serving LLMs, making it possible to deploy these state-of-the-art models cost-effectively in production environments like Kubernetes.
🚪 Enter vLLM
vLLM directly tackles these problems with innovative techniques, providing several key advantages:
- Paged Attention (memory efficiency): This is vLLM’s flagship feature. Inspired by virtual memory and paging in operating systems, Paged Attention manages the KV cache in non-contiguous memory blocks (pages).
- Eliminates Memory Fragmentation: It dynamically allocates KV cache pages only when needed, significantly reducing memory waste.
- Higher Throughput: By using GPU memory much more efficiently, Paged Attention allows significantly more concurrent requests and much longer sequence lengths on a single GPU.
- Guaranteed QoS: It isolates the KV cache of different requests, preventing one request from monopolizing memory.
- Continuous Batching (throughput): Unlike static or dynamic batching, vLLM’s scheduler continuously processes requests, dynamically adding new requests to the current GPU batch as older sequences finish generating tokens. This minimizes GPU idle time and ensures the hardware is constantly busy, leading to massive gains in tokens-per-second and overall cost/usage efficiency.
- Speculative Decoding (latency): vLLM integrates speculative decoding, a technique that reduces latency by having a smaller, faster model (the “draft model”) predict several future tokens at once, which the main, larger model (the “target model”) then verifies in a single, parallel step. This significantly cuts the number of sequential forward passes required by the large model, accelerating text generation without sacrificing output quality.
The result? vLLM often achieves 2-4x higher throughput than existing serving systems. This translates directly to lower inference costs and the ability to serve more users with the same hardware.
✨ Key Features of vLLM
Beyond its core optimization techniques, vLLM offers several practical features that make it a robust choice for production environments:
- Broad Model Compatibility: vLLM supports a vast array of popular open-source LLMs available on the Hugging Face ecosystem (Llama, Mistral, Gemma, Qwen, gpt-oss,.. etc.), making integration straightforward.
- Wide support for GPUs and CPUs: NVIDIA GPUs, AMD CPUs and GPUs, Intel CPUs and GPUs, PowerPC CPUs, and TPU. Additionally, support for diverse hardware plugins such as Intel Gaudi, IBM Spyre and Huawei Ascend.
- Seamless OpenAI Compatibility: vLLM includes an OpenAI-compatible server endpoint. This is a massive value-add, as it allows developers to swap out the official OpenAI API with their self-hosted vLLM deployment with minimal code changes, which is critical for leveraging existing libraries and tooling. Example Endpoints:
/v1/chat/completions, /v1/completions, /v1/models. - Quantized KV Cache: In addition to model quantization, vLLM allows separate quantization of the KV Cache (often to FP8), further reducing the memory bottleneck during decoding and boosting throughput.
- Distributed Inference: vLLM supports running massive models across multiple GPUs or even multiple nodes to serve models too large for a single device.
- Streaming outputs: which allows for real-time, token-by-token generation of responses from LLMs. This is particularly beneficial for applications requiring low-latency user interaction, such as chatbots and interactive AI tools.
🚀 Deployment of vLLm
Local deployment using Docker
There are multiple ways to deploy vLLM whether for testing or in production (Docker image, python package,…etc), you can also deploy it to target GPU, CPU or TPUs depending on your infrastructure. We are focusing on Kubernetes hosting in this series, so we will use the Docker image path.
Let’s first deploy it locally to explore how it works. For demo purposes, I will use the CPU deployment before we dig into GPUs.
NOTE: When deploying on CPU, you have to check if your machine’s CPU supports the avx512f, avx512_bf16, or avx512_vnni instructions. If they are not supported by your CPU then you have to build the image from the source
By checking my CPU using a tool like CPU-Z, I can see that I don’t have those options, so we will need to build our own image.

I will first clone the vLLM repo and build the image as follows.
git clone https://github.com/vllm-project/vllm.git vllm_source
cd vllm_source
docker build -f docker/Dockerfile.cpu \
        --build-arg VLLM_CPU_AVX512BF16=false \
        --build-arg VLLM_CPU_AVX512VNNI=false \
        --build-arg VLLM_CPU_DISABLE_AVX512=false \
        --tag vllm-cpu \
        --target vllm-openai .

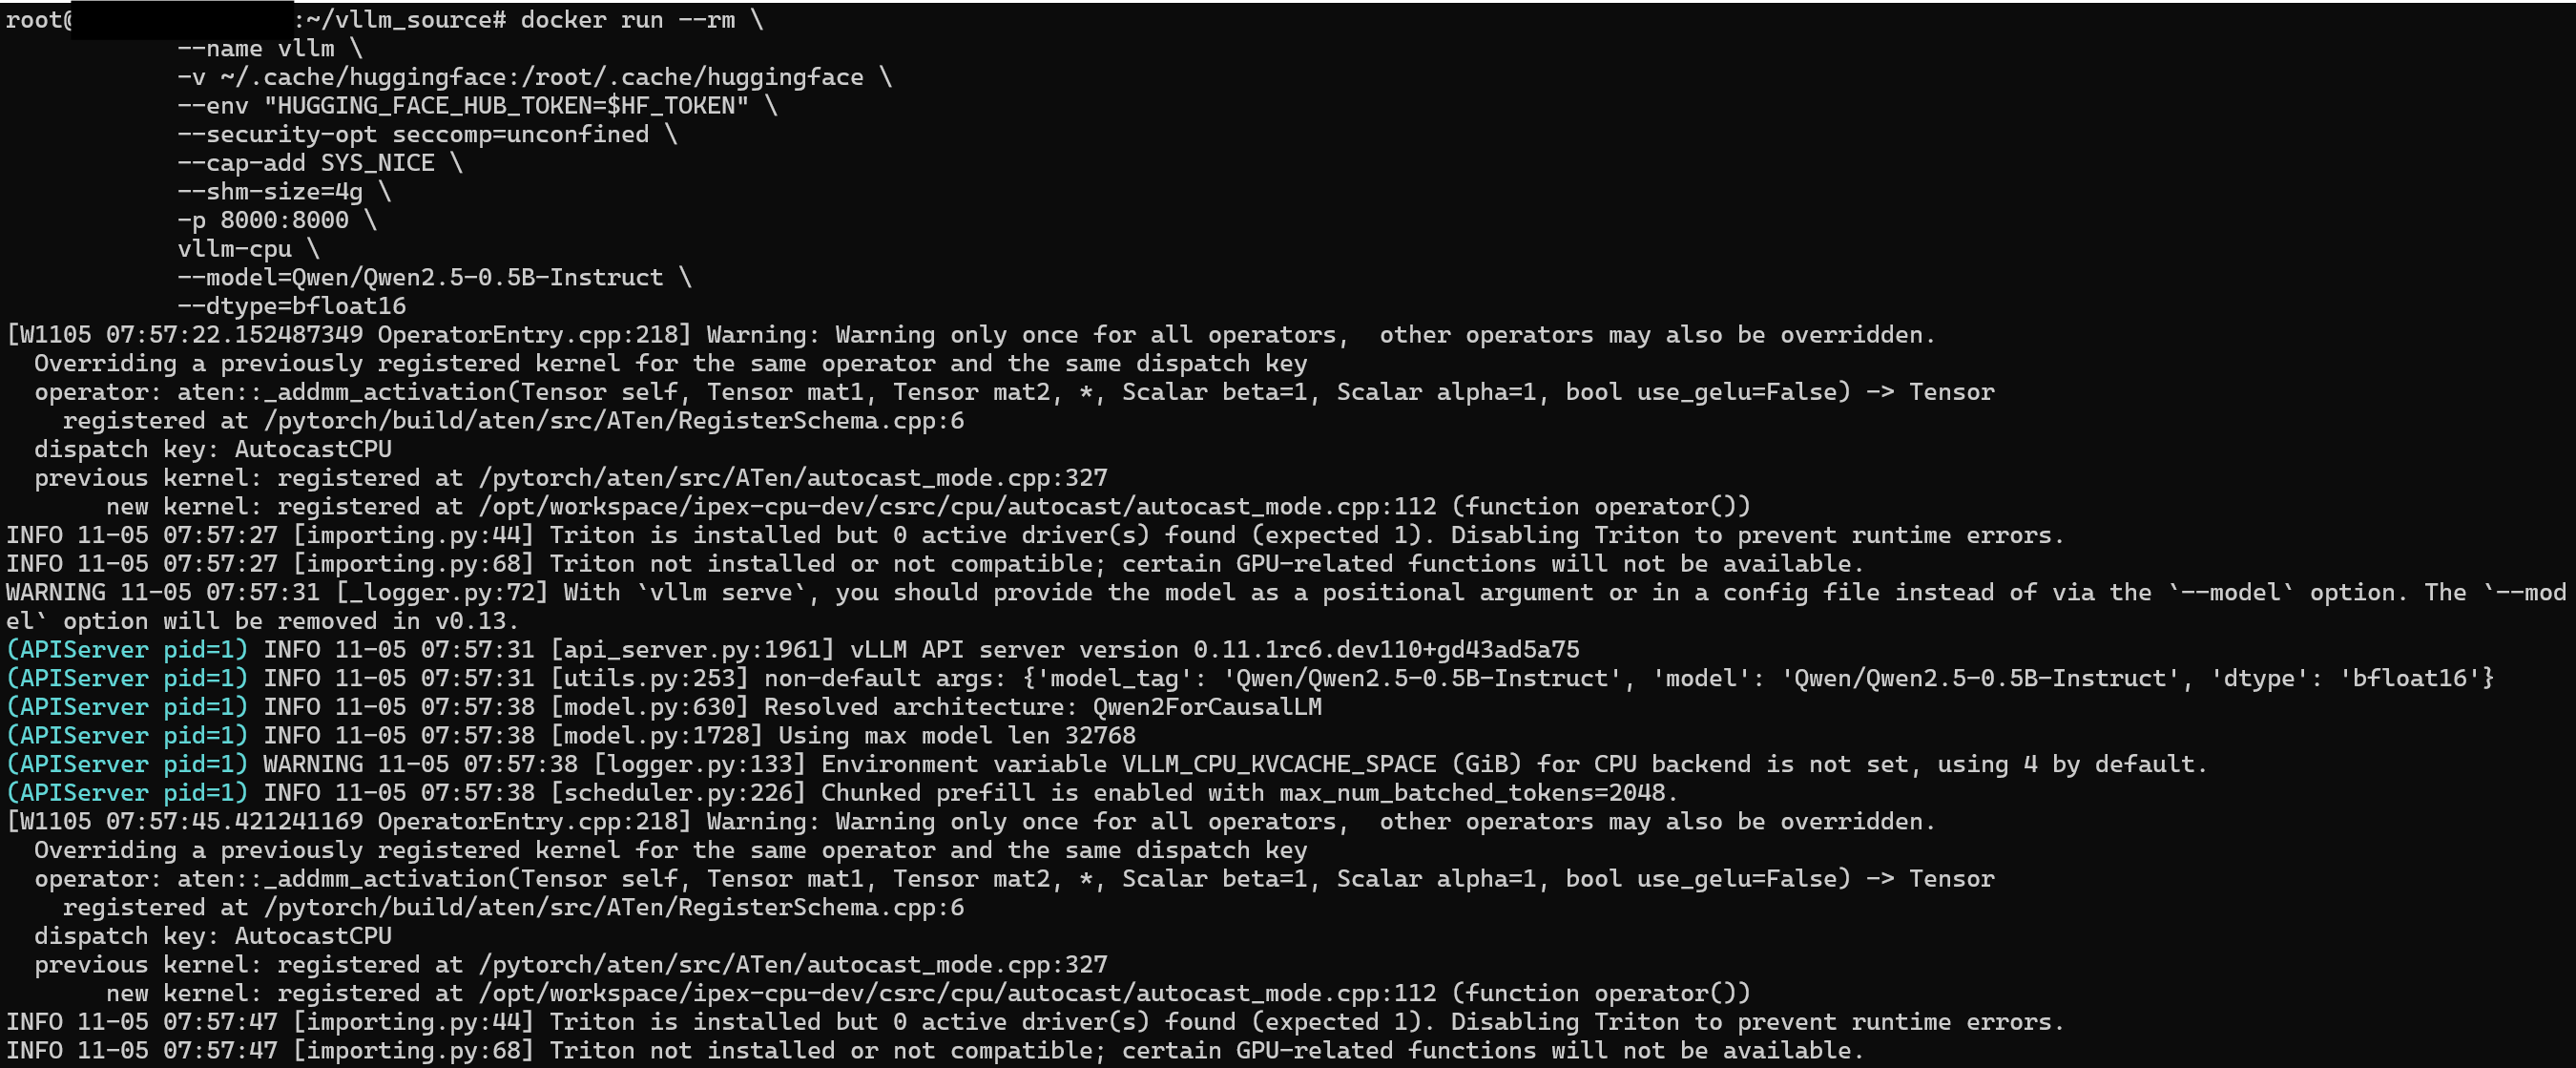
Now to run the container, we will run the below command. Note that we have to provide a Hugging Face token to be able to download the models hosted there. You can find the list of open-source text generation models here
docker run --rm \
	    --name vllm \
	    -v ~/.cache/huggingface:/root/.cache/huggingface \
            --env "HUGGING_FACE_HUB_TOKEN=$HF_TOKEN" \
            --security-opt seccomp=unconfined \
            --cap-add SYS_NICE \
            --shm-size=4g \
            -p 8000:8000 \
            vllm-cpu \
            --model=Qwen/Qwen2.5-0.5B-Instruct \
            --dtype=bfloat16 \
            --host=0.0.0.0 \
            --port=8000

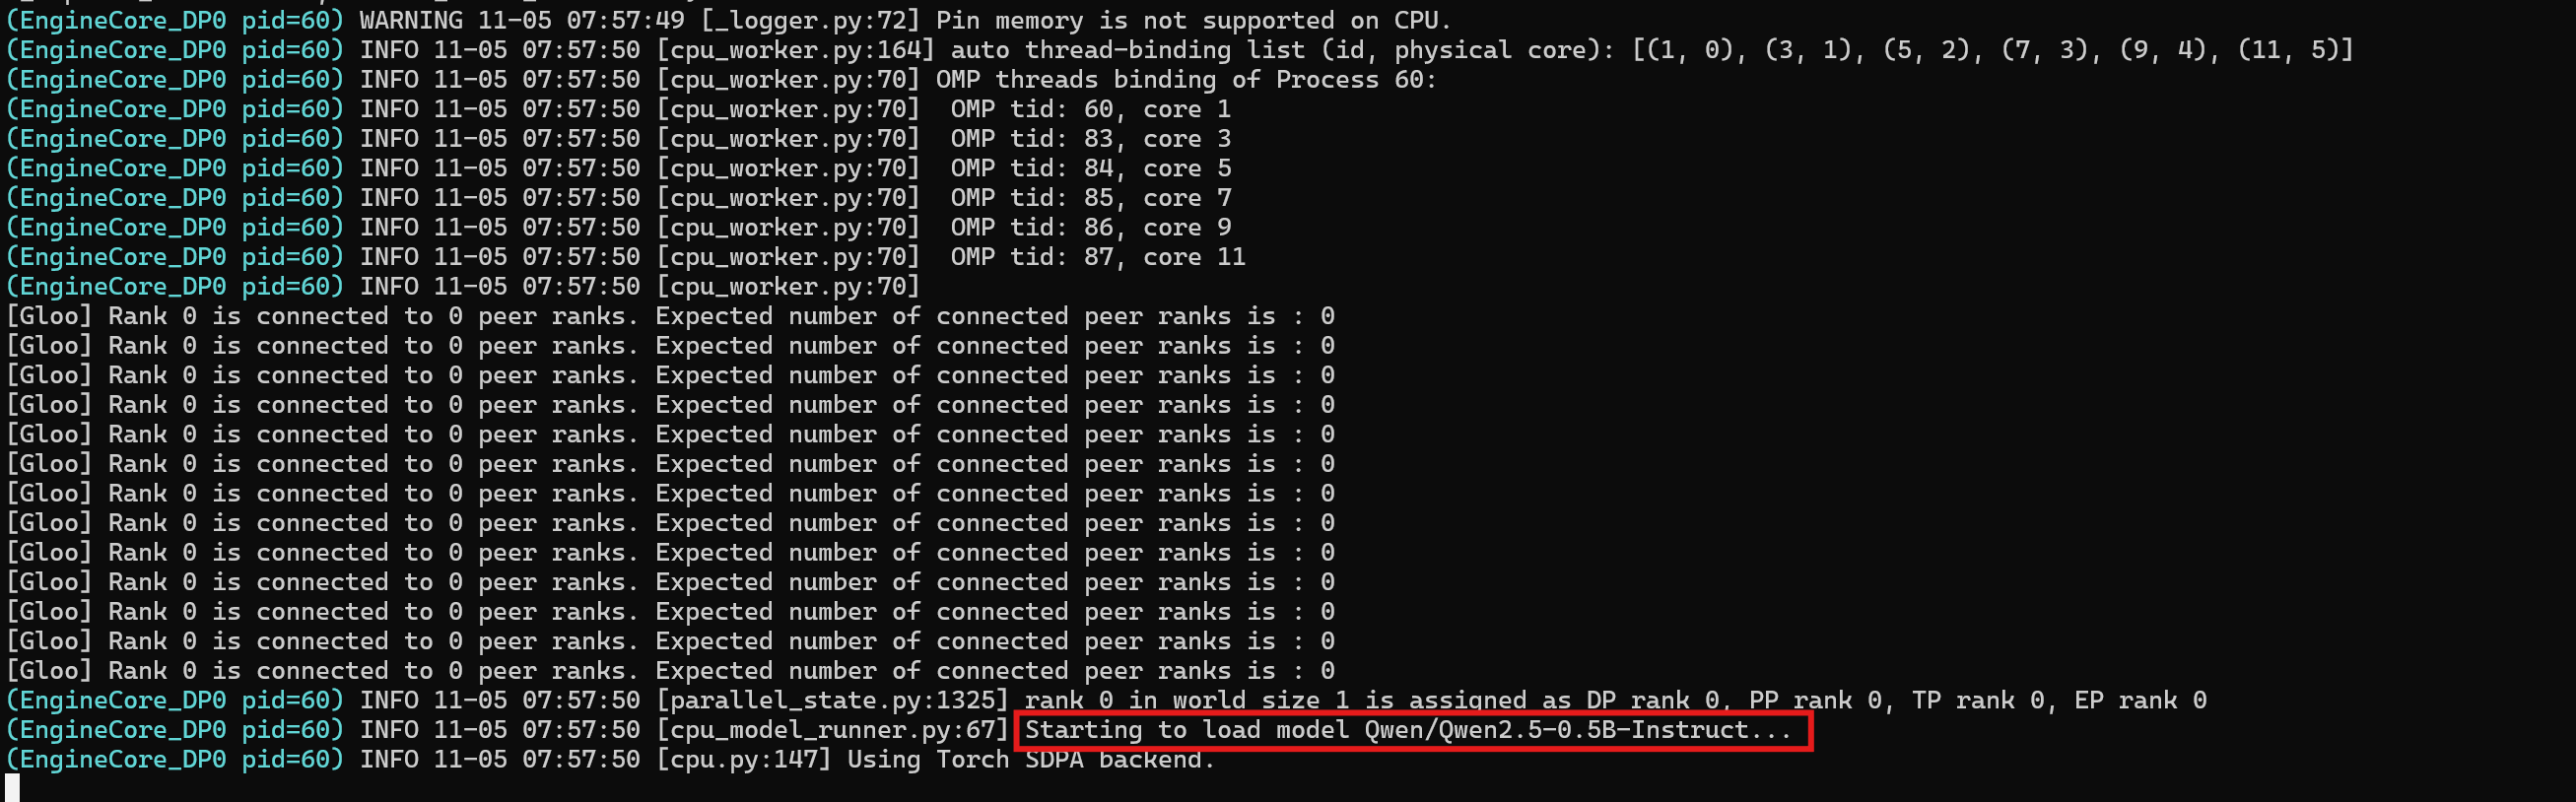
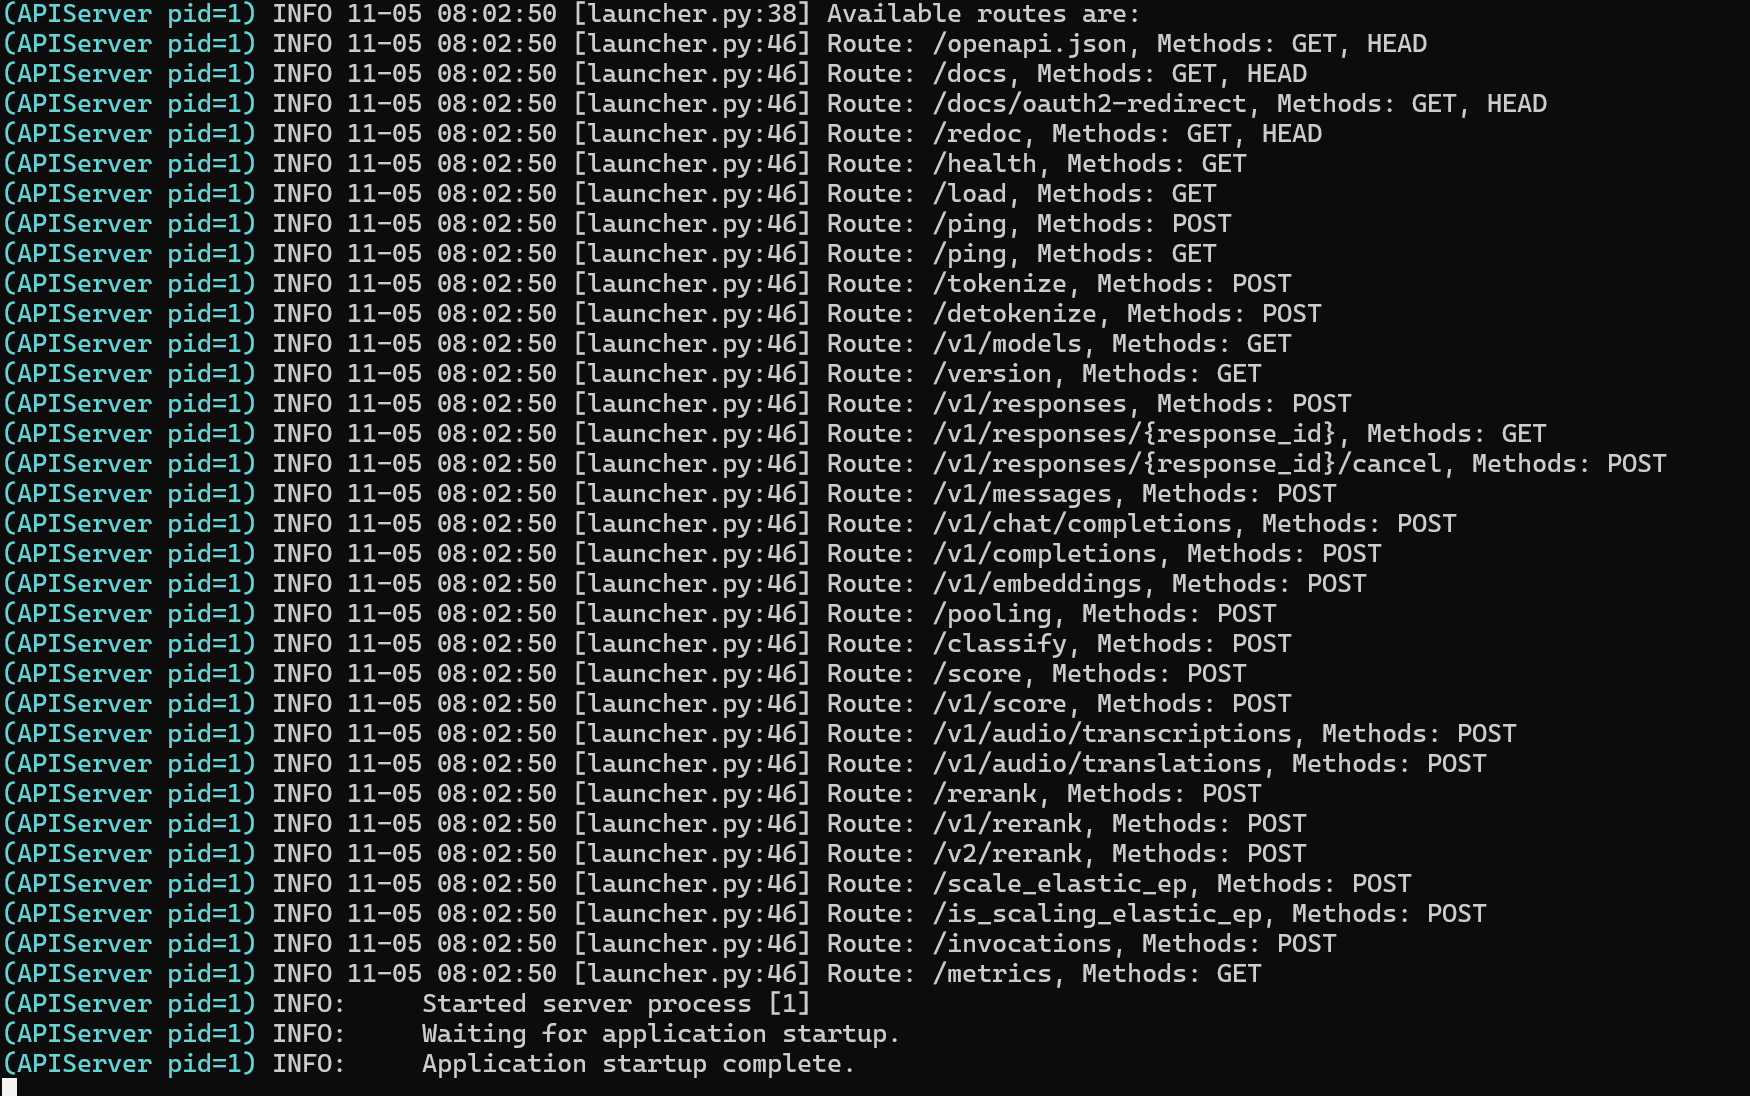
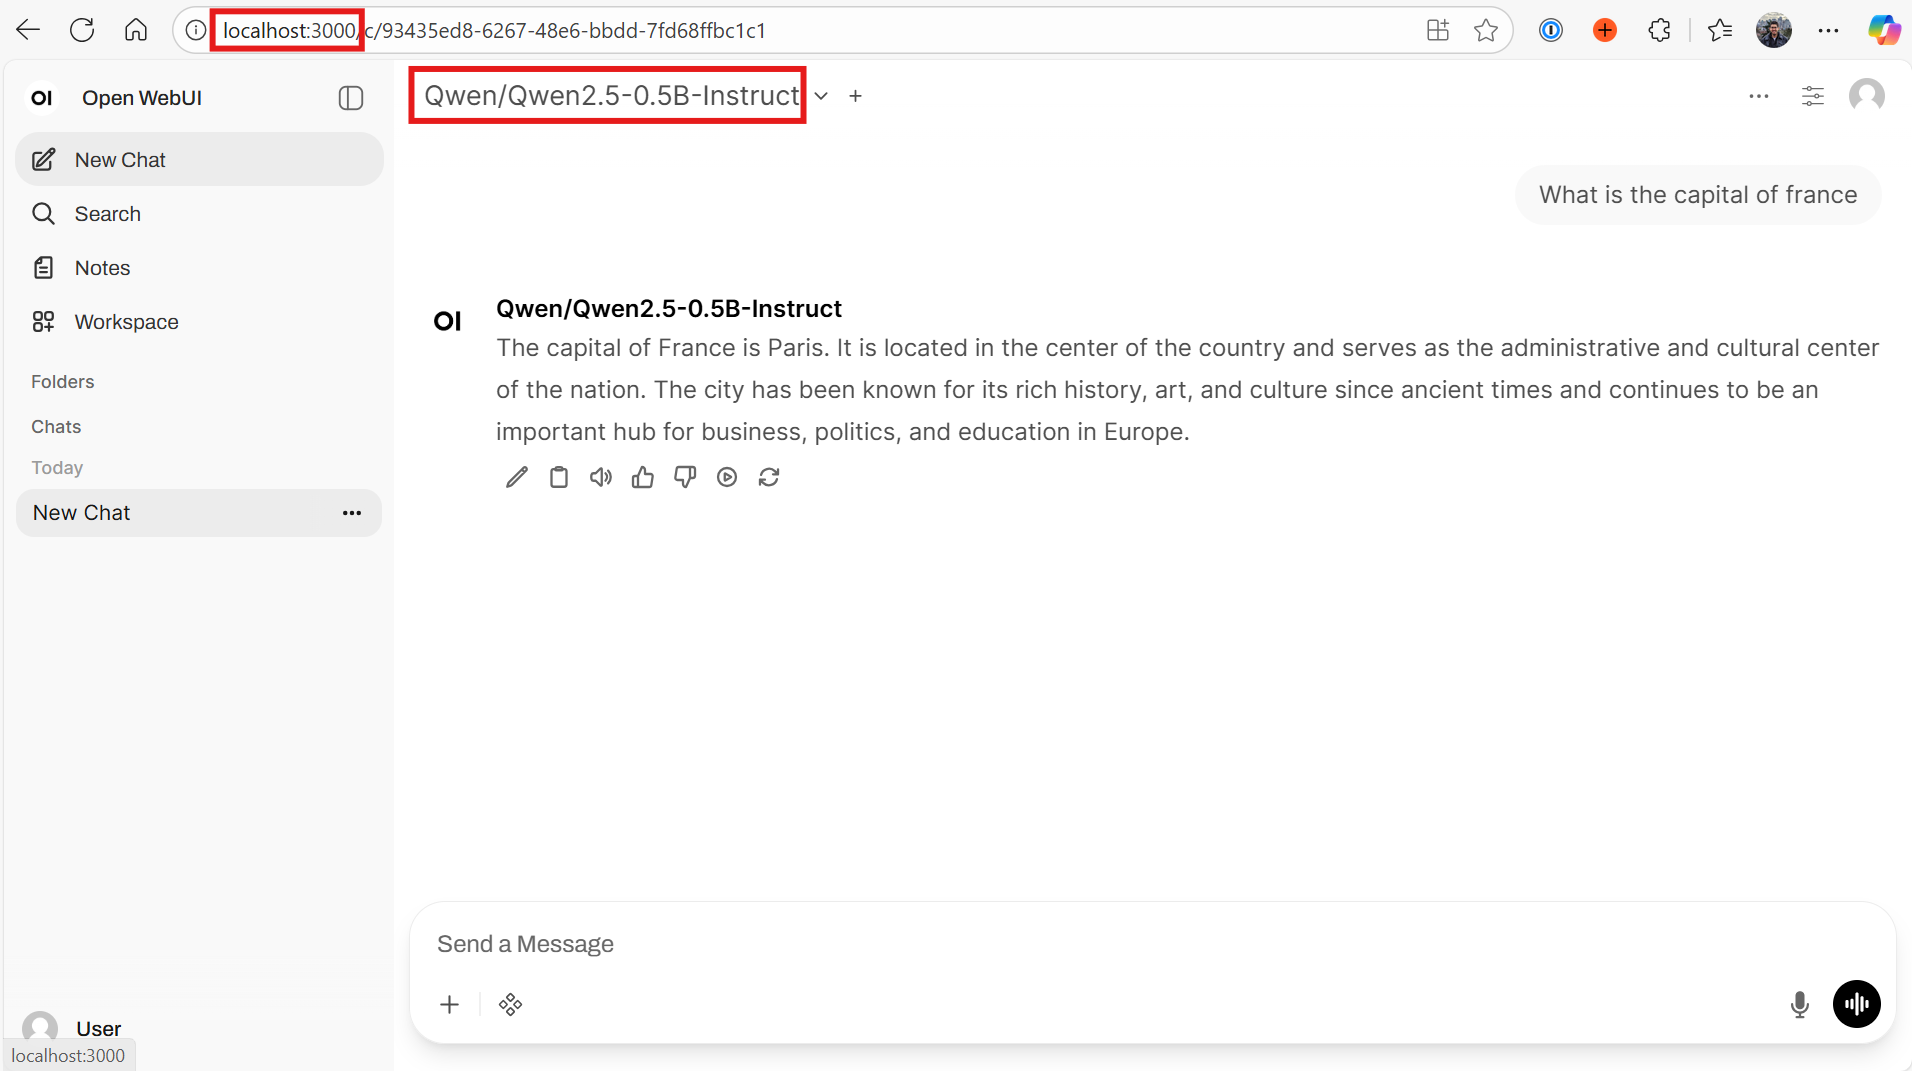
Now after the model has been downloaded and the vLLM server is ready to serve on port 8000, let’s try to submit a simple query.
curl -X POST "http://0.0.0.0:8000/v1/chat/completions" \
	-H "Content-Type: application/json" \
	--data '{
		"model": "Qwen/Qwen2.5-0.5B-Instruct",
		"messages": [
			{
				"role": "user",
				"content": "What is the capital of France?"
			}
		]
	}'


If you want to have a UI to do testing, you can also use the Open WebUI docker image and connect it to your vLLM server.
docker run -d \
    --name open-webui \
    -p 3000:8080 \
    -v open-webui:/app/backend/data \
    -e OPENAI_API_BASE_URL=http://host.docker.internal:8000/v1 \
    -e WEBUI_AUTH=false \
    --restart always \
    ghcr.io/open-webui/open-webui:main
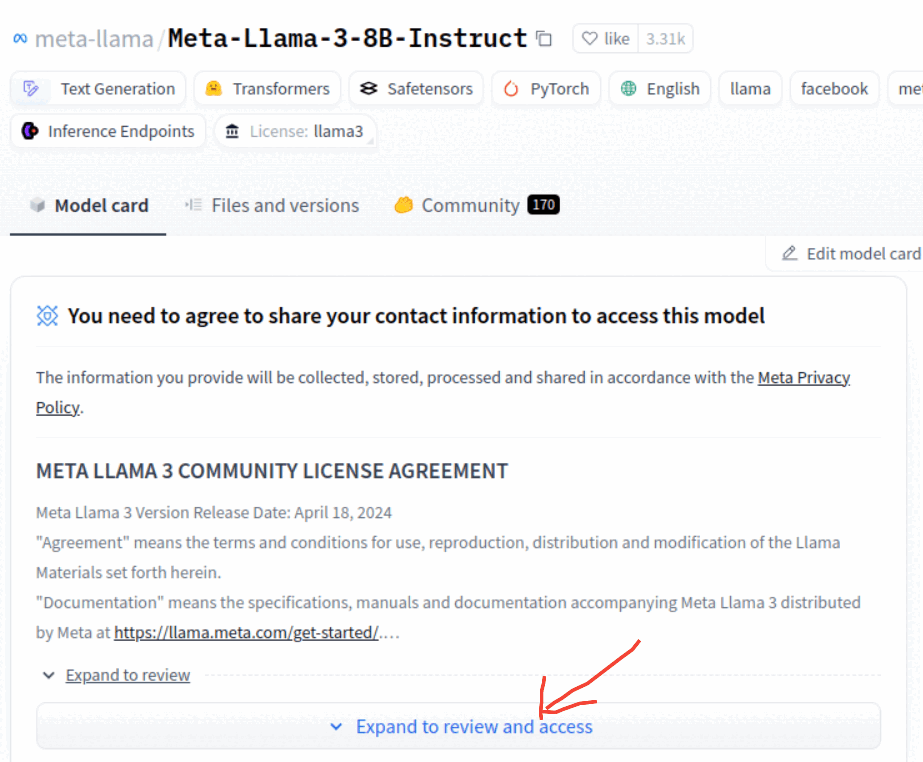
NOTE: Some models like Llama requires you to submit a request on HuggingFace to be able to use it
Kubernetes deployment
Now let’s see how to deploy vLLM and server a model on a Kubernetes cluster. In this post, we will do this manually but in the upcoming post we will explore a more production-ready deployment.
To deploy vLLM with GPUs on Kubernetes (we will use AKS), we need to have the following components:
- Deploy NVIDIA’s GPU operator to automate the management of all NVIDIA software needed to provision and consume GPUs. This will also install the required NVIDIA drivers.
- Deploy Node Feature Discovery (NFD) to detects hardware features and system configuration on each node within a Kubernetes cluster and advertises these features as node labels. This enables more intelligent scheduling of workloads based on specific hardware capabilities or system configurations
- Deploy a secret to store the Hugging token so we can download models from its repositories
- Deploy a persistent volume claim to store the downloaded model on a persistent volume
- Deploy the vLLM server to start serving our LLM
- Deploy a Kubernetes service to expose the vLLM server and start sending requests
This is how a basic deployment of vLLM on Kubernetes would look like:
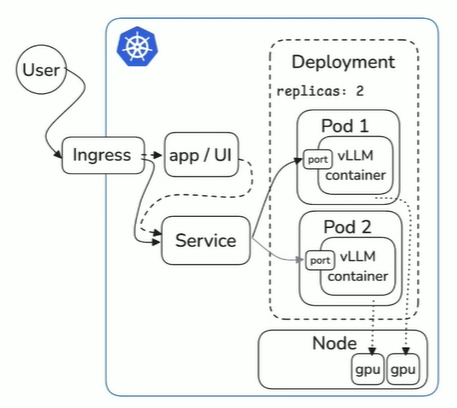
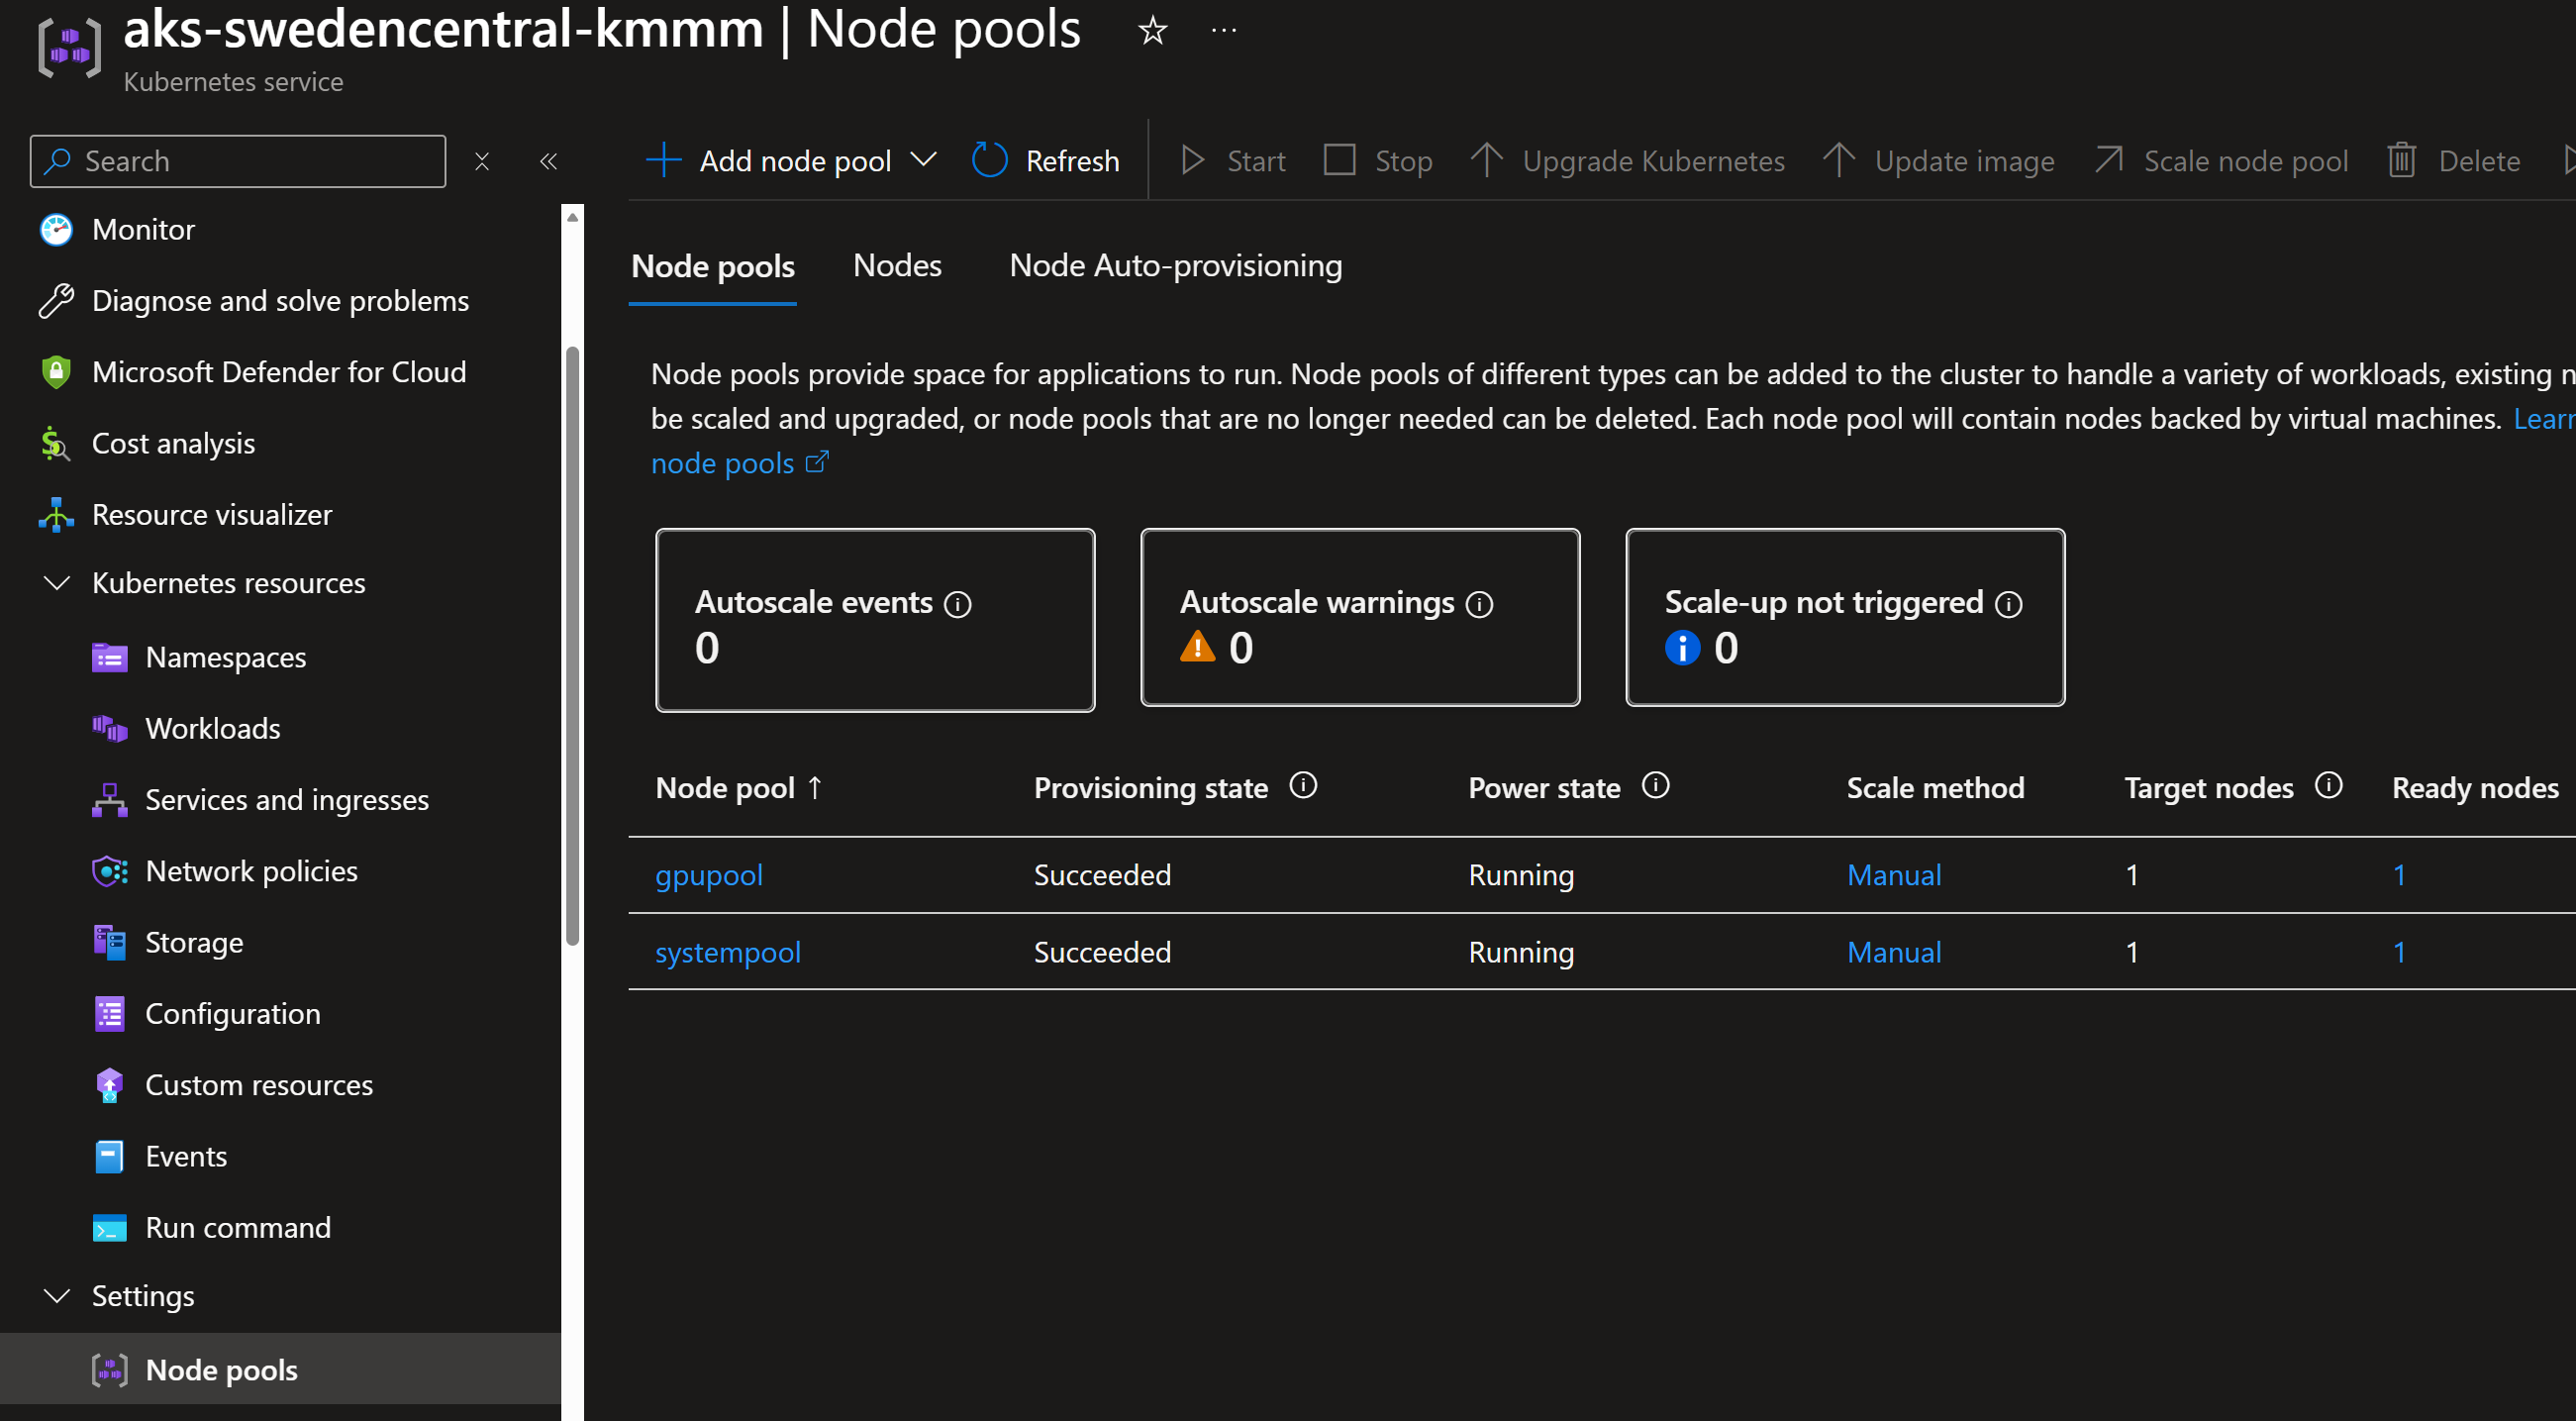
We will deploy an AKS cluster with a GPU node pool having nodes with NVIDIA GPU attached.
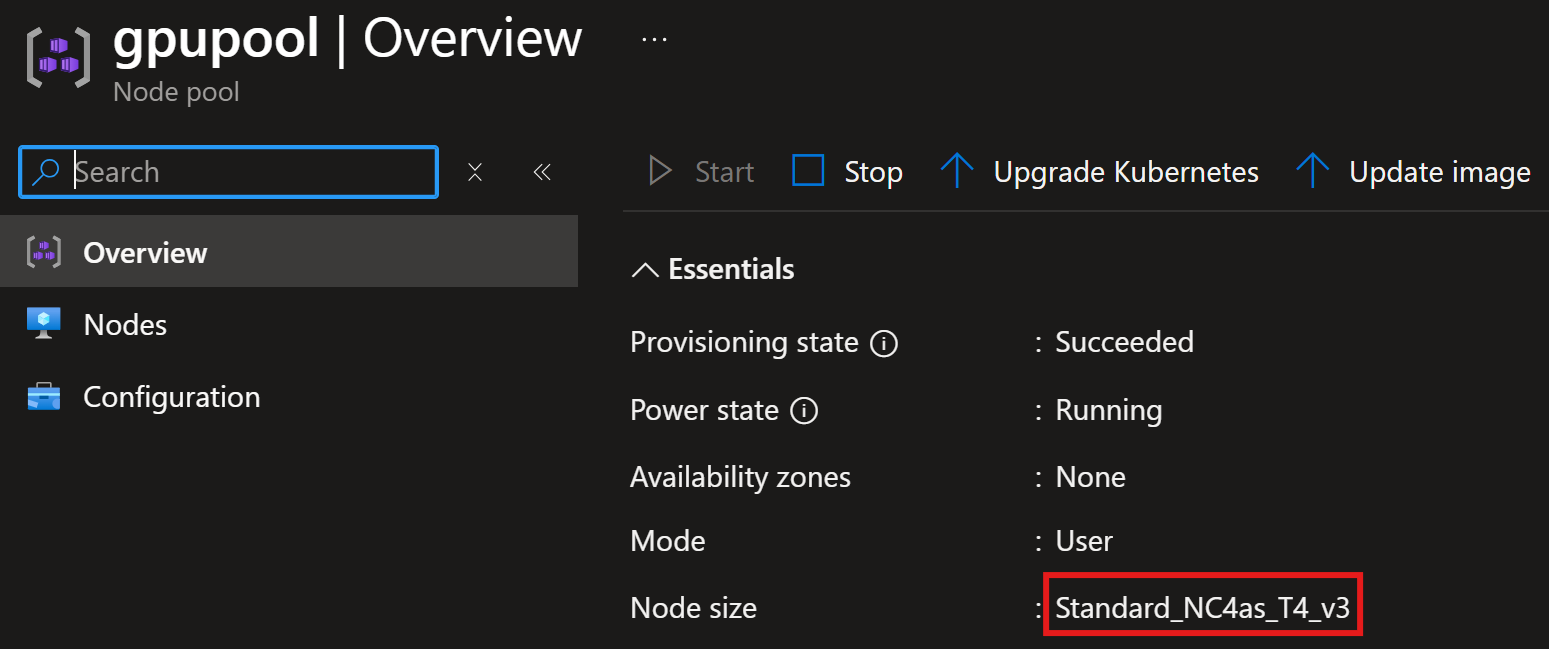
GPU software deployment
First, let’s deploy the Node Feature Discovery (NFD)
helm install --wait --create-namespace -n gpu-operator node-feature-discovery node-feature-discovery --repo https://kubernetes-sigs.github.io/node-feature-discovery/charts --set-json master.config.extraLabelNs='["nvidia.com"]'

We can see that the Node Feature Discovery pods have been deployed successfully.

Next, we deploy the gpu operator.
helm repo add nvidia https://helm.ngc.nvidia.com/nvidia && helm repo update
helm install --wait gpu-operator -n gpu-operator nvidia/gpu-operator --set nfd.enabled=false --set driver.enabled=false
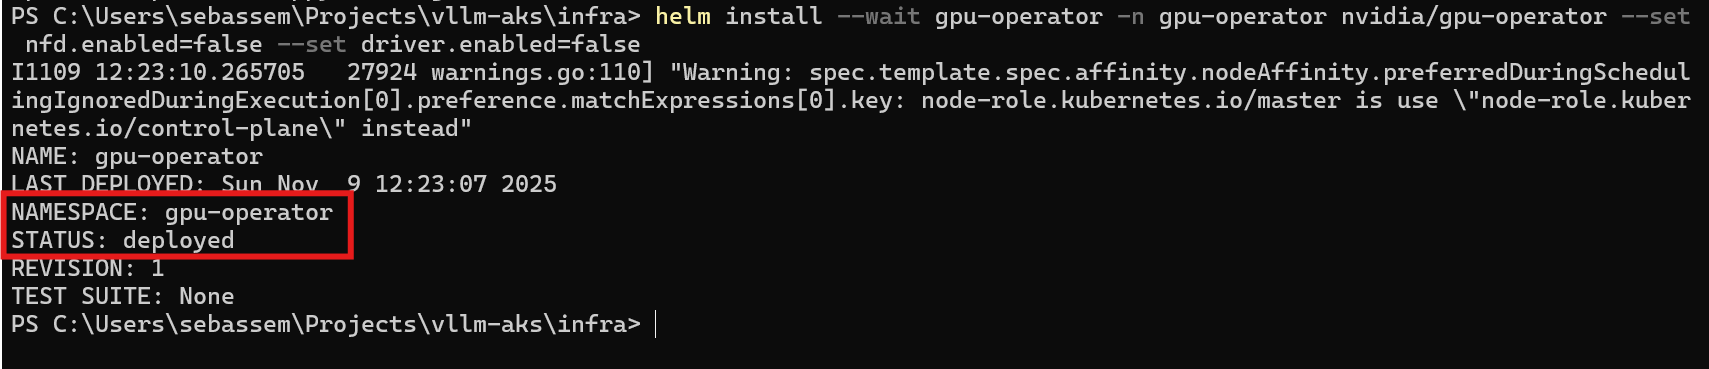
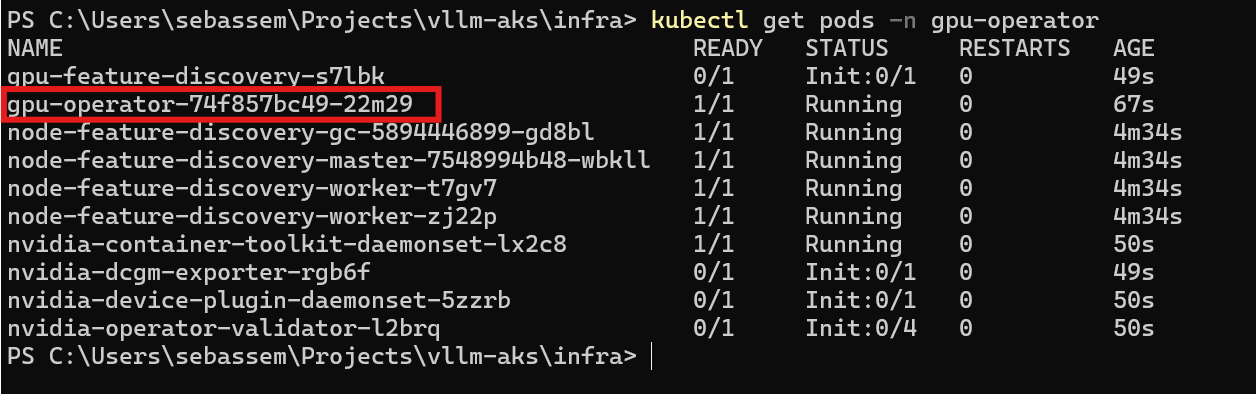
We can see that the gpu operator pods have been deployed successfully.
vLLM deployment
Before we deploy vLLM, let’s create namespace for it.
kubectl create namespace vllm
Next, we deploy the persistent volume claim and secret for the model download.
apiVersion: v1
kind: PersistentVolumeClaim
metadata:
  name: vllm-qwen3-pvc
spec:
  accessModes:
  - ReadWriteOnce
  resources:
    requests:
      storage: 50Gi
  storageClassName: default
  volumeMode: Filesystem
apiVersion: v1
kind: Secret
metadata:
  name: hf-token-secret
type: Opaque
stringData:
  token: "XXXXXXXXXXXXXXXXXXXXXXXXXXXXX"
Finally, we deploy vLLM with the Qwen/Qwen3-0.6B model.
You can see that we provide some arguments for the vLLM server. All supported arguments can be found here
apiVersion: apps/v1
kind: Deployment
metadata:
  name: vllm-server
  labels:
    app: qwen3
spec:
  replicas: 1
  selector:
    matchLabels:
      app: qwen3
  template:
    metadata:
      labels:
        app: qwen3
    spec:
      nodeSelector:
        agentpool: gpupool
      tolerations:
      - key: nvidia.com/gpu
        operator: Exists
        effect: NoSchedule
      volumes:
      - name: cache-volume
        persistentVolumeClaim:
          claimName: vllm-qwen3-pvc
      - name: shm
        emptyDir:
          medium: Memory
          sizeLimit: "2Gi"
      containers:
      - name: vllm-server
        image: vllm/vllm-openai:latest
        args:
          - "--model"
          - "Qwen/Qwen3-0.6B"
          - "auto"
          - "--port"
          - "8000"
          - "--host"
          - "0.0.0.0"
          - "--enable-prefix-caching"
        env:
        - name: HUGGING_FACE_HUB_TOKEN
          valueFrom:
            secretKeyRef:
              name: hf-token-secret
              key: token
        - name: VLLM_USE_FLASHINFER_SAMPLER
          value: '0'
        ports:
        - containerPort: 8000
        resources:
          limits:
            cpu: "4"
            memory: "20Gi"
            nvidia.com/gpu: "1"
          requests:
            cpu: "2"
            memory: "18Gi"
            nvidia.com/gpu: "1"
        volumeMounts:
        - mountPath: /root/.cache/huggingface
          name: cache-volume
        - name: shm
          mountPath: /dev/shm
        livenessProbe:
          httpGet:
            path: /health
            port: 8000
          initialDelaySeconds: 60
          periodSeconds: 10
        readinessProbe:
          httpGet:
            path: /health
            port: 8000
          initialDelaySeconds: 60
          periodSeconds: 5
---
apiVersion: v1
kind: Service
metadata:
  name: vllm-service
spec:
  type: LoadBalancer
  selector:
    app: qwen3
  ports:
  - protocol: TCP
    port: 8000
    targetPort: 8000
Now, the pod will take some time to download the vLLM image and then download the model from Hugging Face.


If we try to send a request to our published Kubernetes service, we can see that the vLLM server gets the request and responds as expected.
$body = @{
    model = "Qwen/Qwen3-0.6B"
    messages = @(
        @{
            role = "user"
            content = "What is the capital of France?"
        }
    )
} | ConvertTo-Json

$response=Invoke-RestMethod -Uri "http://4.165.7.121:8000/v1/chat/completions" `
    -Method Post `
    -ContentType "application/json" `
    -Body $body

$response.choices[0].message.content

The model’s response:
Okay, the user is asking for the capital of France. I know that France's capital is Paris. But wait, let me make sure. I've heard conflicting information before, like maybe the capital is another city. No, I think Paris is definitely the capital. Let me check my knowledge. Yes, Paris is the capital. I should confirm that there's no other city that's commonly referred to as the capital. Also, maybe the user is a student or someone learning about geography, so providing the answer clearly is important. I should state that Paris is the capital of France and maybe mention that it's the largest city in the country to add context. No mistakes here.
</think>

The capital of France is **Paris**
Recap
In this post, we explored on a high-level what vLLM is and how to deploy it both locally and on a Kubernetes cluster. In the upcoming posts, we will explore how to do a more advanced production-ready deployment including automation, optimizing GPU, serving multiple models monitoring, secure access and more.
Share on:You May Also Like
Self-Hosting LLMs on Kubernetes: GPU optimization
Series map Introduction How LLMs and GPUs work? GPU optimization …
Self-Hosting LLMs on Kubernetes: How LLMs and GPUs Work?
Series map Introduction How LLMs and GPUs work? GPU optimization …
Self-Hosting LLMs on Kubernetes: Intro
Series map Introduction How LLMs and GPUs work? GPU optimization …