Deploying an ARM template using Azure Monitor Workbooks
In a previous post, i talked about Azure Monitor Workbooks and how useful they are to visualize and monitor your environment interactively by querying multiple sources and displaying the results in different visualizations.
The sky is the limit to what you can build with Workbooks and in this post i will demonstrate one of the cool capabilities that allows to deploy an ARM template right from within the Workbook using Link actions.
Scenario
Let’s assume that you are interested in looking at the governance posture of your environment, more specifically to your tagging compliance. You would like to be able to see all of the untagged Virtual machines and be able to take action by deploying a certain tag to them. Let’s start creating a Workbook that will do just that 🚀.
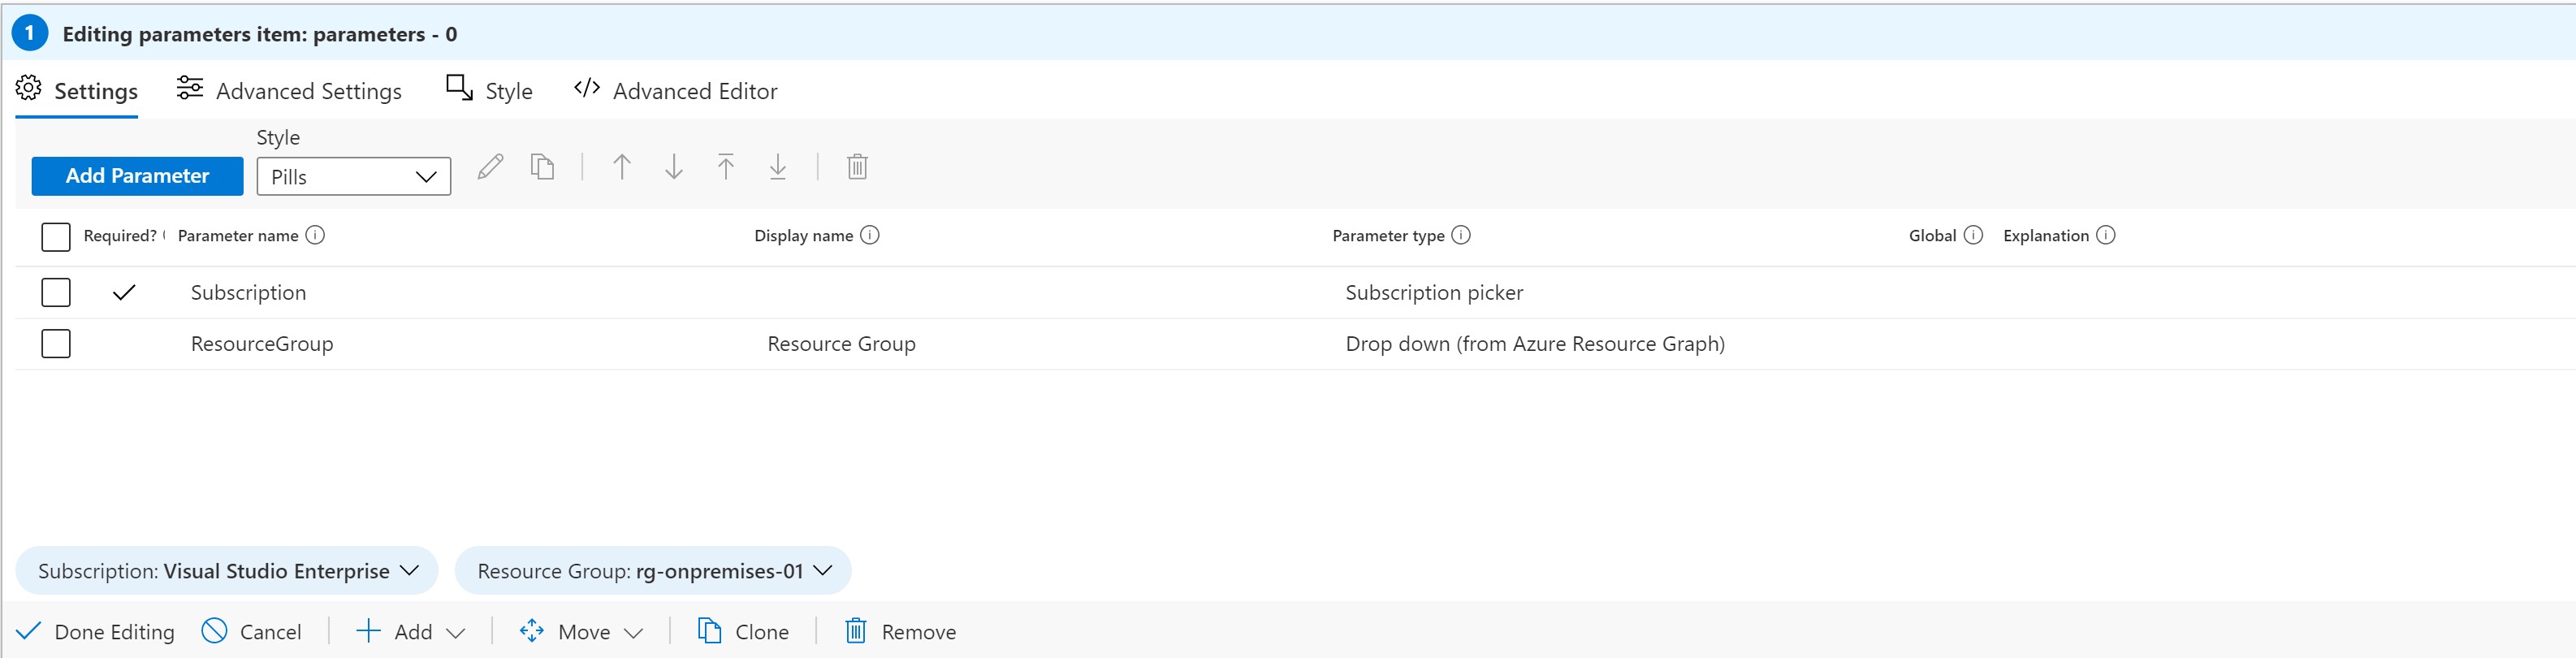
- First thing is to add some parameters to make our Workbook more usable.
- Add a Subscription parameter.
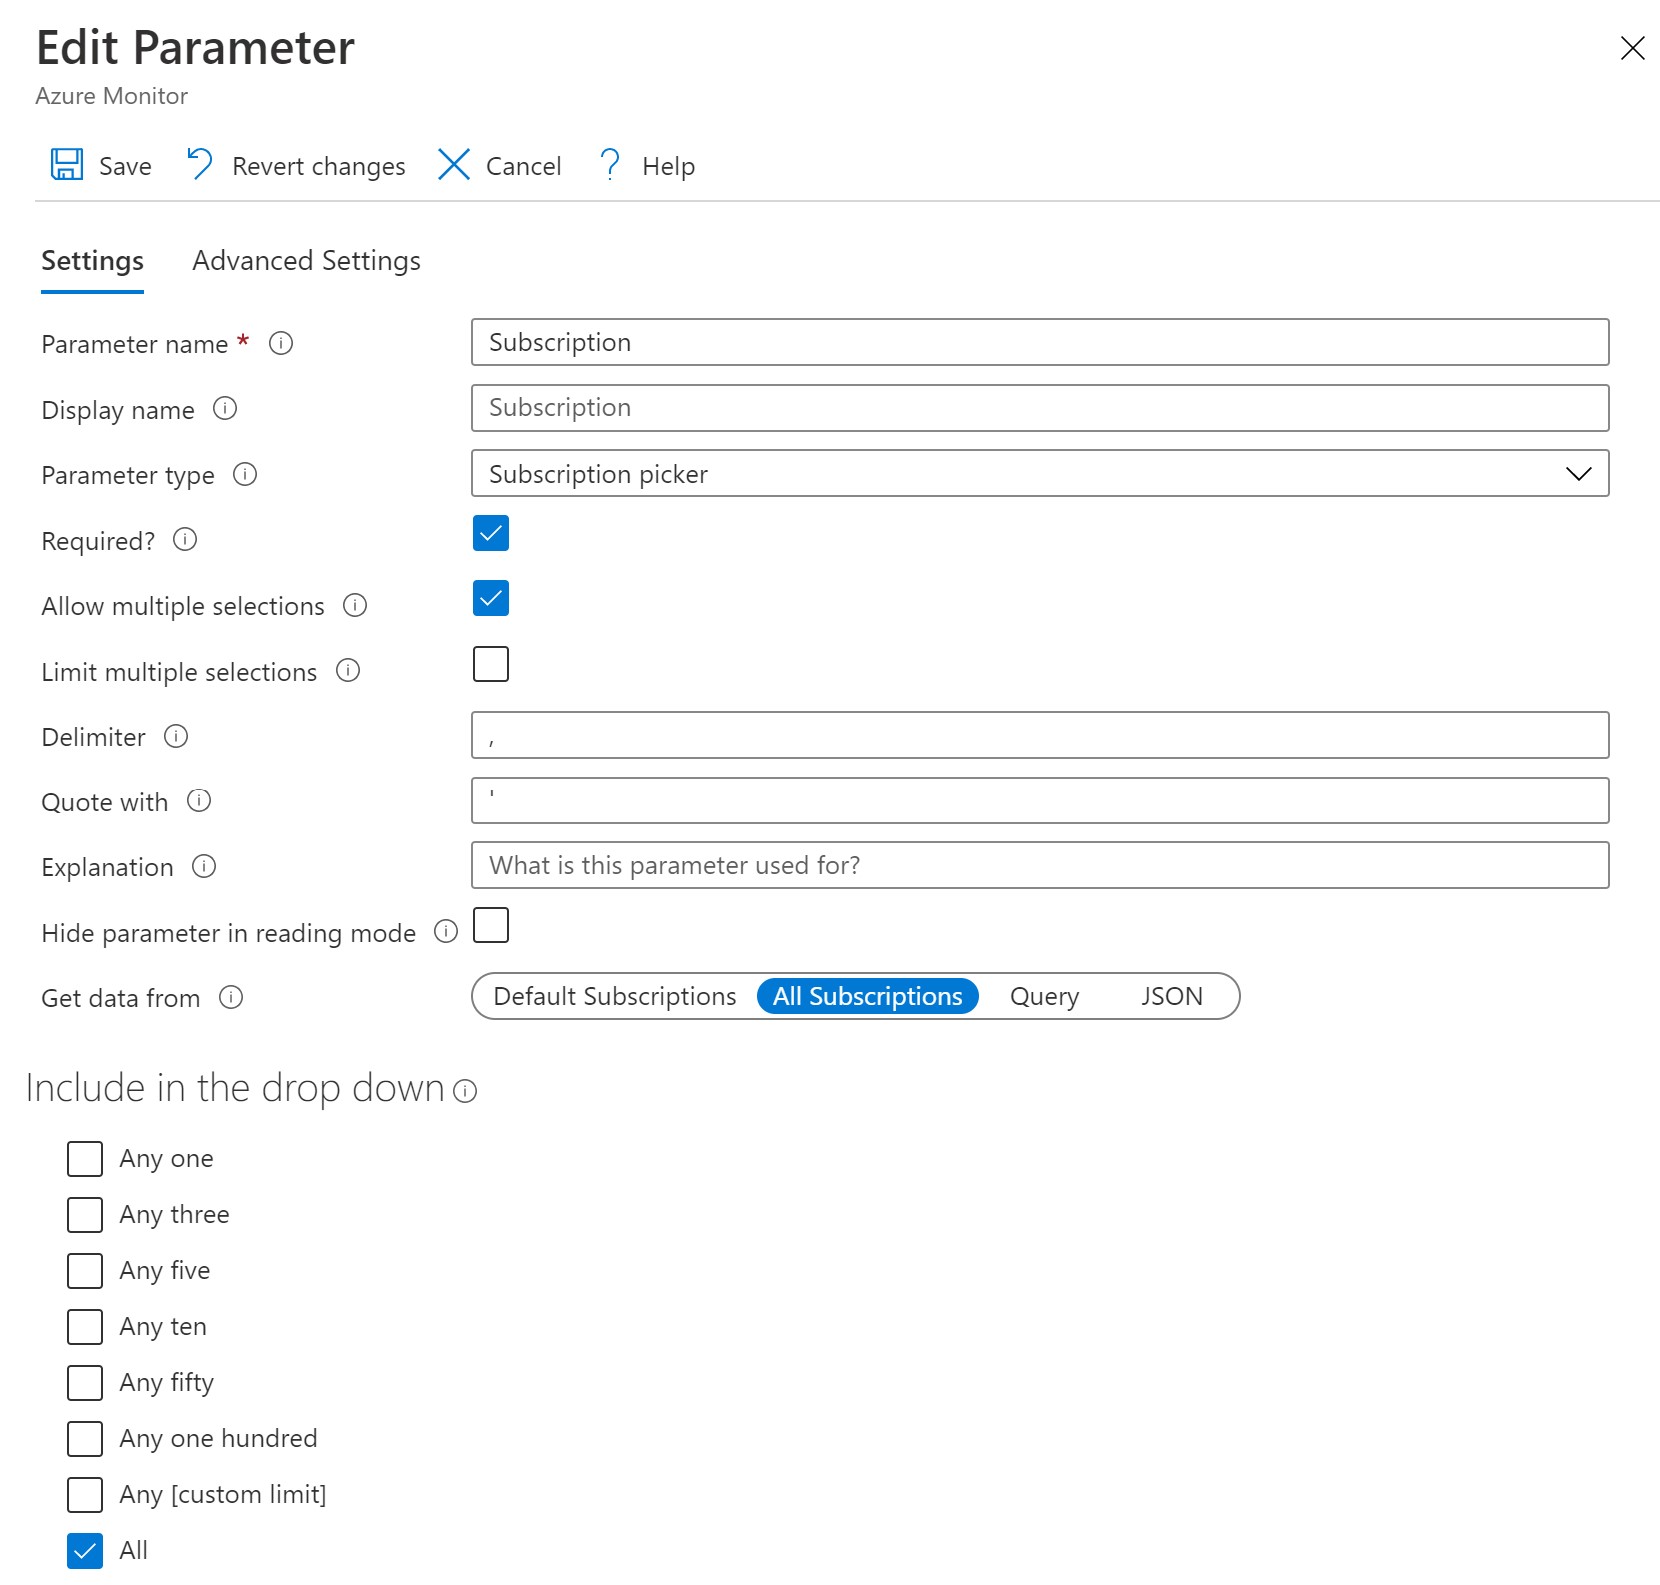
- Add a Subscription parameter.
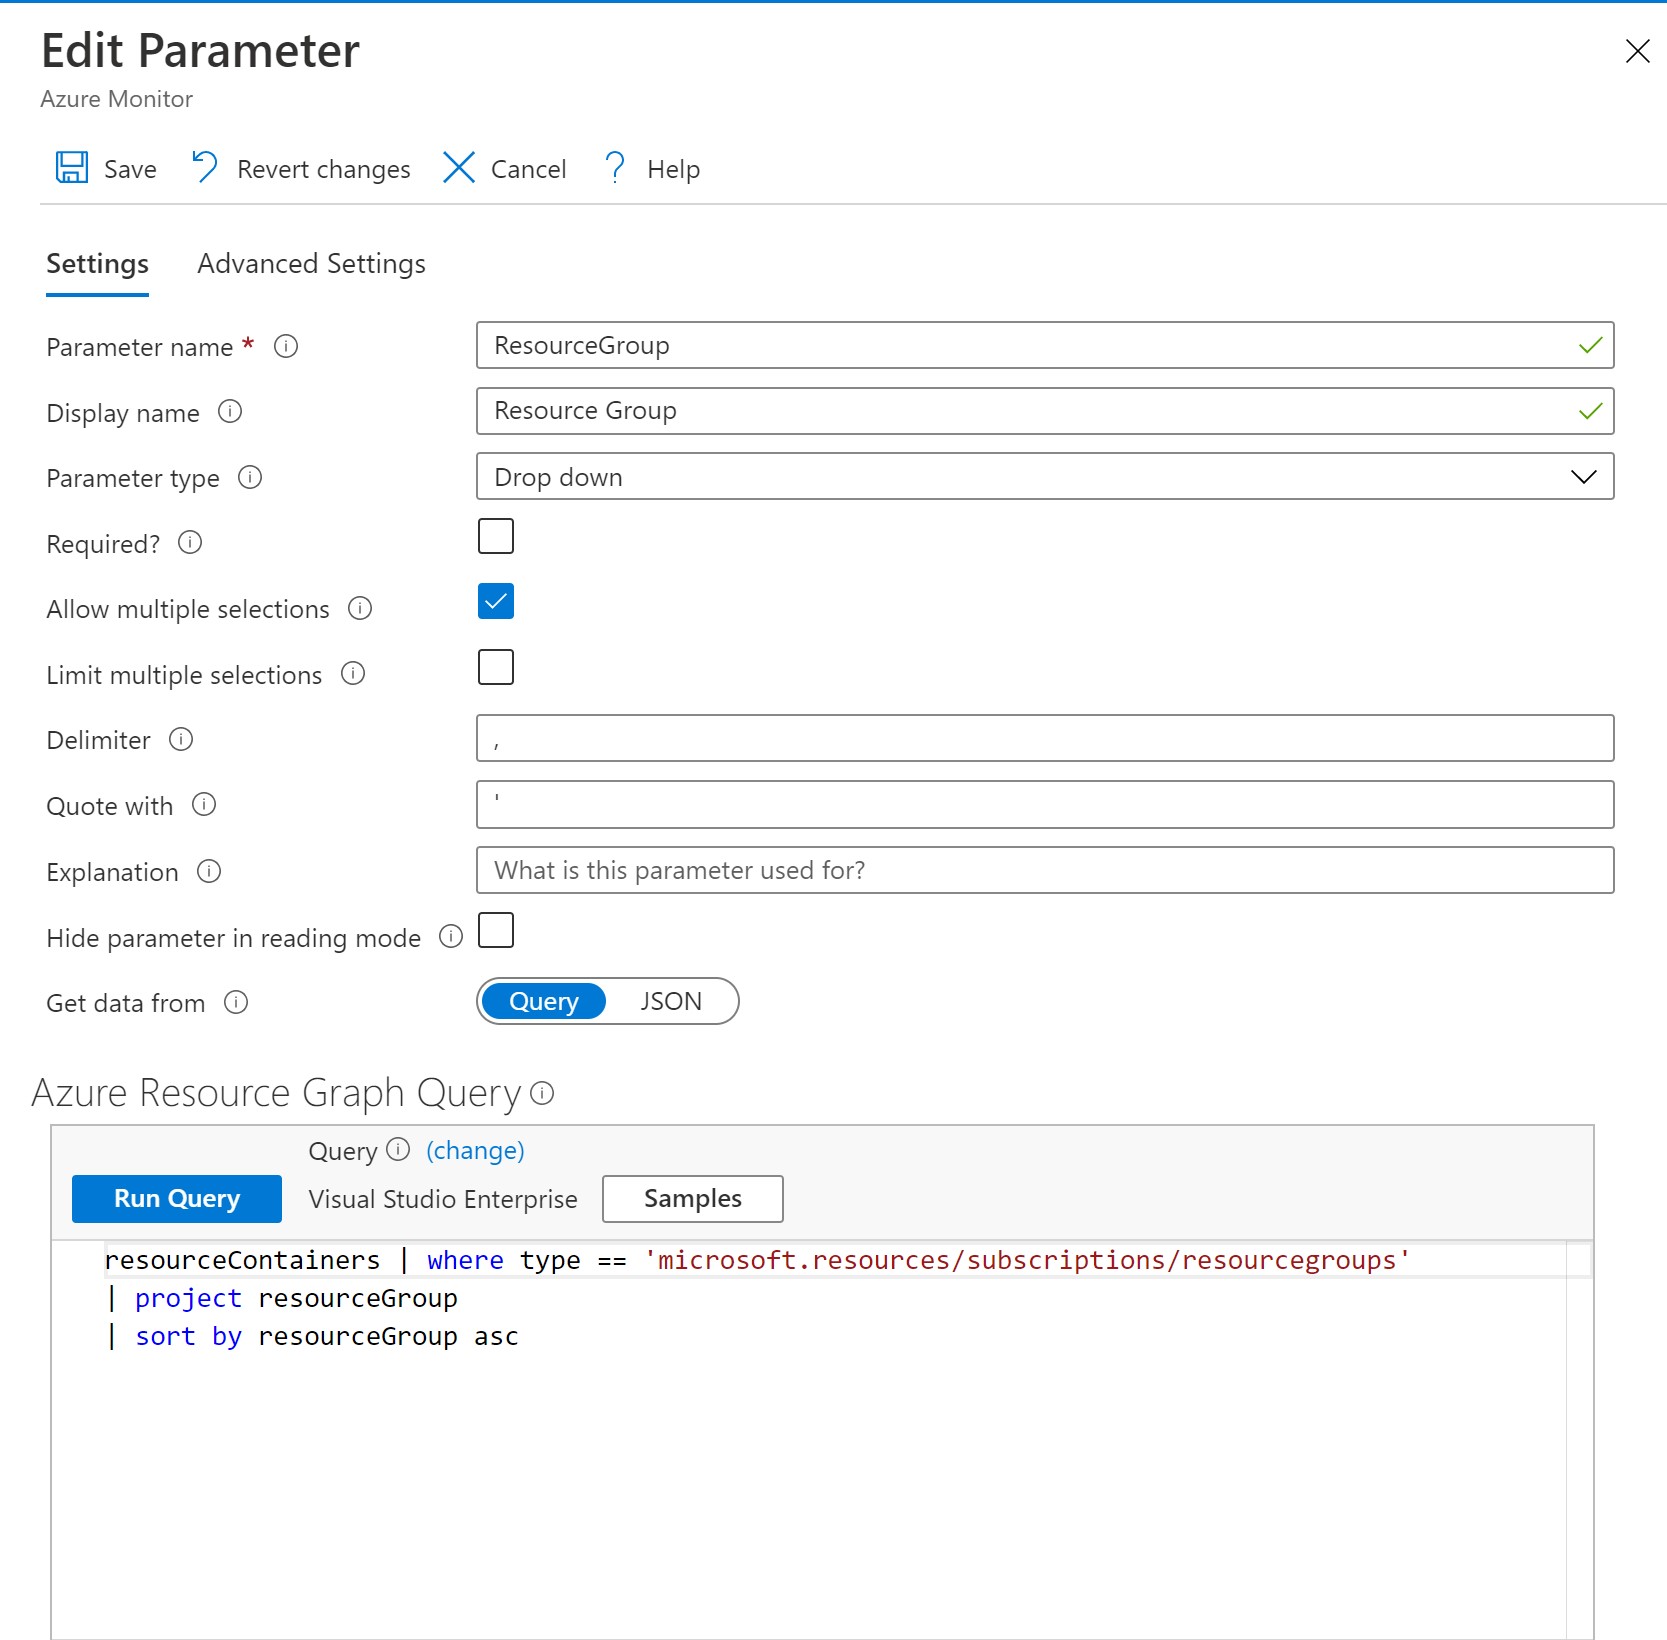
- Add a Resource group parameter.
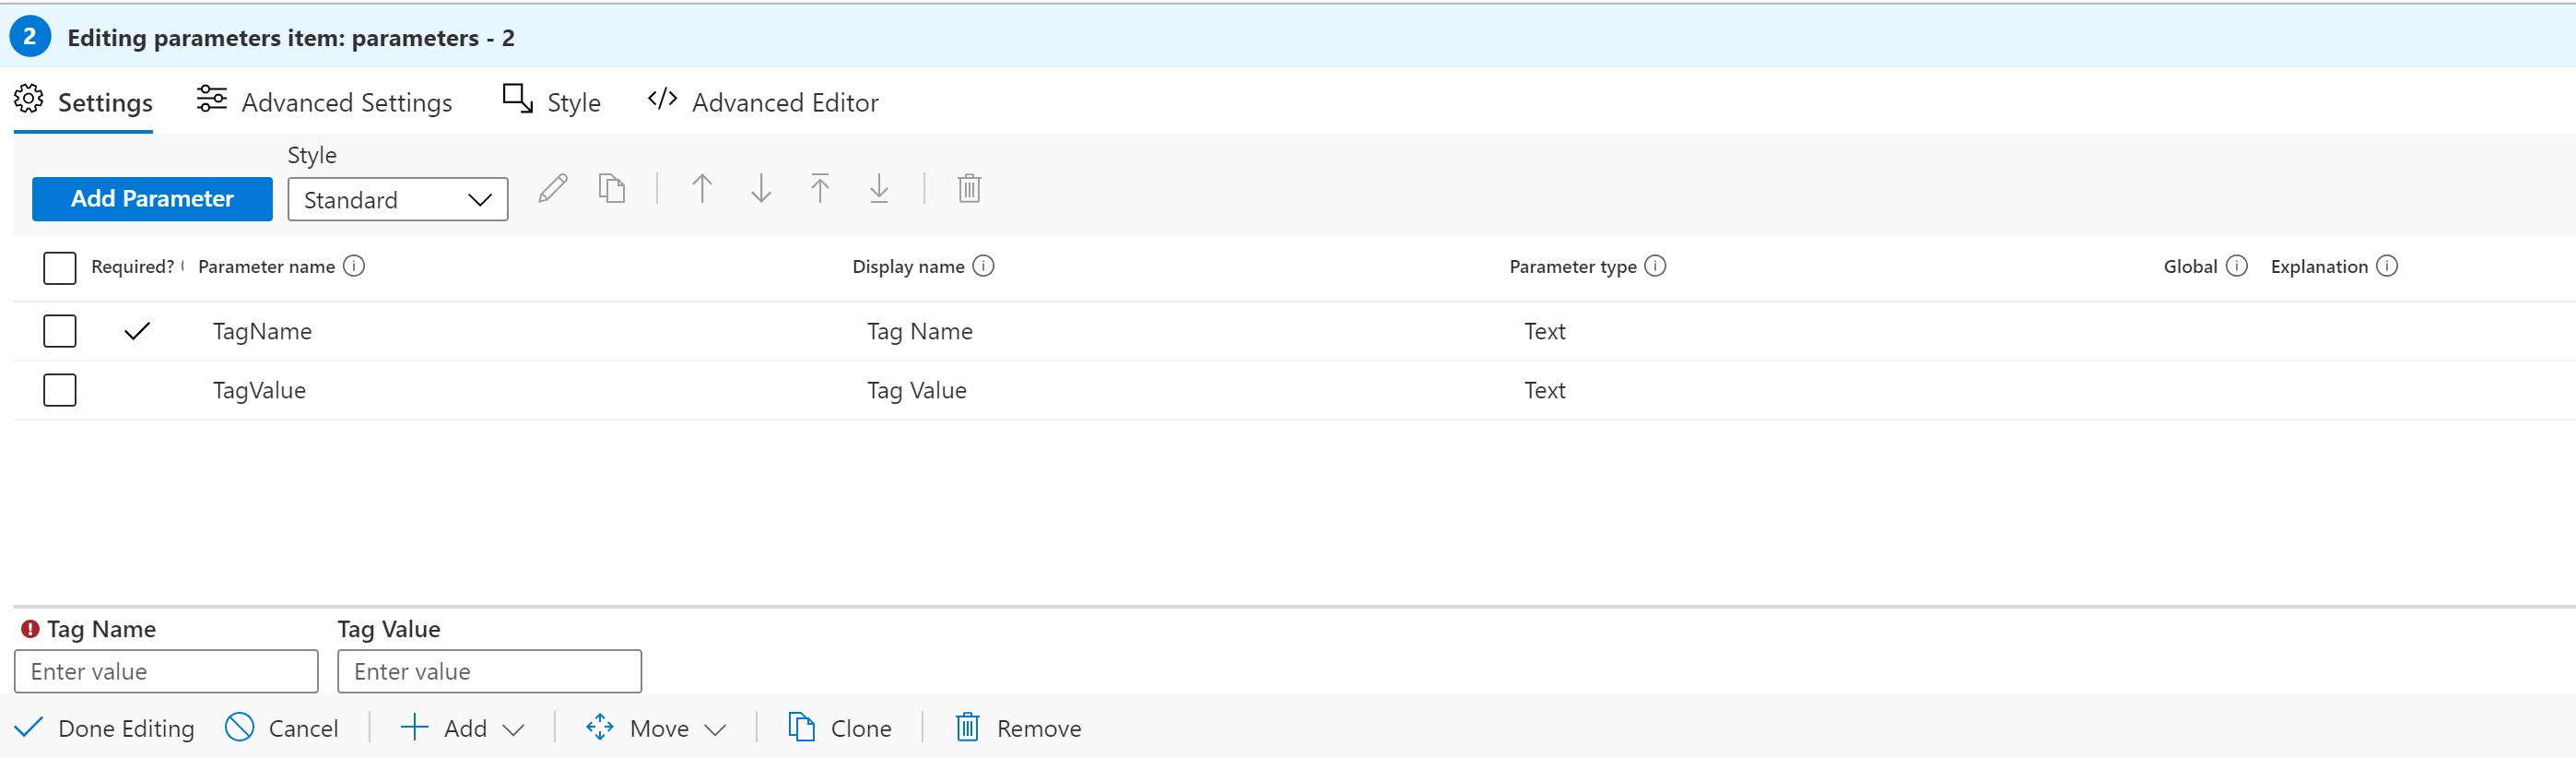
- We also need to add parameters for the tags that we will deploy. Those will be text parameters.
- Next, we need to add a query to list all untagged Virtual machines. We will use Azure Resource Graph to list them.
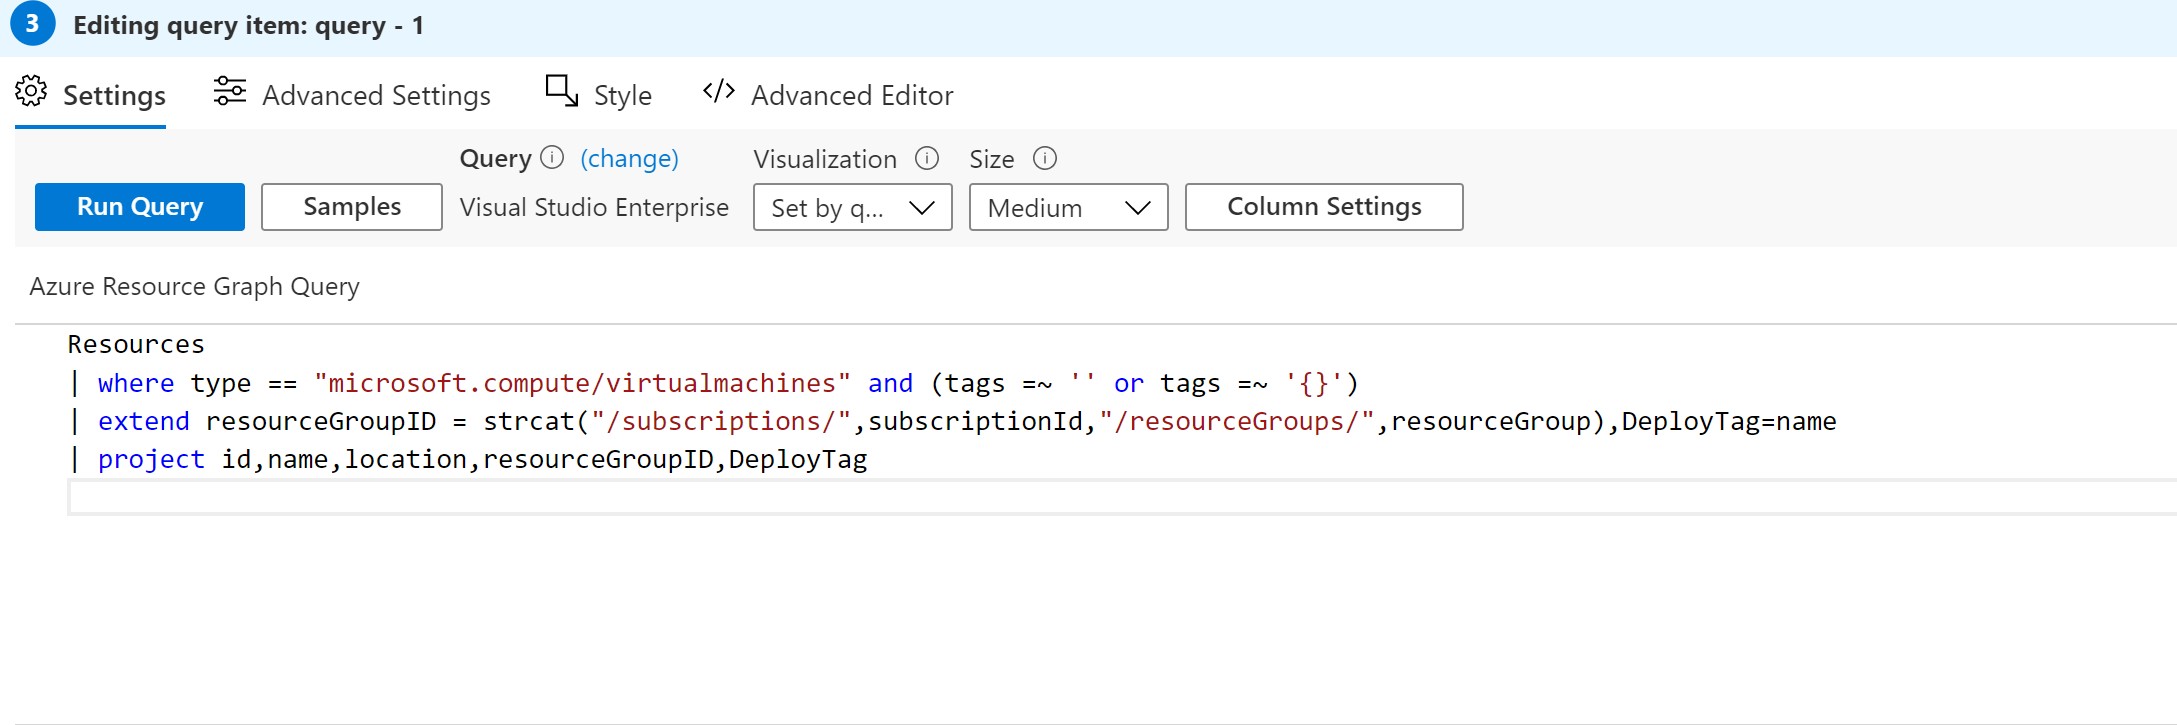
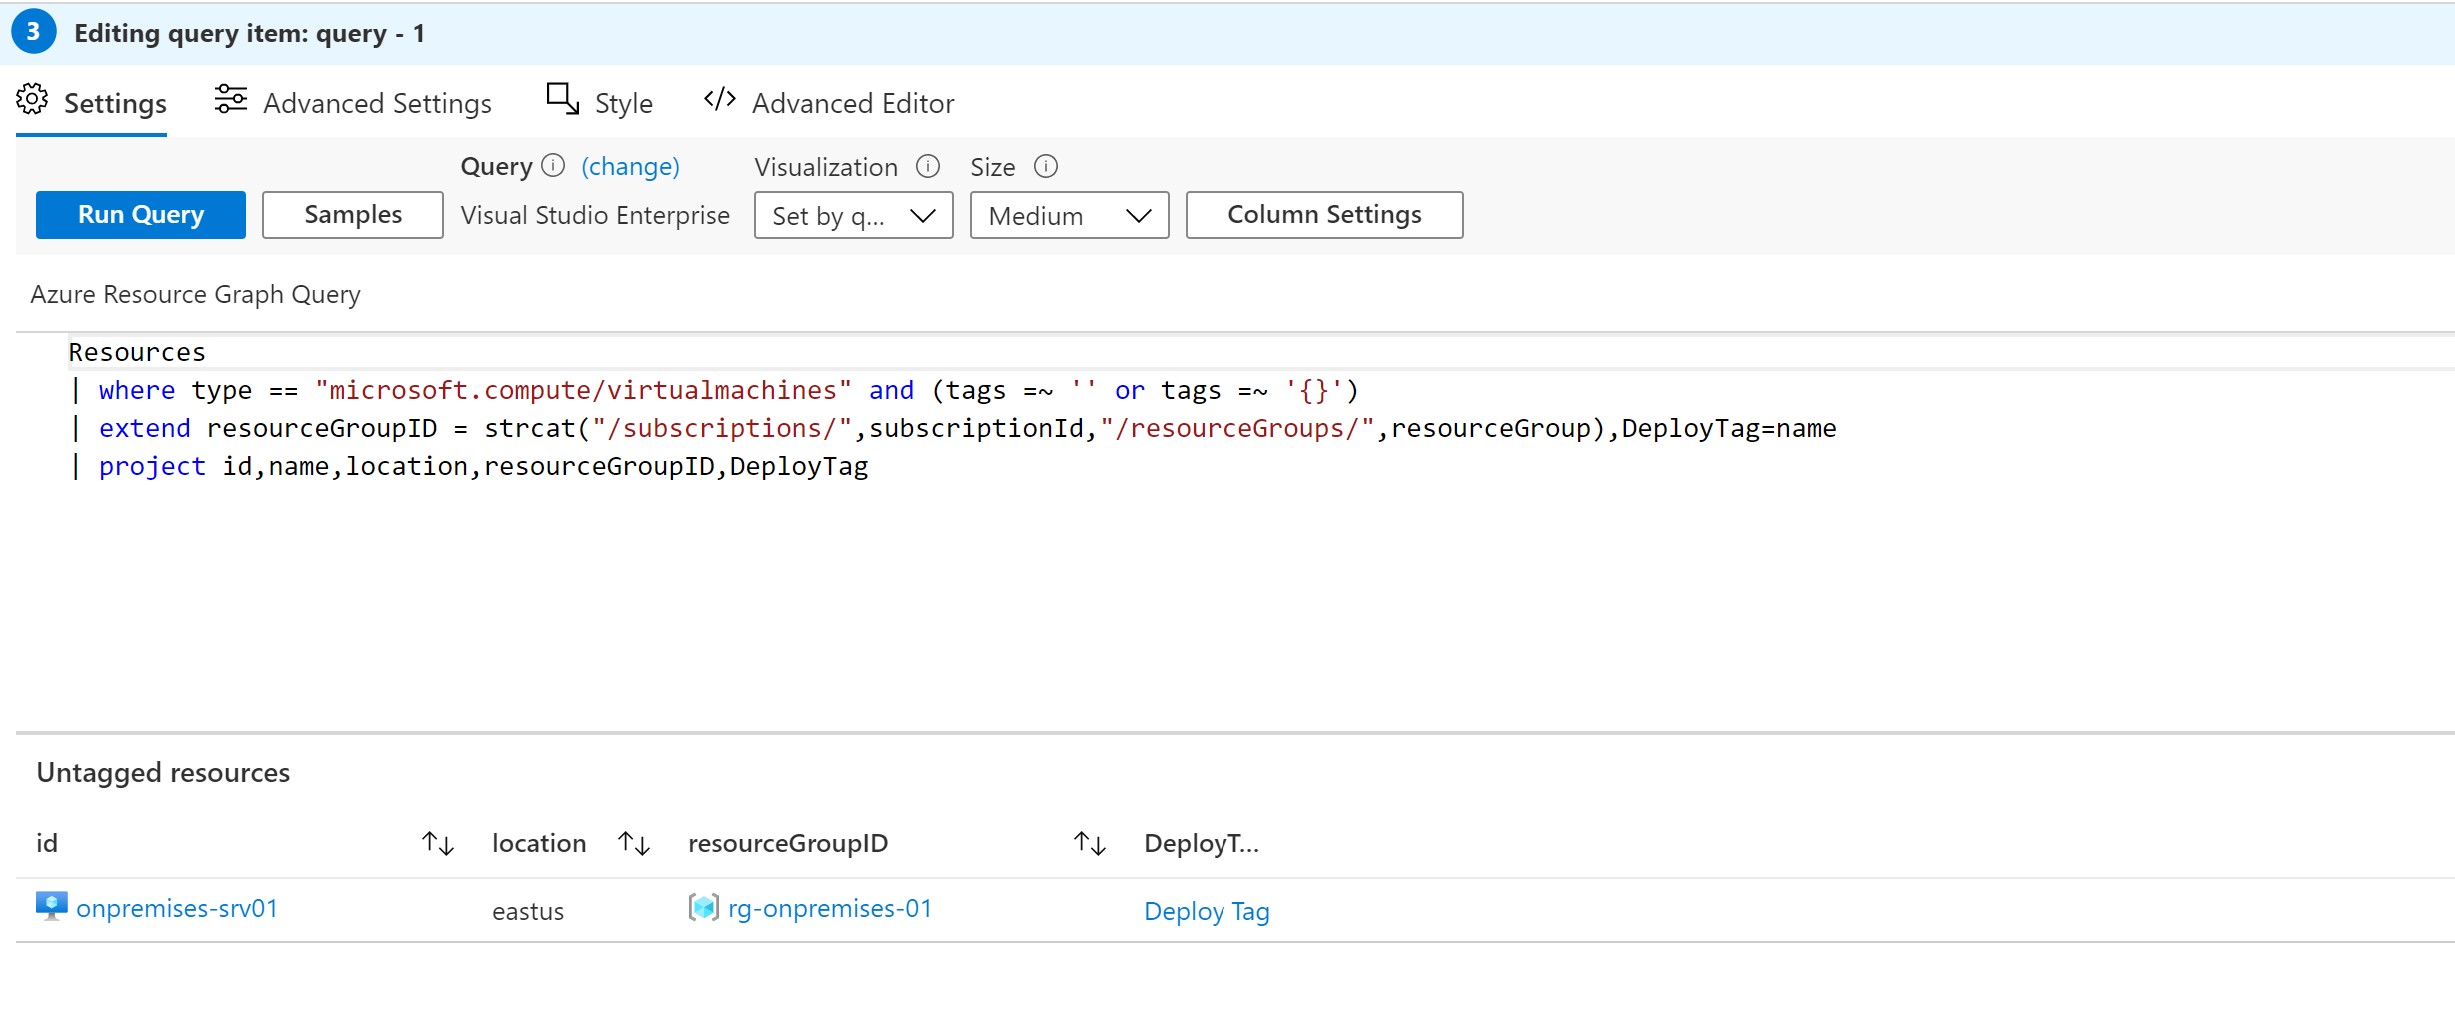
💡 You can see that i have added a new column named DeployTag which i will use later for the ARM template.
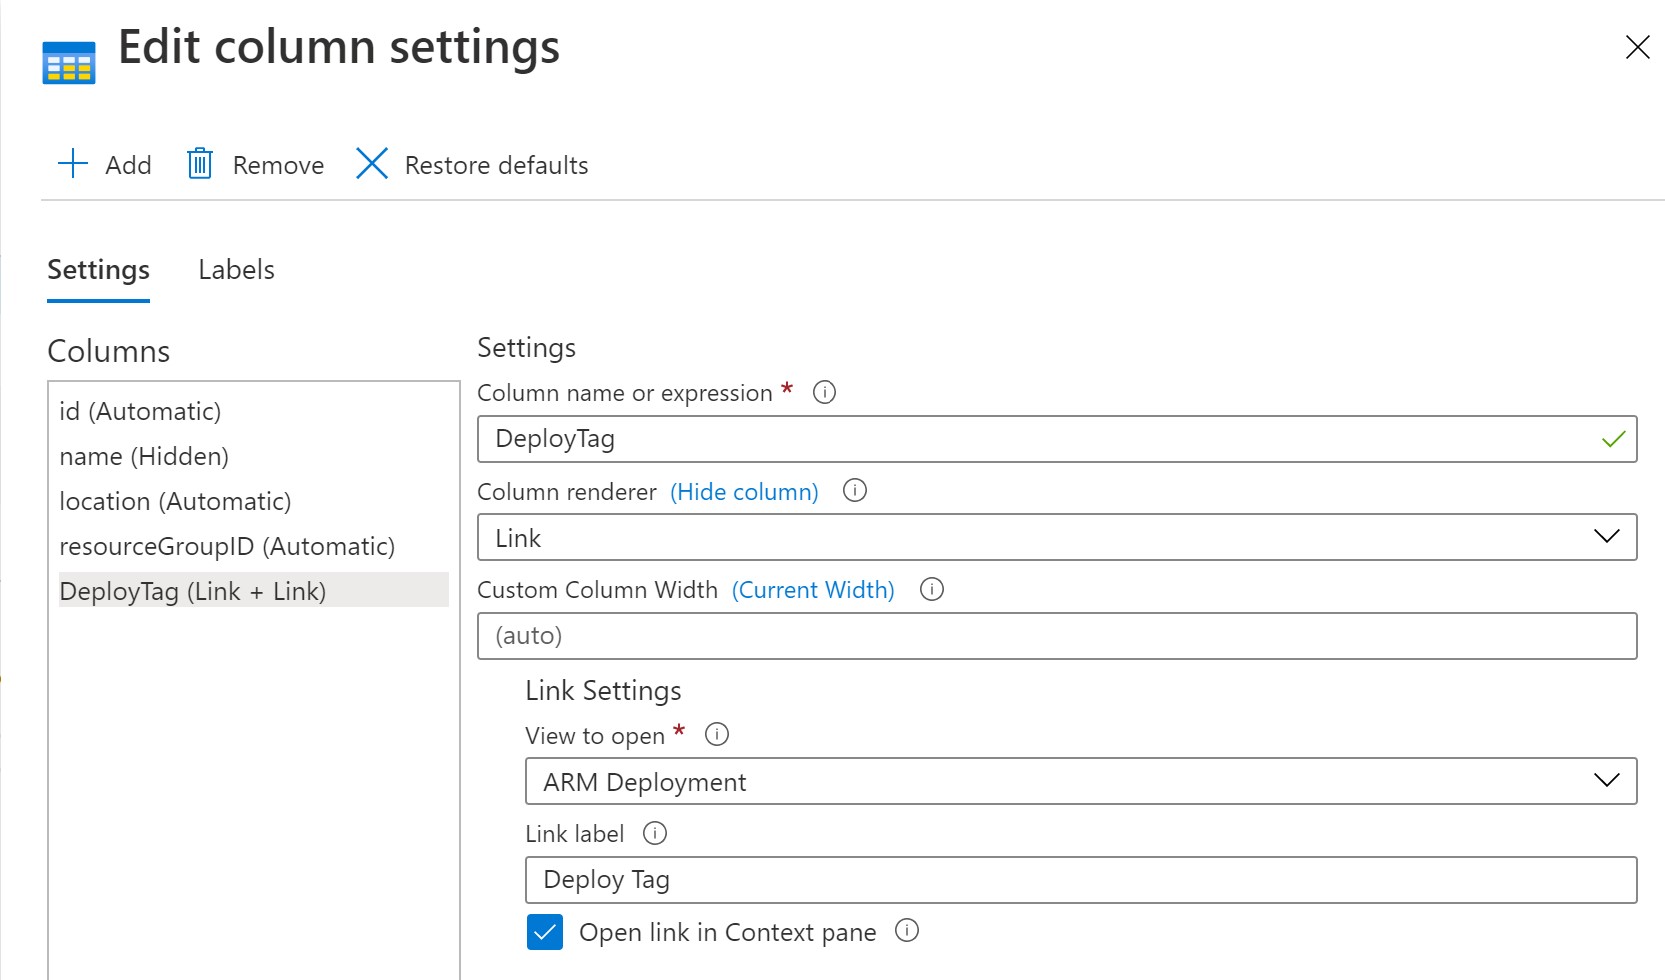
- Now, let’s go to Column Settings where all the magic happens.
- Change the Column renderer of the “DeployTag” column to Link, choose the view to be ARM Deployment and type in a label for this link Deploy Tag(this will be the text displayed for each Virtual machine).
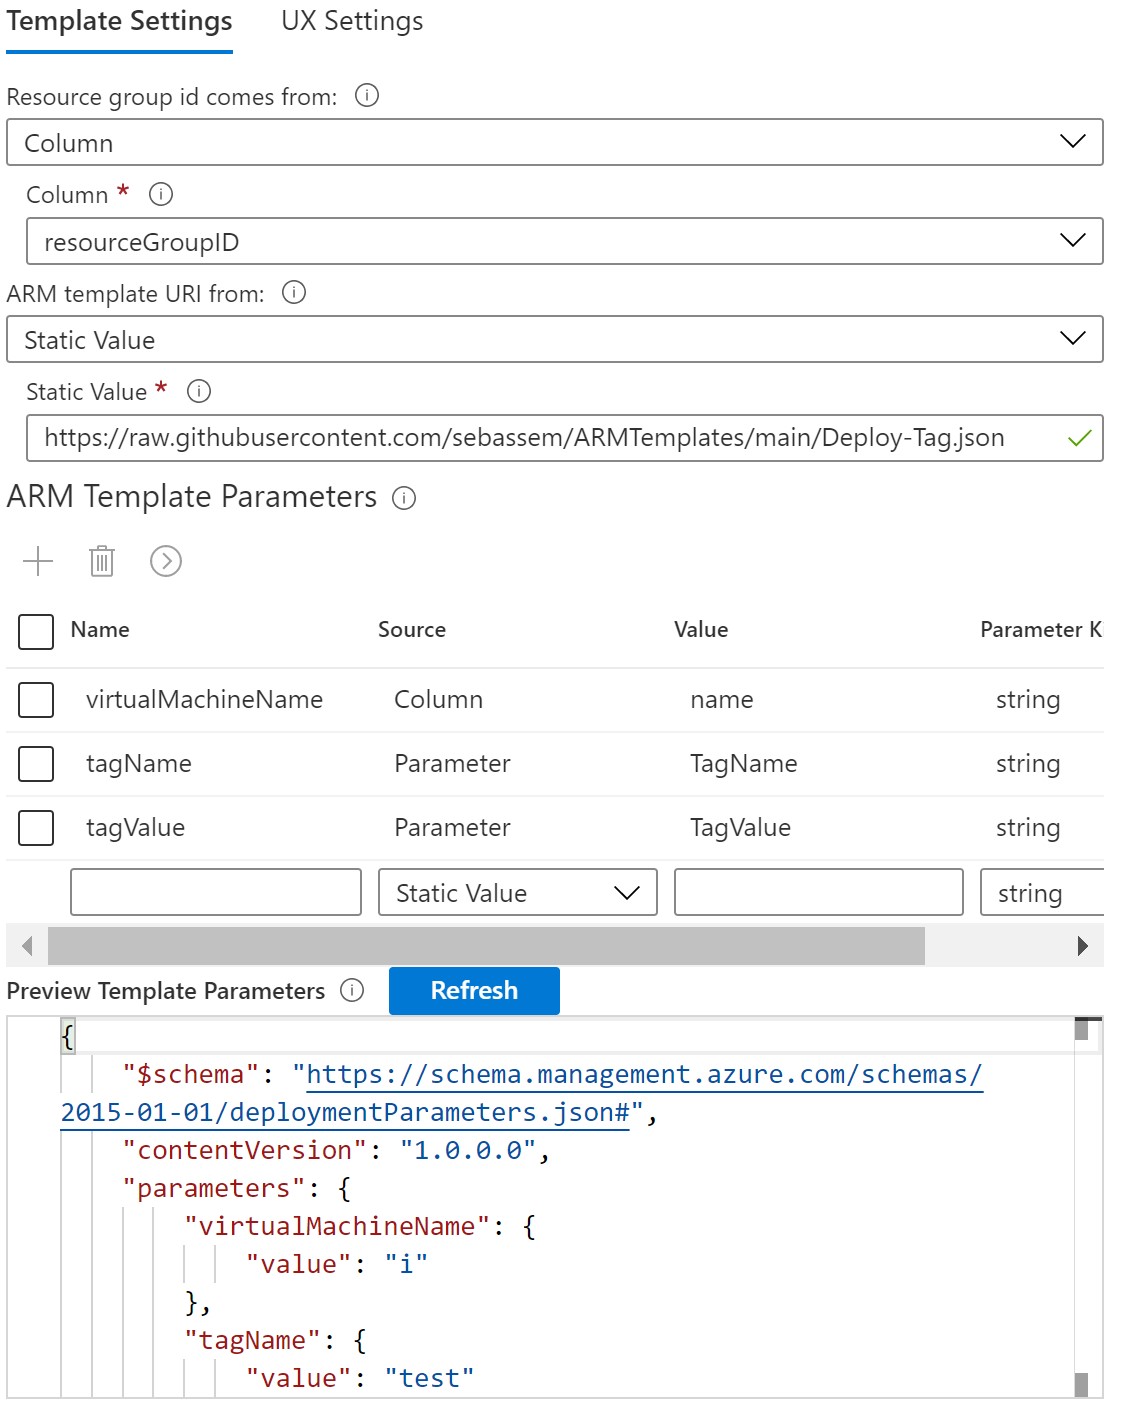
- Then we need to configure the ARM deployment settings:
- Since this is an ARM deployment, we need to get the Resource group Id. It’s already exposed in the Virutal machines’ query in the column resourceGroupID.
- Set the URI for the ARM template to a static value and provide it’s URI (in my case I have it hosted on GitHub).
- To refresh the view with the parameters of the ARM template, press on the arrow button to initialize the view. You can see that the preview is showing the parameters we have in the ARM template.

- Select where the parameters will come from, in our case the Virtual machine name is in the previous query and the tags are parameters.
-
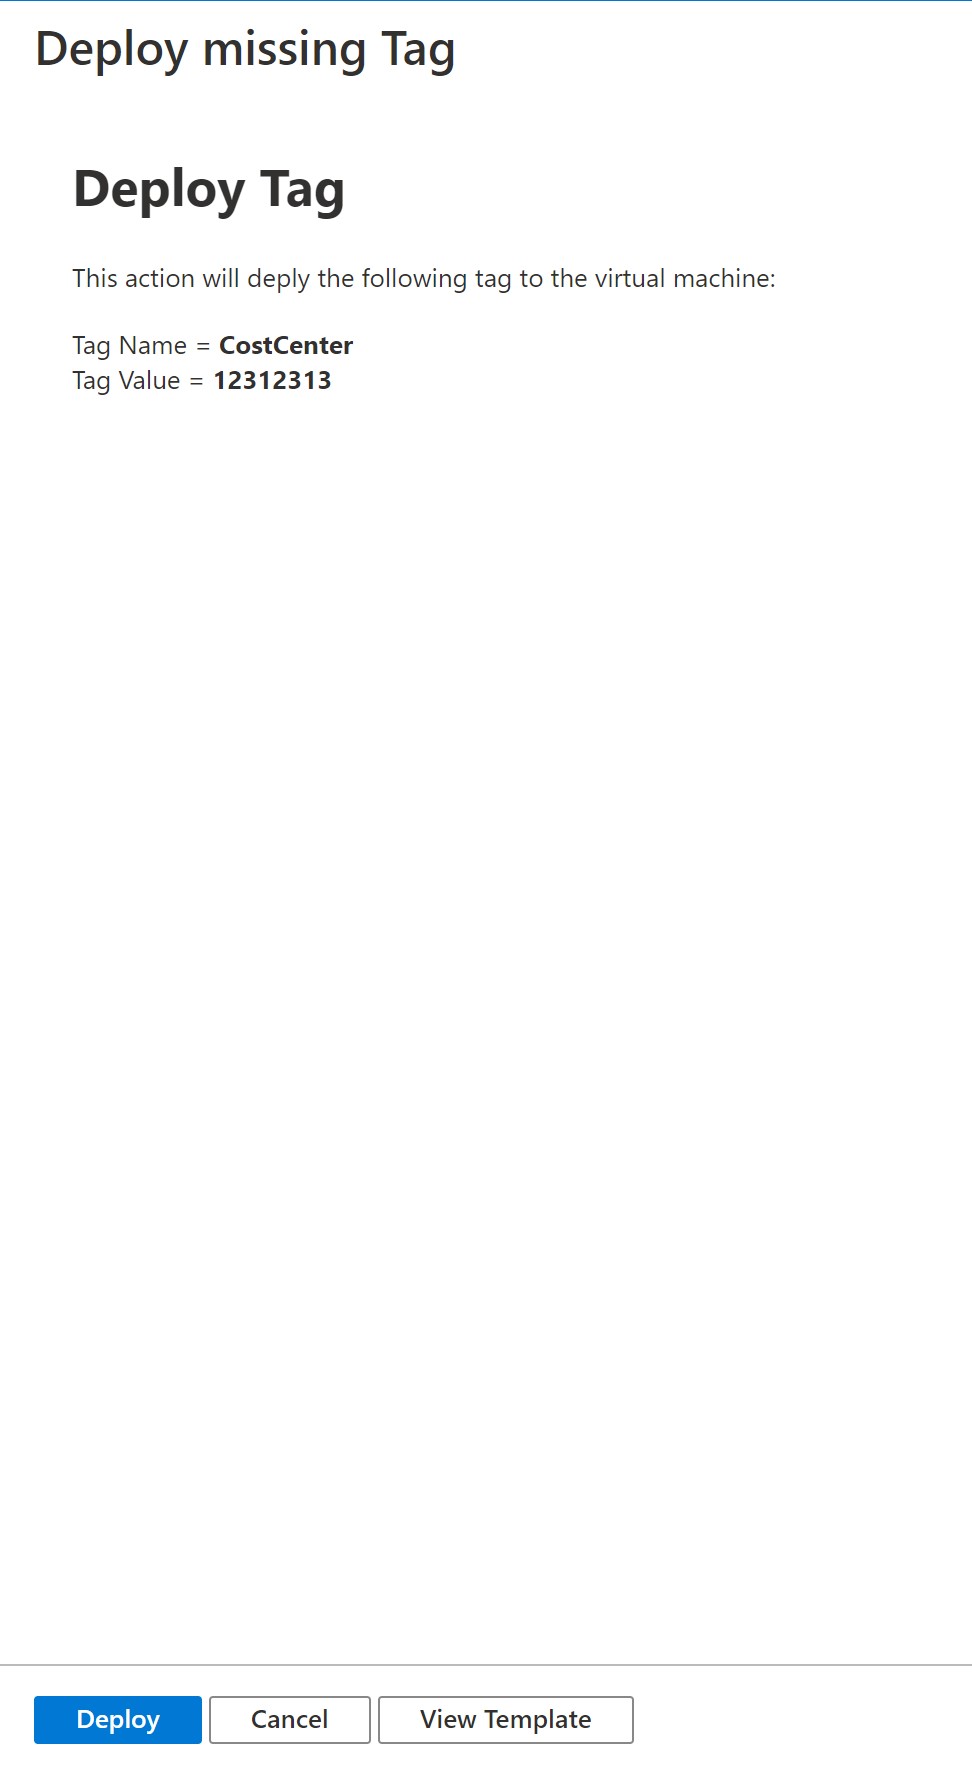
Finally, go to the UX Settings tab to provide descriptive text when you start the deployment process.
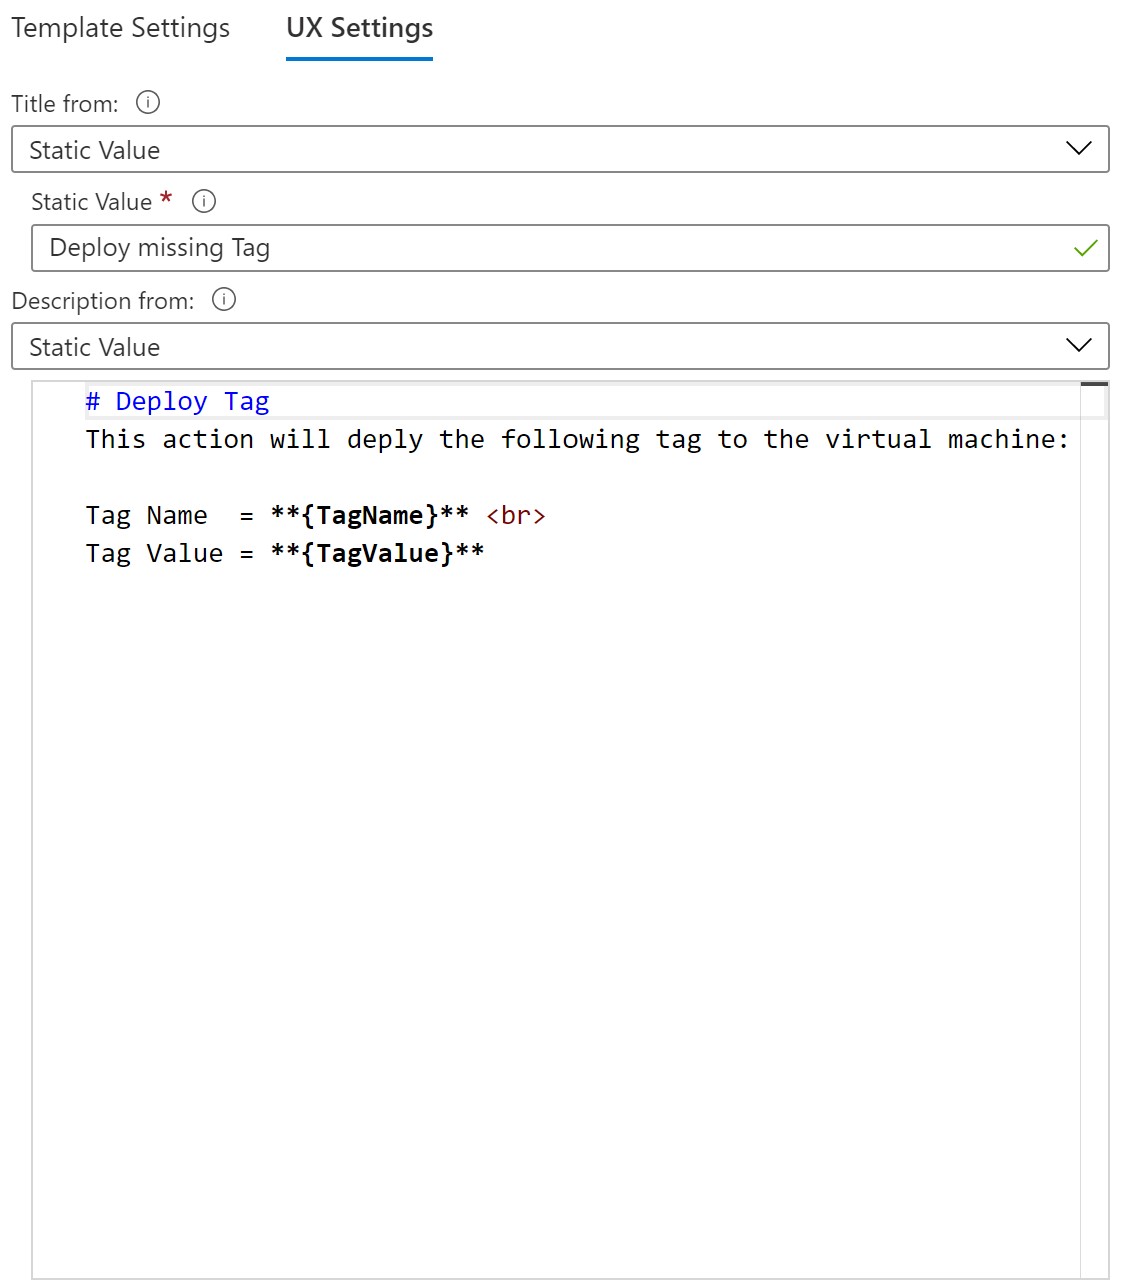
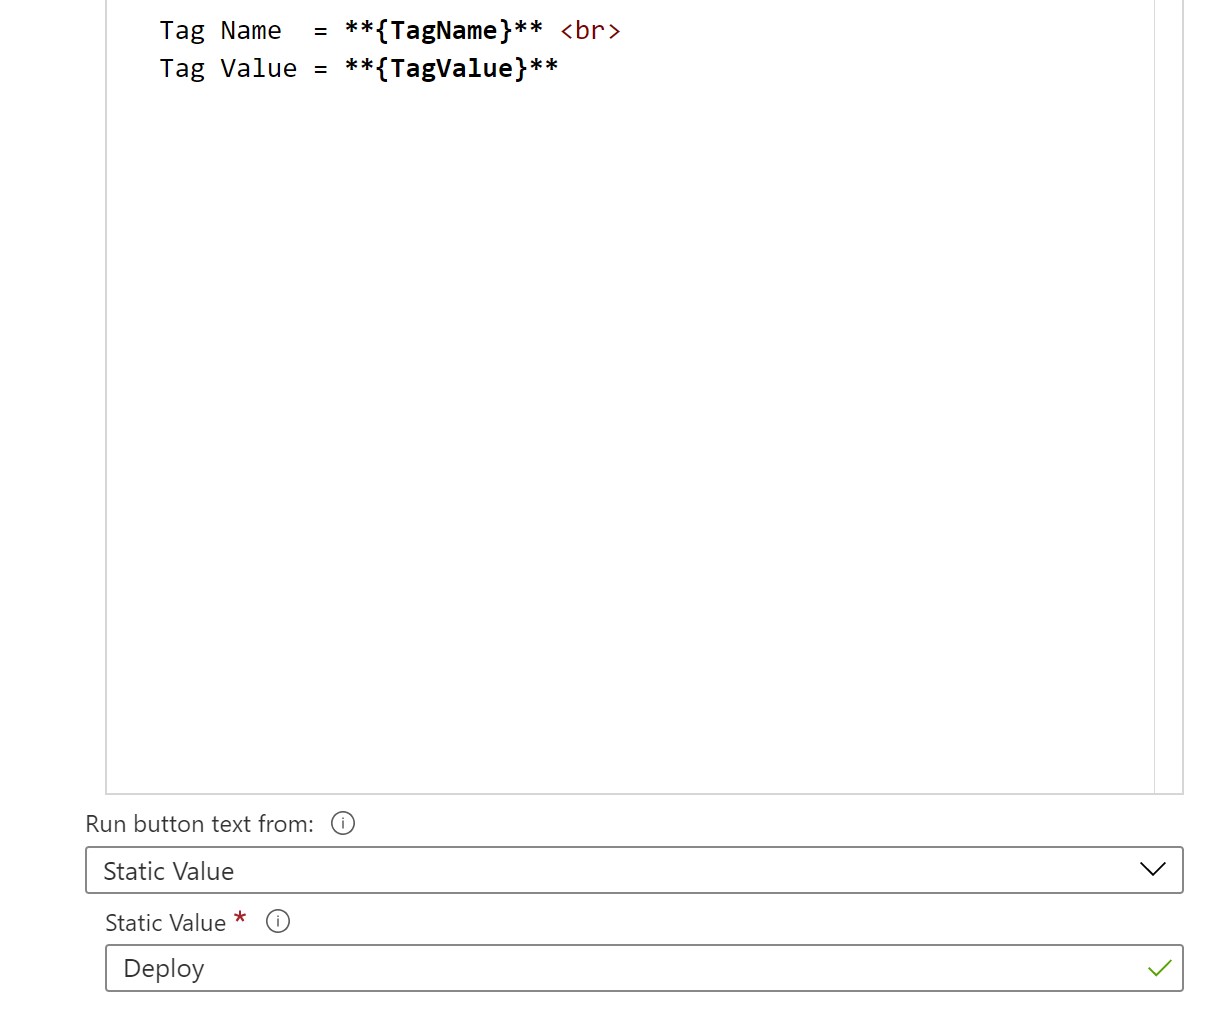
-
Save and Close.
Testing the Workbook
- If we click Done Editing and view our Workbook, we can see that we have one Virtual machine that is untagged and we can see the Deploy Tag link in the query.
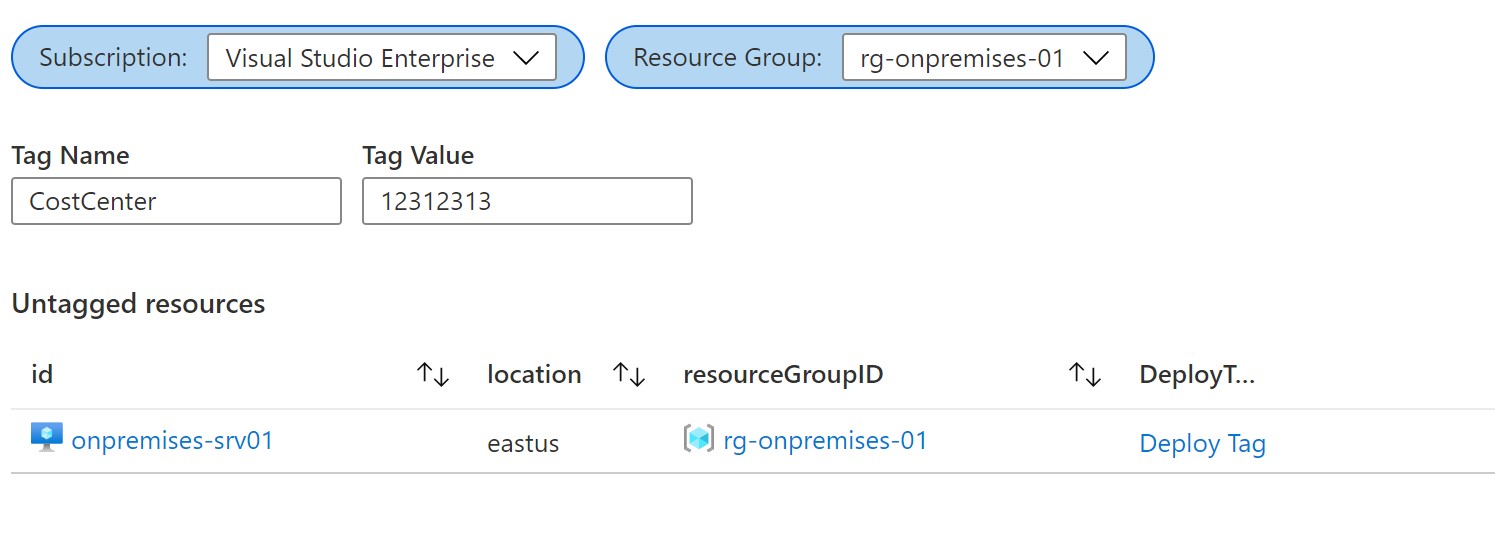
- On clicking this link, we can see the context menu with information on what will this action deploy as we specified in the UX Settings
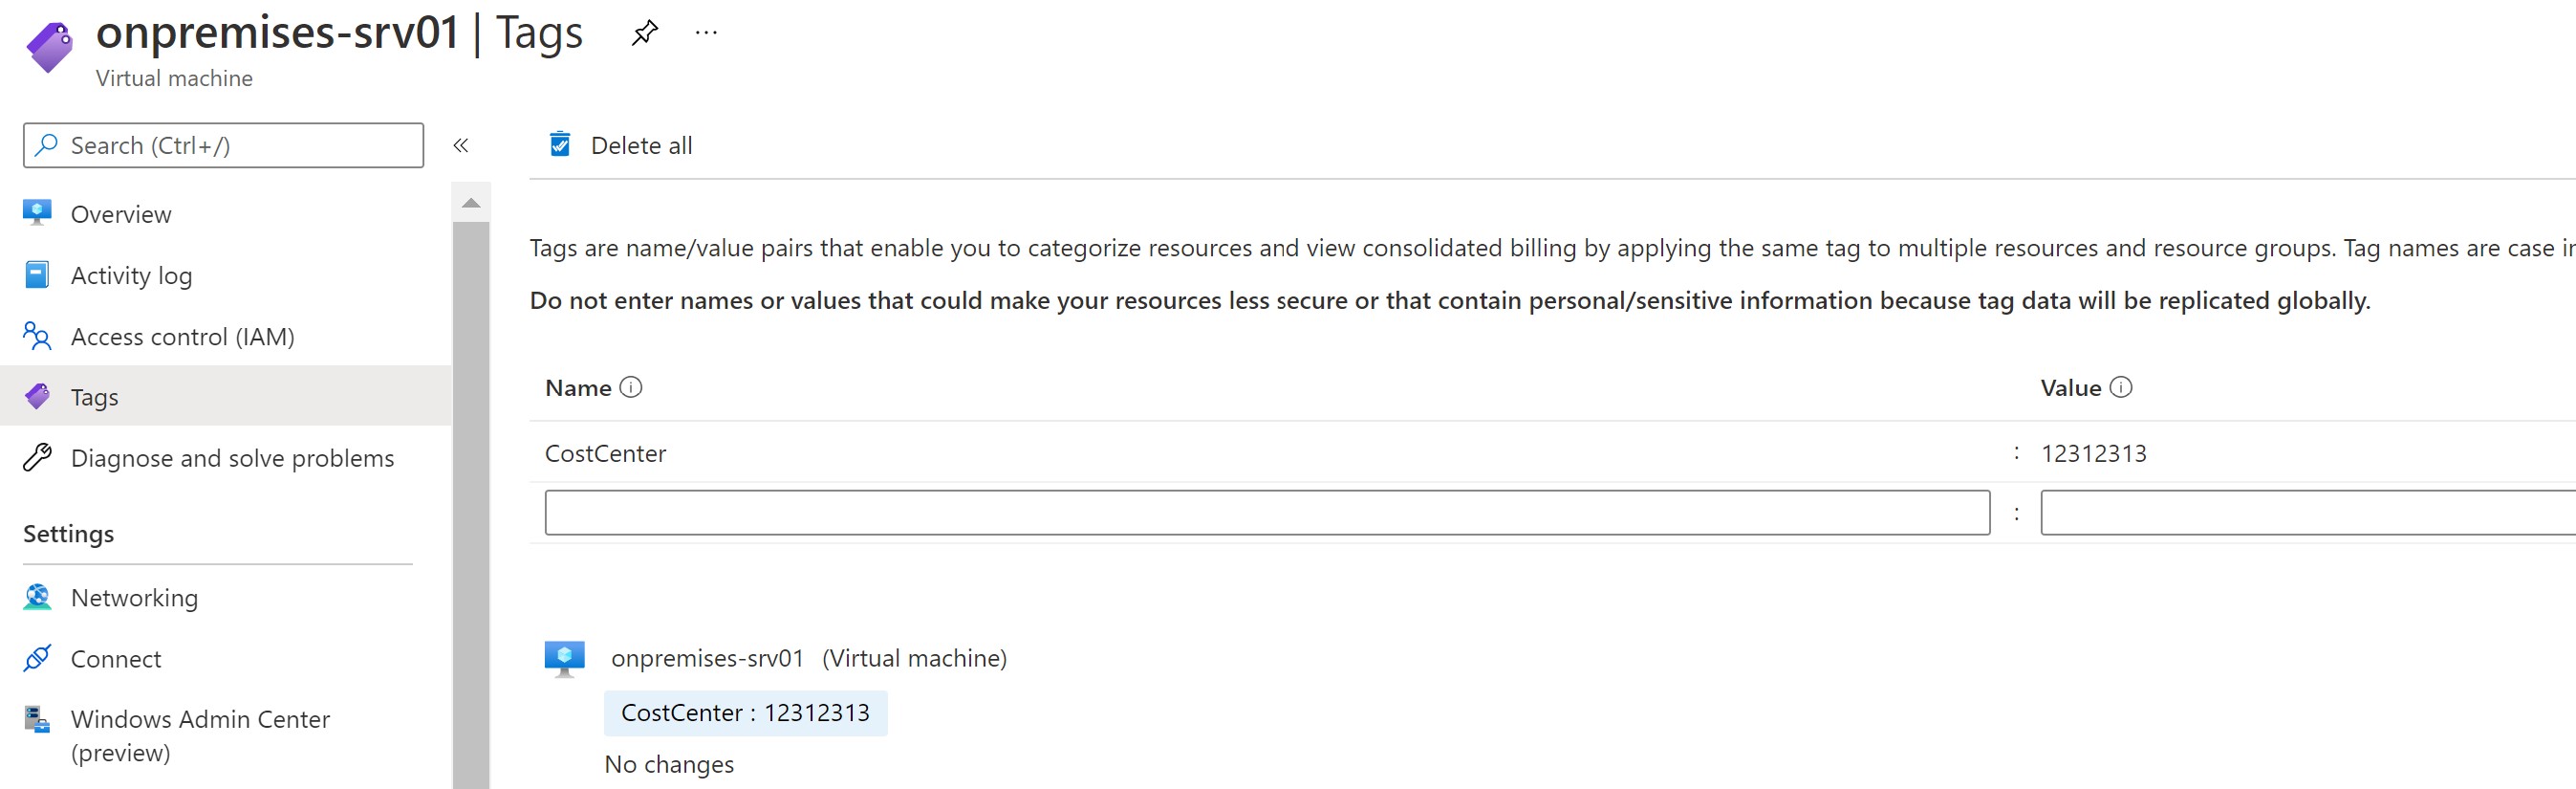
- The deployment process starts and in a couple of seconds, we can see that the tag is successfully deployed to the Virtual machine.


My name is
Seif Bassem
You May Also Like

Azure Monitor workbooks - Your interactive monitoring canvas
Azure Monitor Workbooks Workbooks are one of my favorite services on …

The ultimate guide to the new Azure Monitor Agent
When looking at monitoring virtual machines using Azure Monitor , you …

Automate non-Azure servers with Azure Arc-enabled servers
Azure Arc-enabled servers allows you to project your hybrid servers …