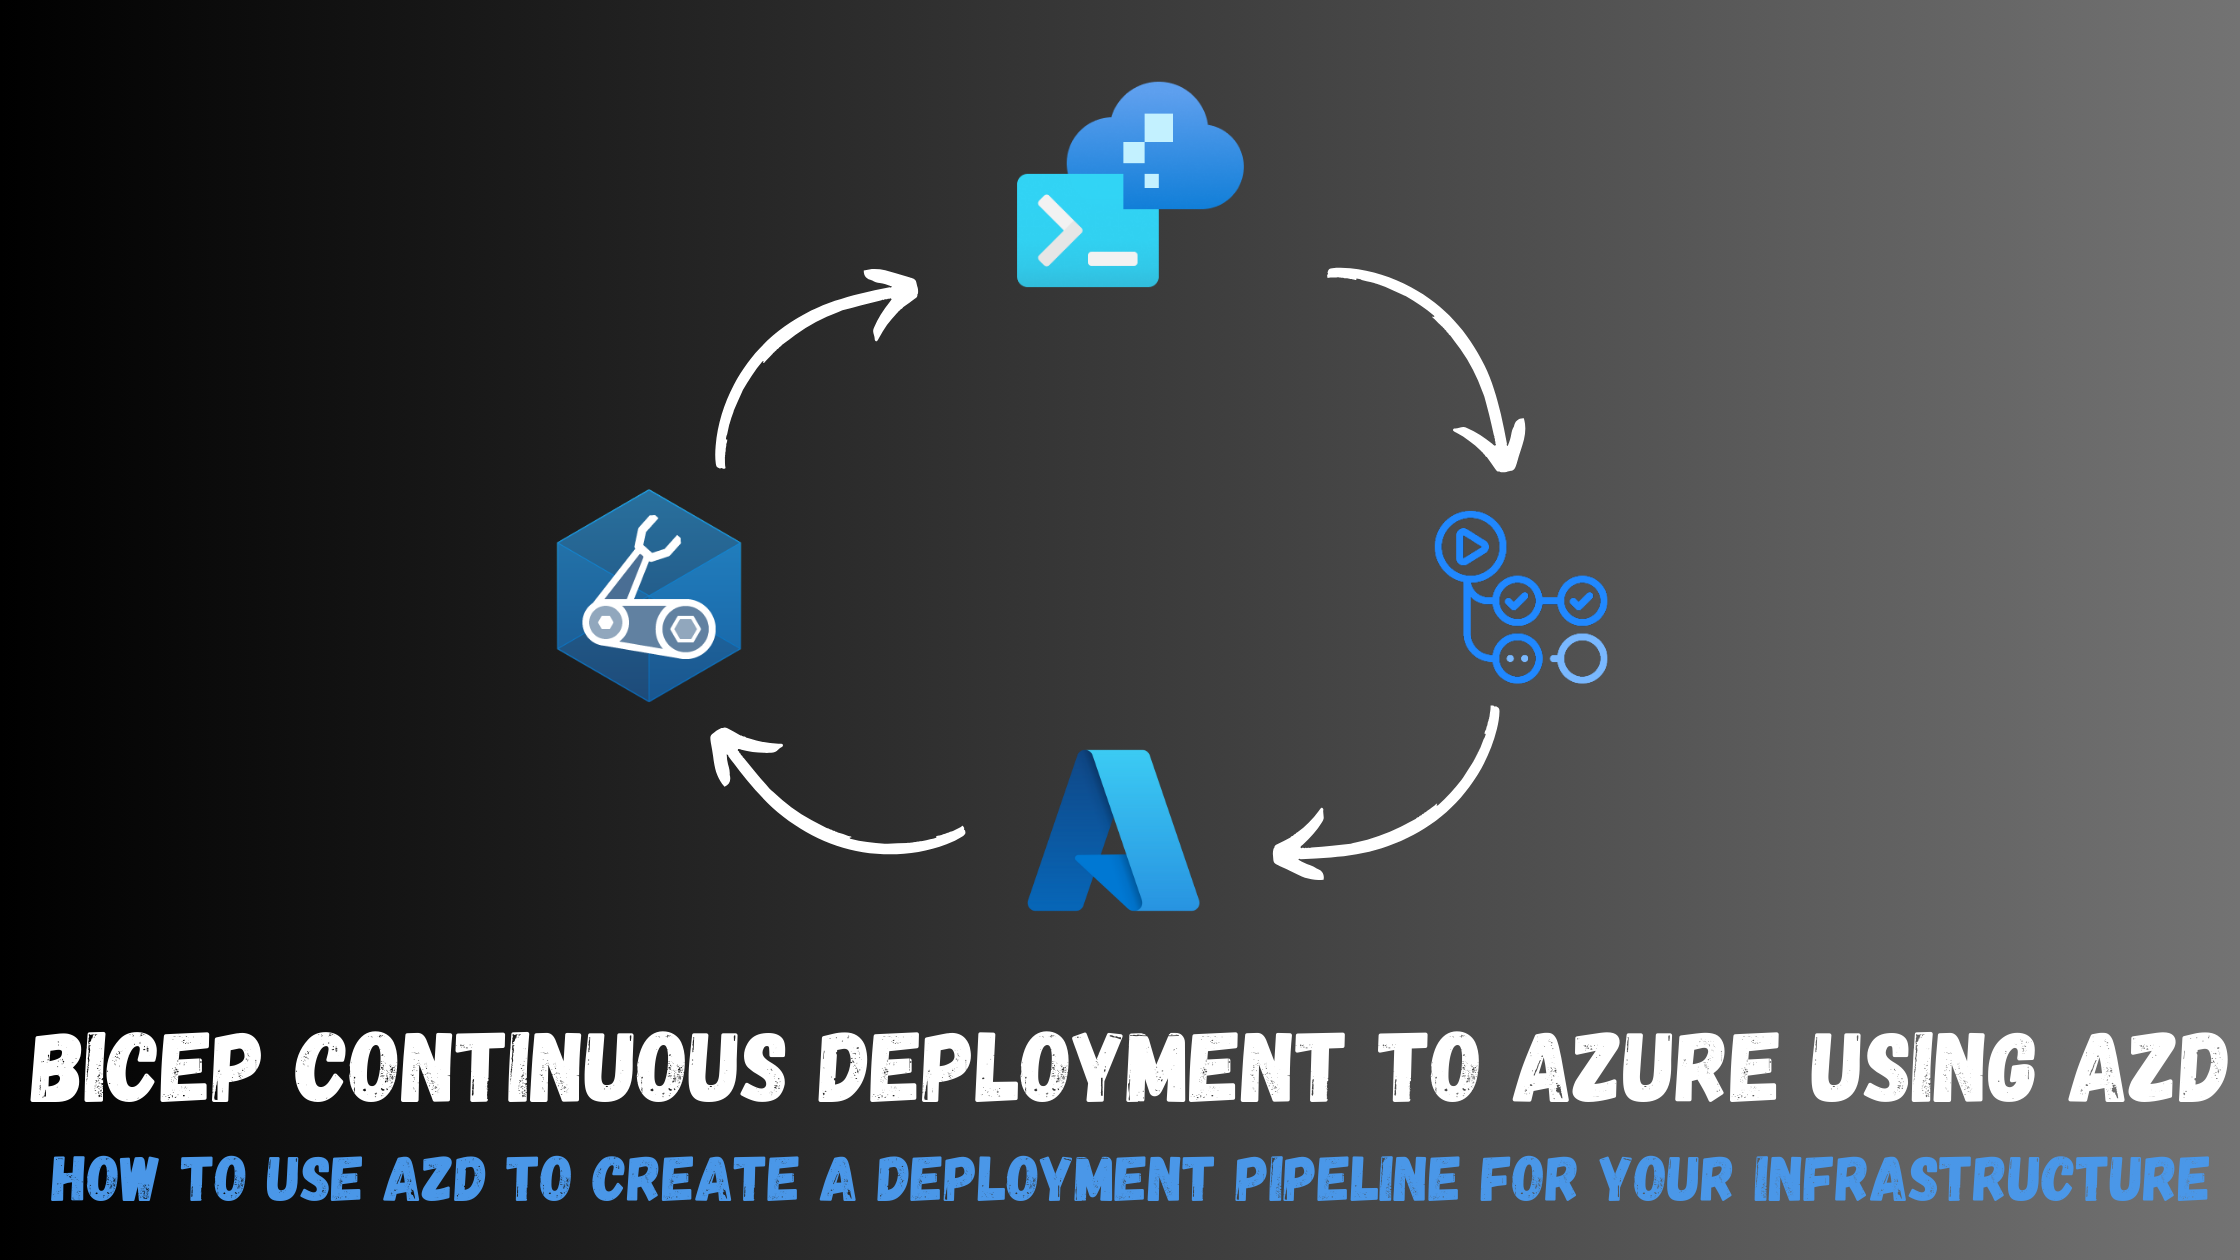
Continuously deploy your infrastructure via Bicep and azd
In this post, I will go through how the Azure Developer CLI (azd) can help you automate the deployment of infrastructure on Azure and create a deployment pipeline on GitHub so you can continuously deploy those resources while tracking changes.
Overview
The Azure Developer CLI (azd) is an open-source tool that helps developers accelerate the time it takes to get their application from local development environment to Azure. It provides a set of best practice, developer-friendly commands that map to key stages in your workflow, whether you’re working in the terminal, your editor or integrated development environment (IDE), or CI/CD (continuous integration/continuous deployment). You can use azd with extensible blueprint templates that include everything you need to get an application up and running on Azure. These templates include reusable infrastructure as code assets and proof-of-concept application code that can be replaced with your own app code.
You can also create your own templates or find ones to build upon. Once you’ve installed Azure Developer CLI, you can get your app running on Azure in just a few steps: select an Azure Developer CLI template, initialize the project with the template by running azd init, package, provision and deploy the app by running azd up, and continue iterating on your application code and deploying changes as needed by running azd deploy. Azure Developer CLI is a useful tool for developers who want to streamline their workflow and deploy their applications to Azure more efficiently.
NOTE: Check out this previous post for more context on how useful it is to use azd with bicep.
Setup
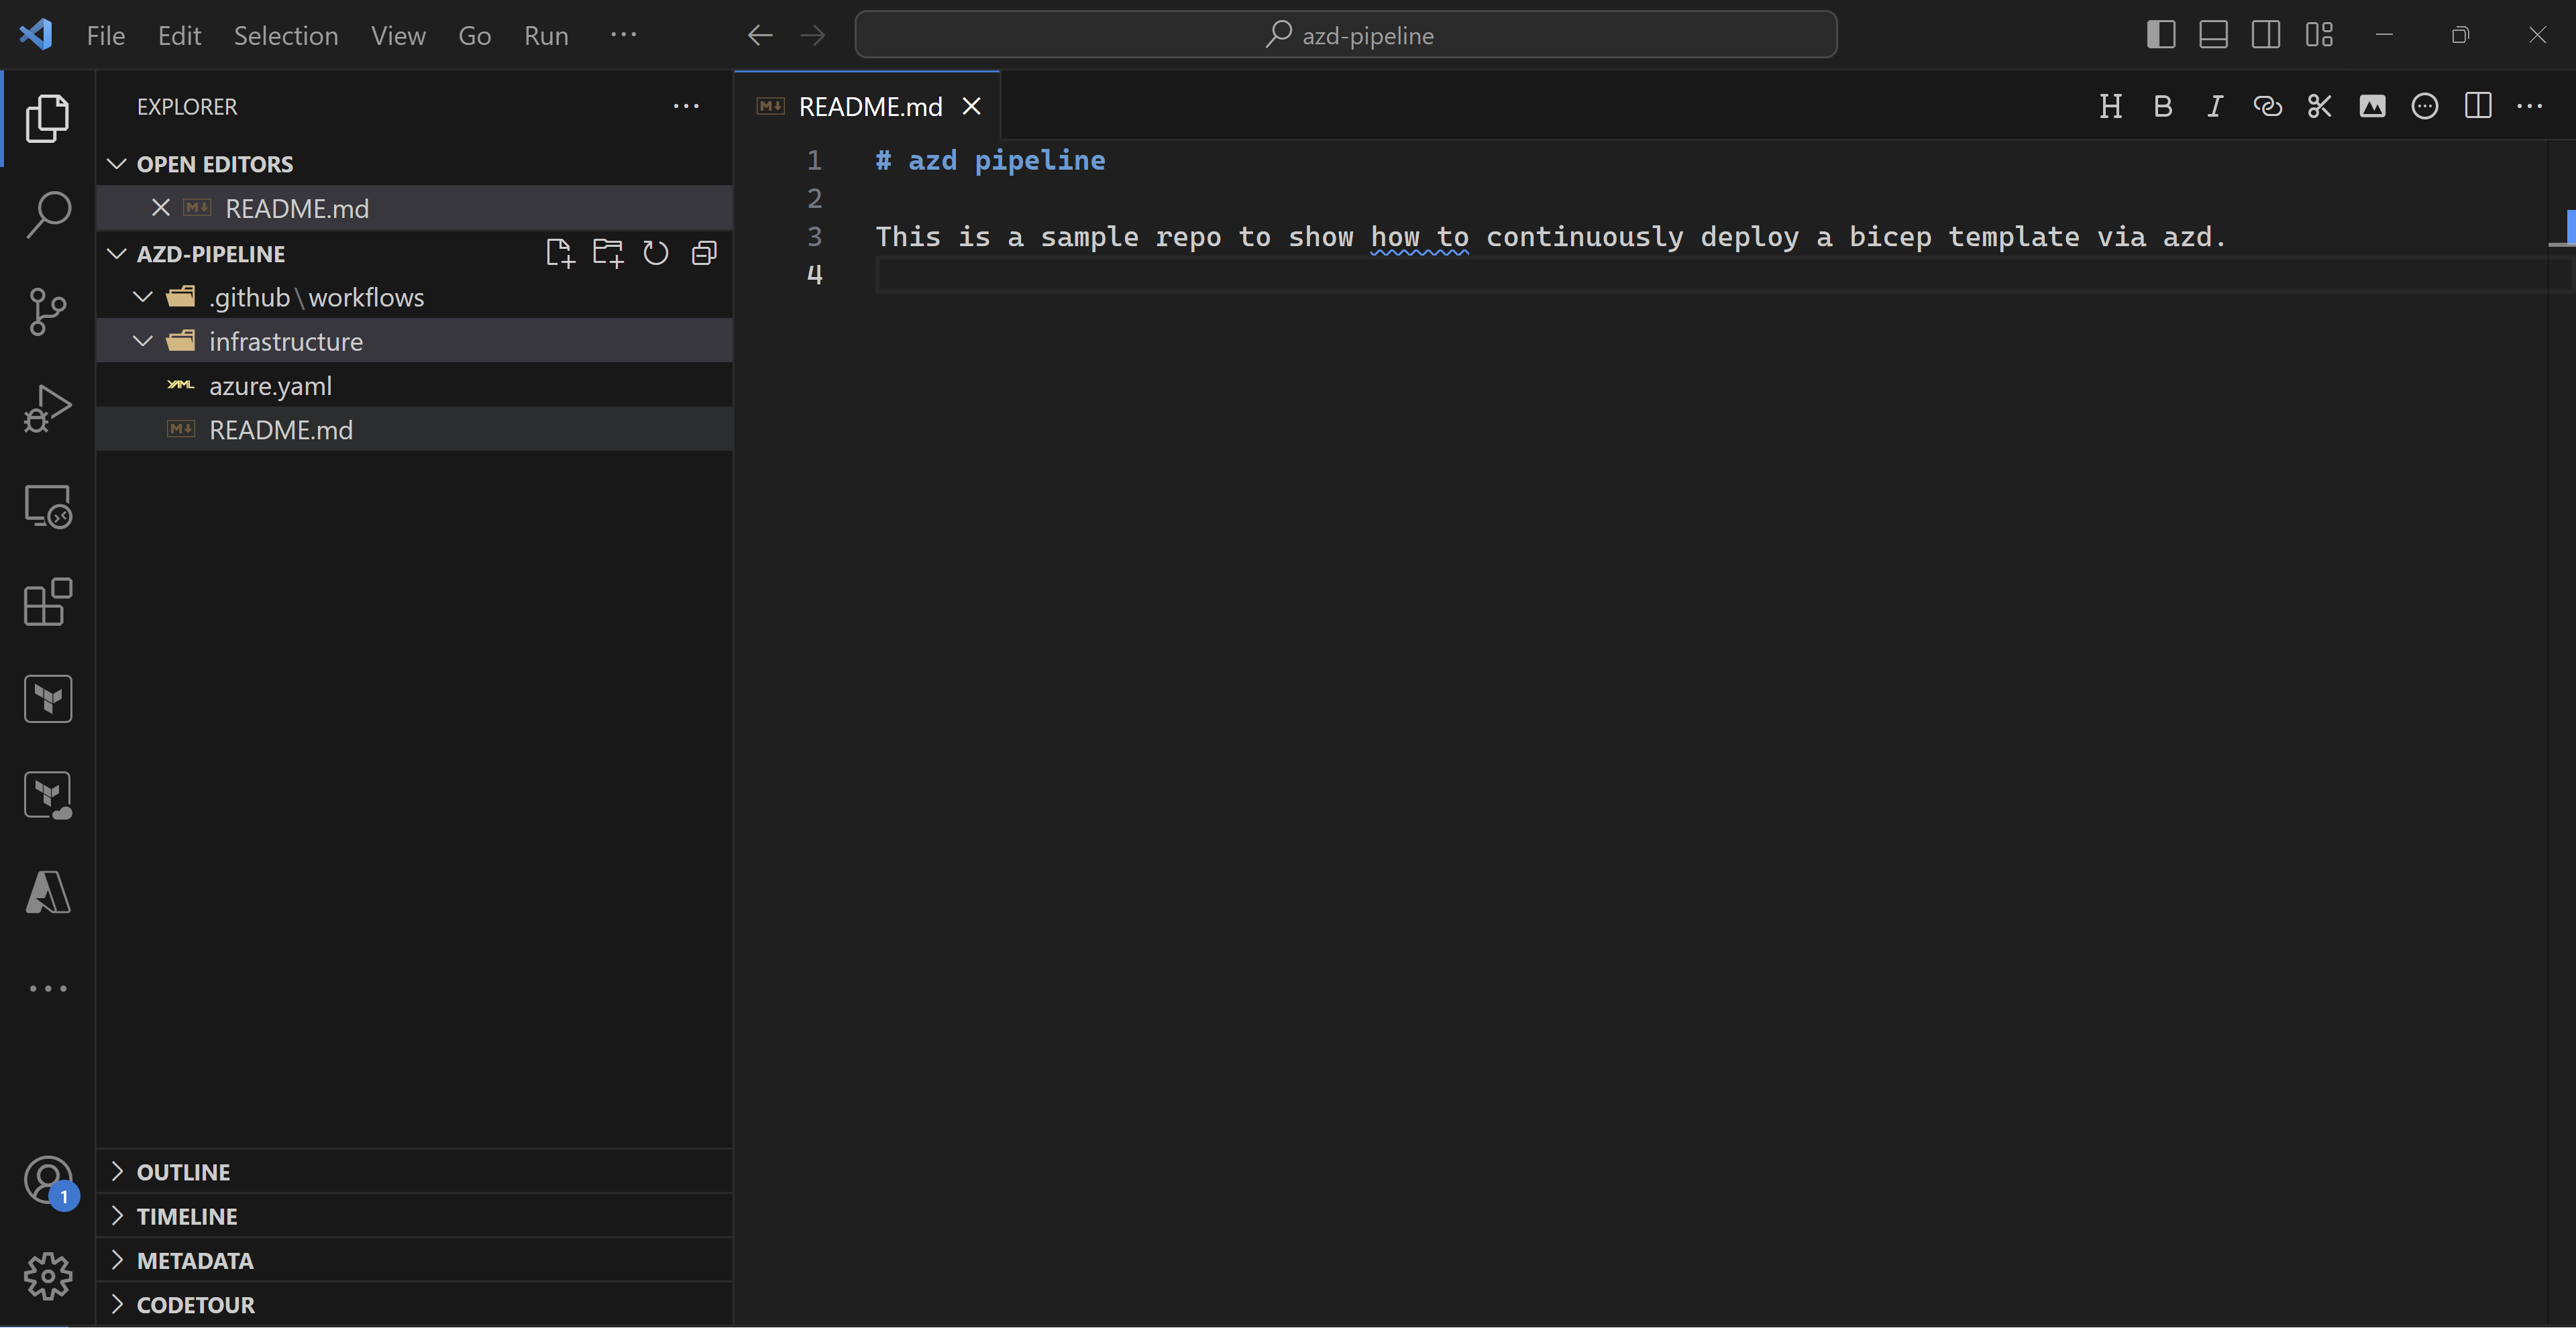
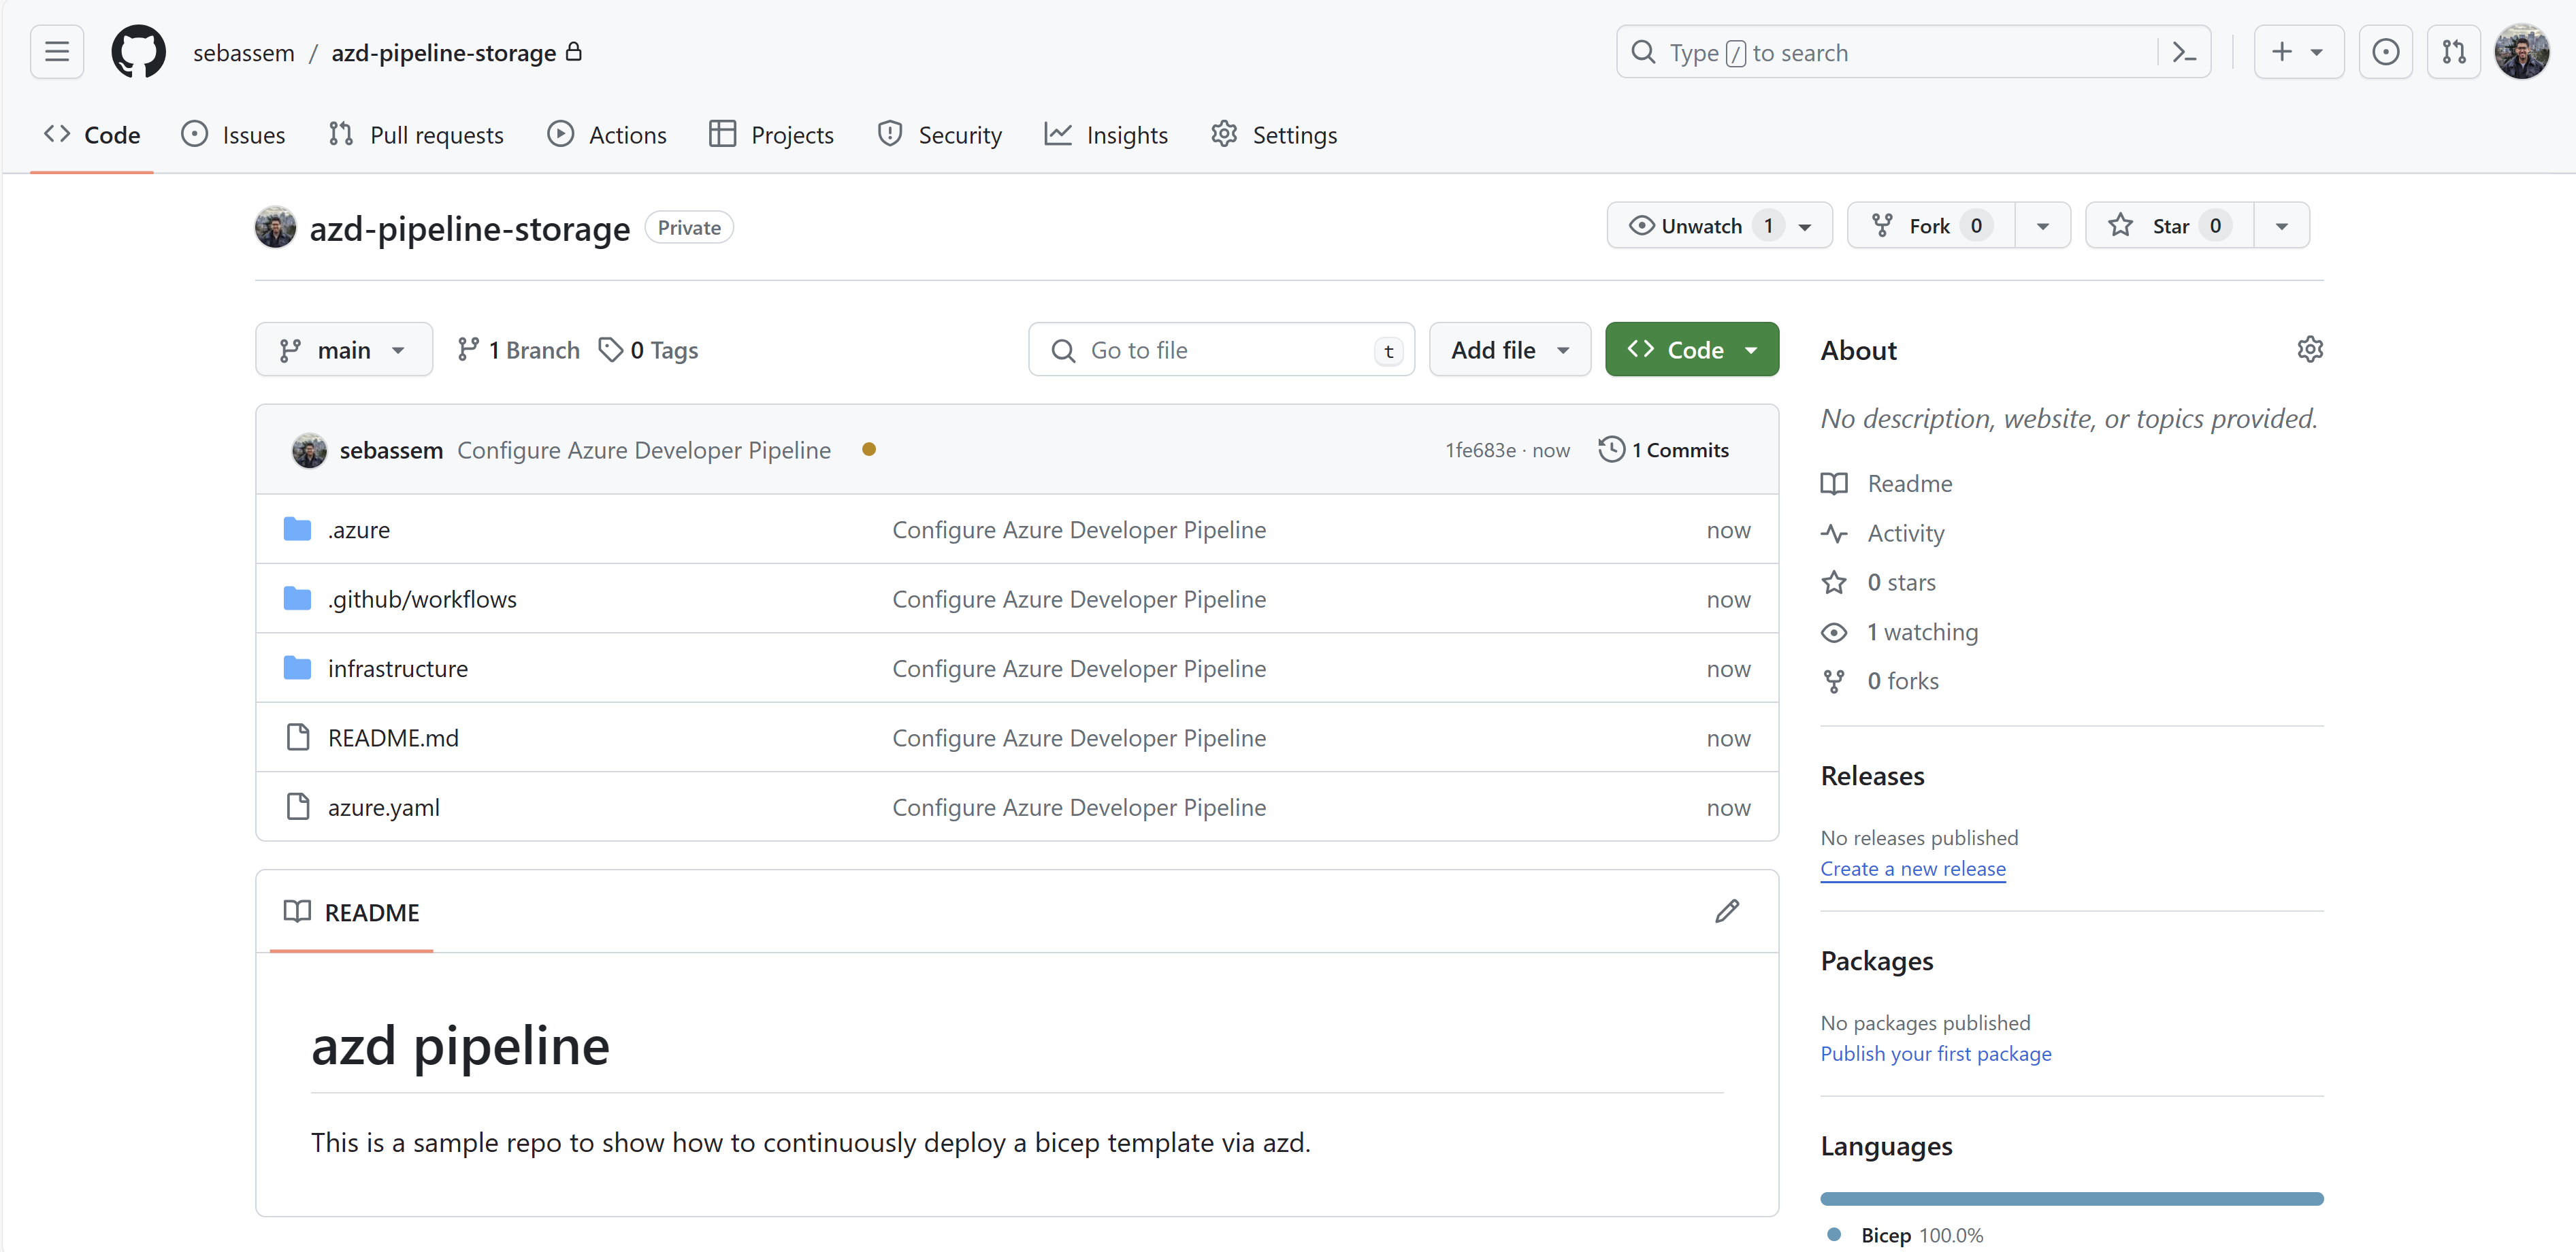
In this demonstration, I will simply deploy a storage account to Azure using bicep. I will first create the template folder structure for azd.
├── .devcontainer                                [ For DevContainer ]
├── .github                                      [ Configures a GitHub workflow ]
├── .vscode                                      [ VS Code workspace configurations ]
├── .azure                                       [ Stores Azure configurations and environment variables ]
├── infrastructure                               [ Contains infrastructure as code files ]
│   ├── main.bicep                               [ Main infrastructure file ]
│   ├── main.parameters.json                     [ Parameters file ]
└── azure.yaml                                   [ Describes the app and type of Azure resources]
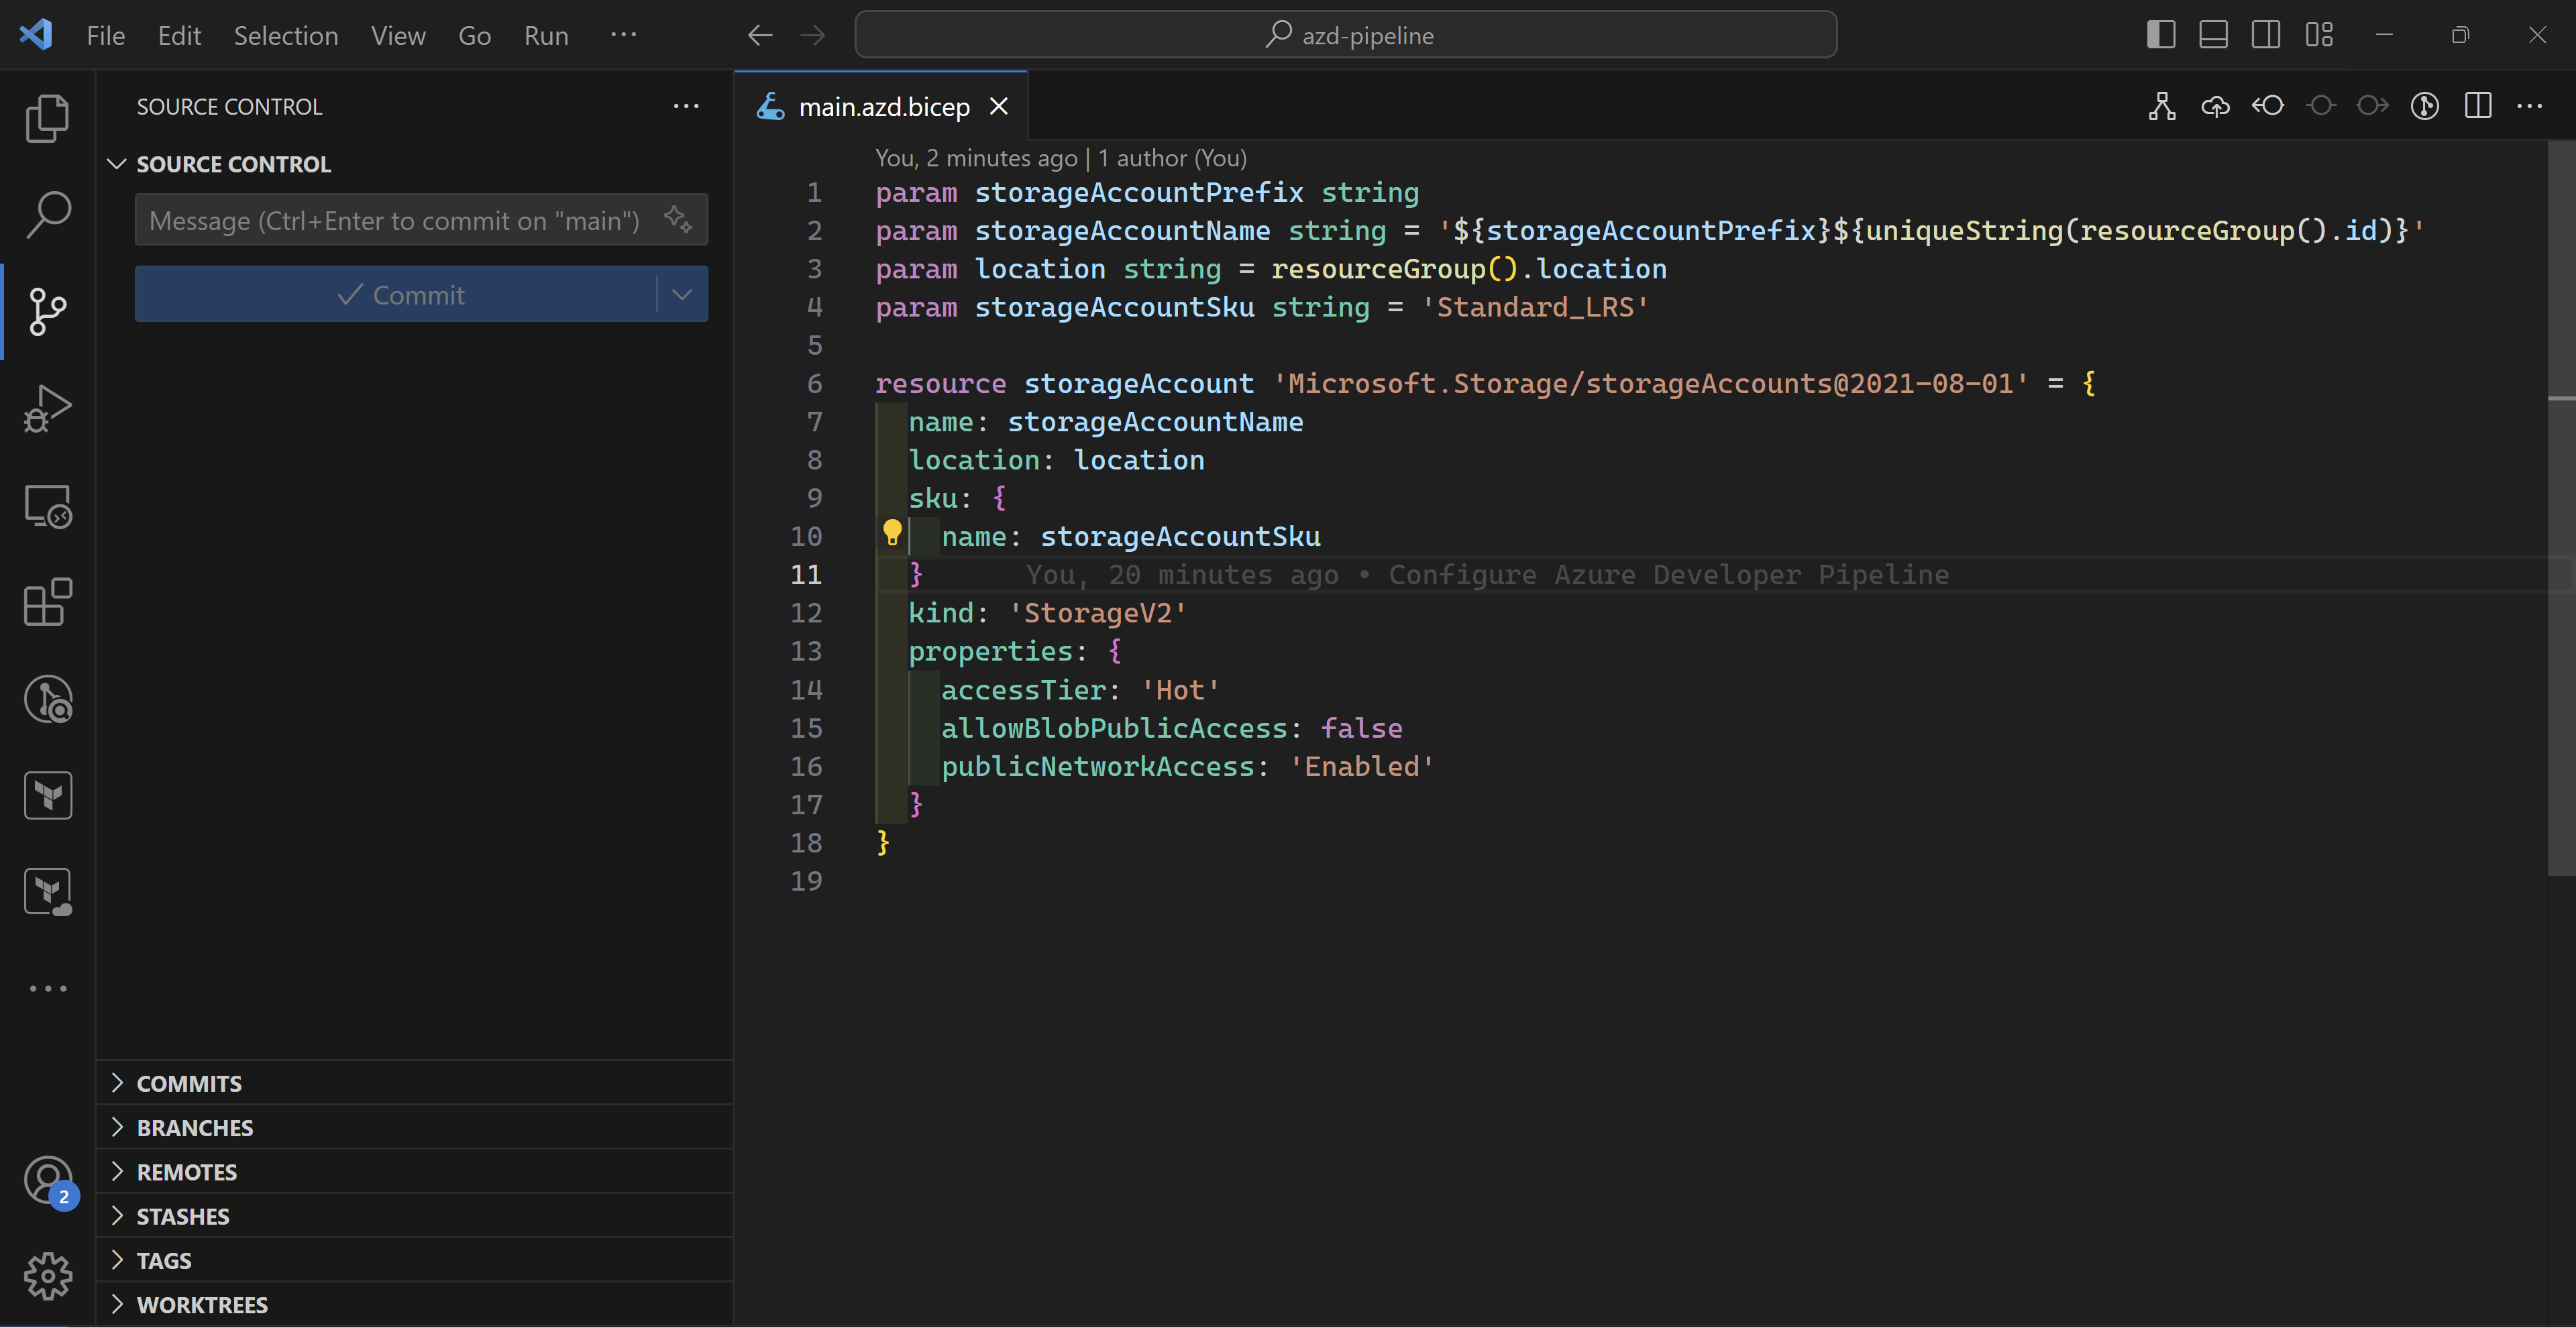
I will add a very simple storage account bicep deployment to represent the Azure infrastructure.
Then, I will download the sample GitHub action available in any azd template and add it to my “.github/workflows” folder.
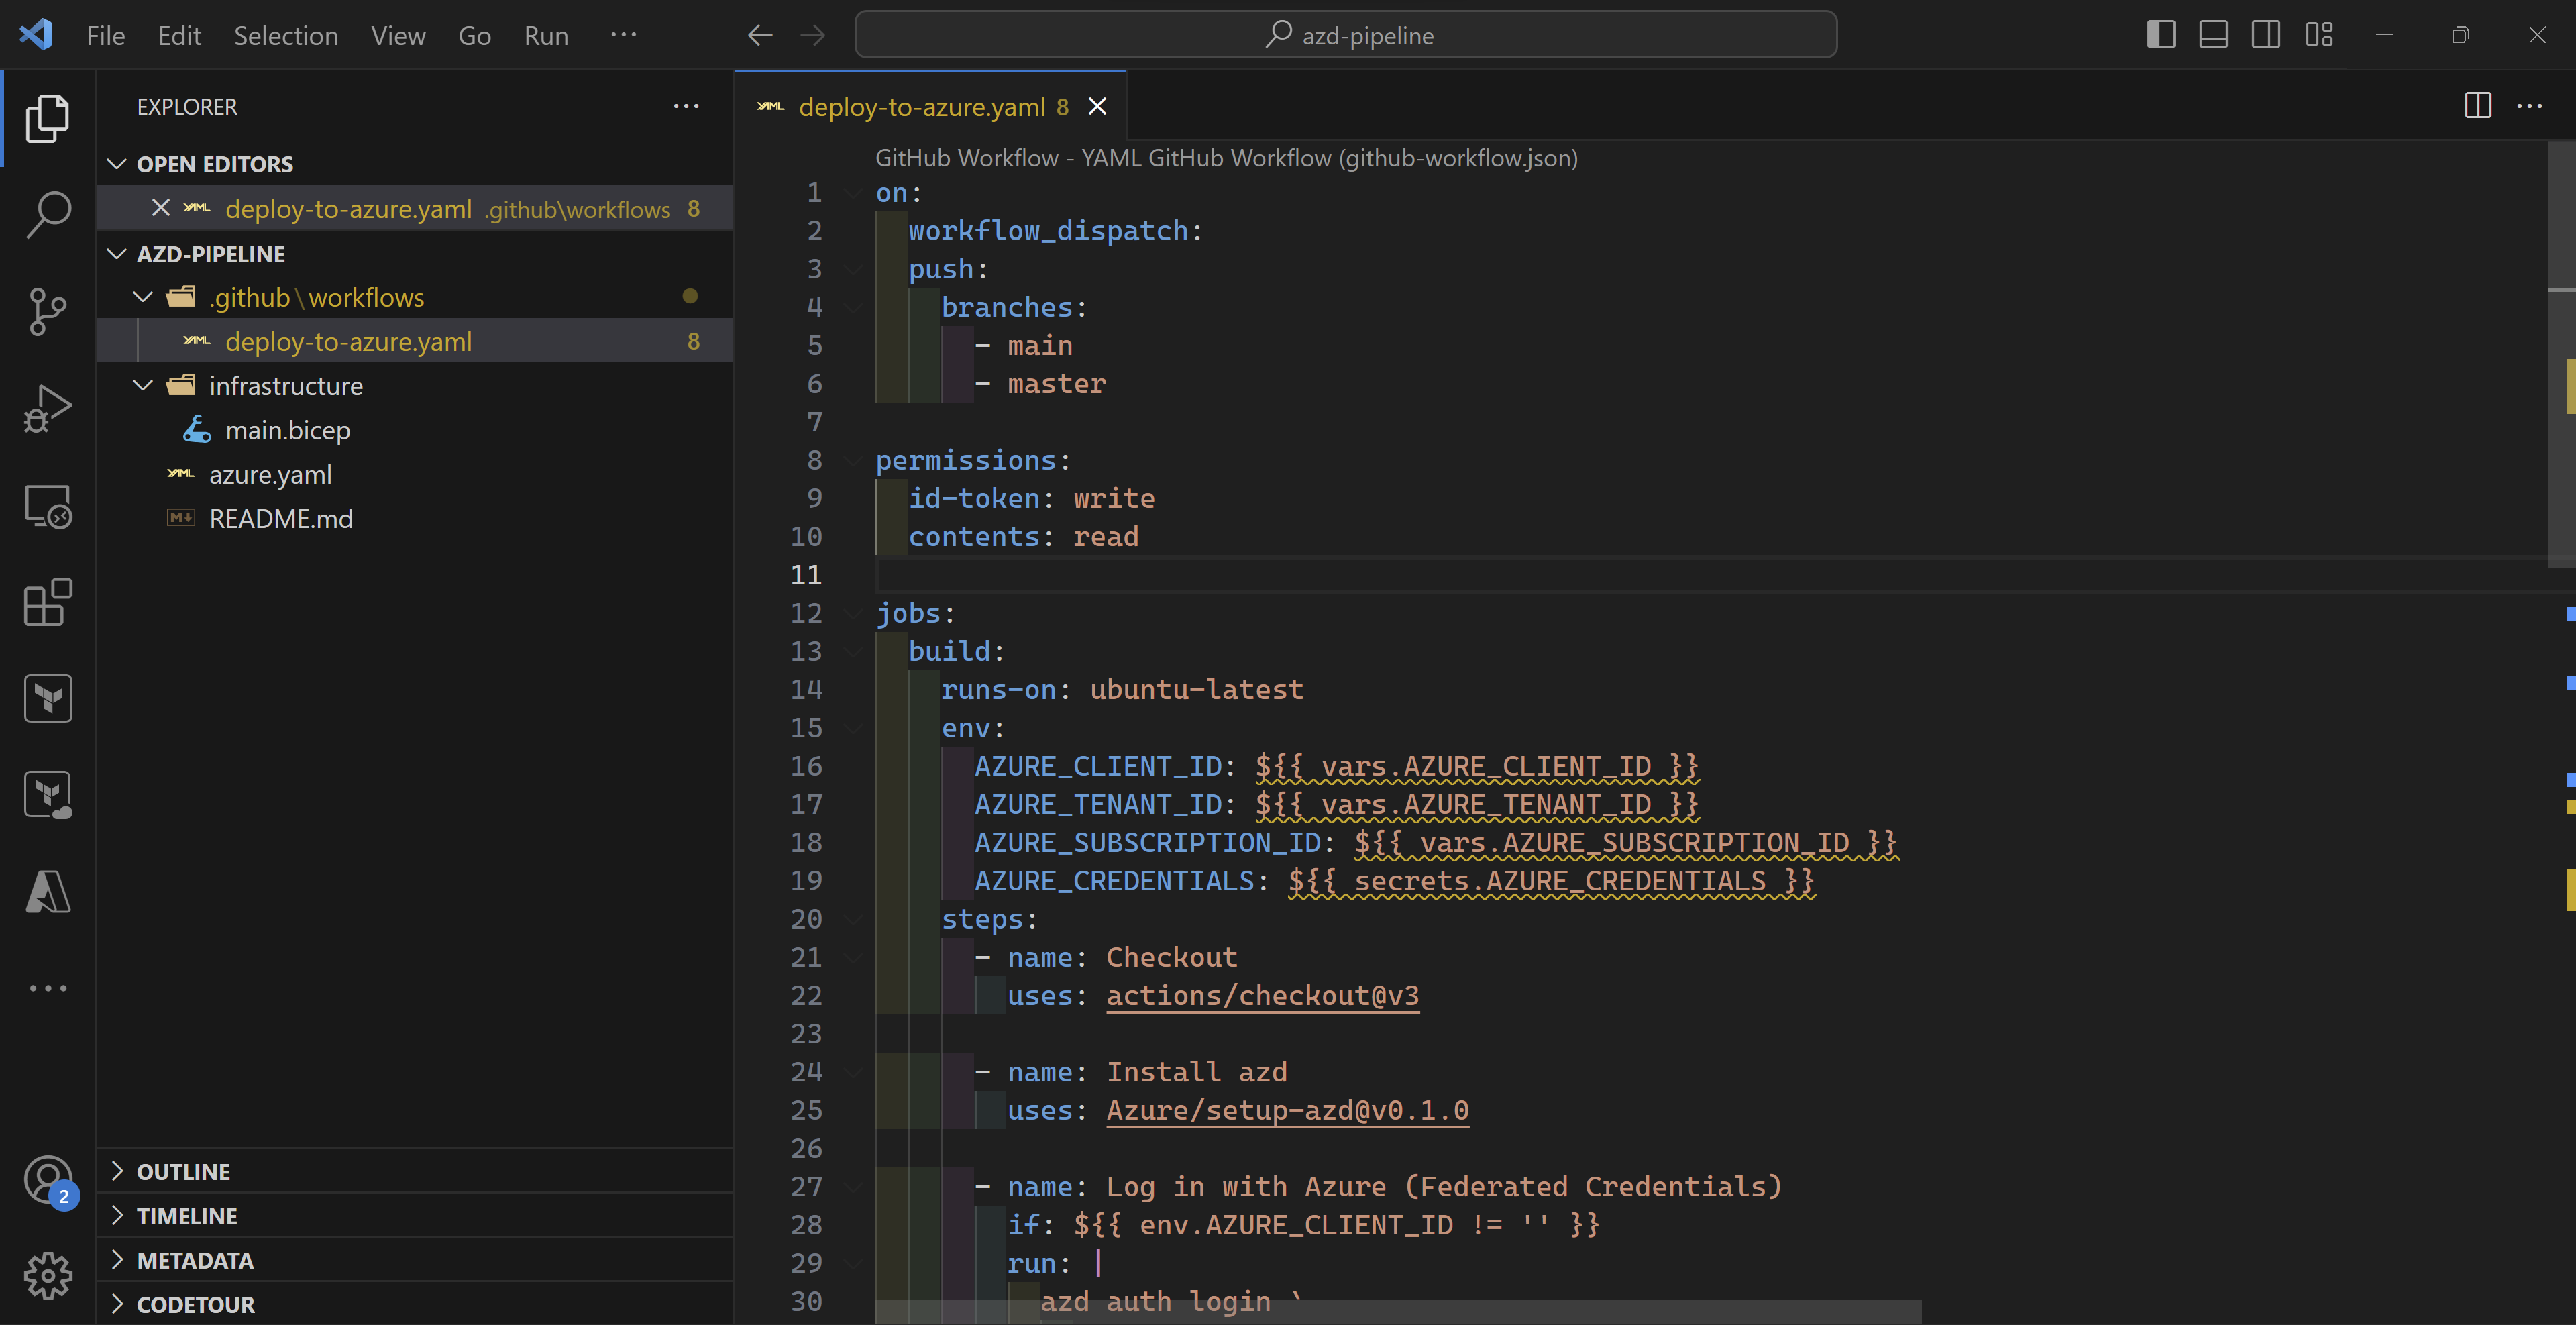
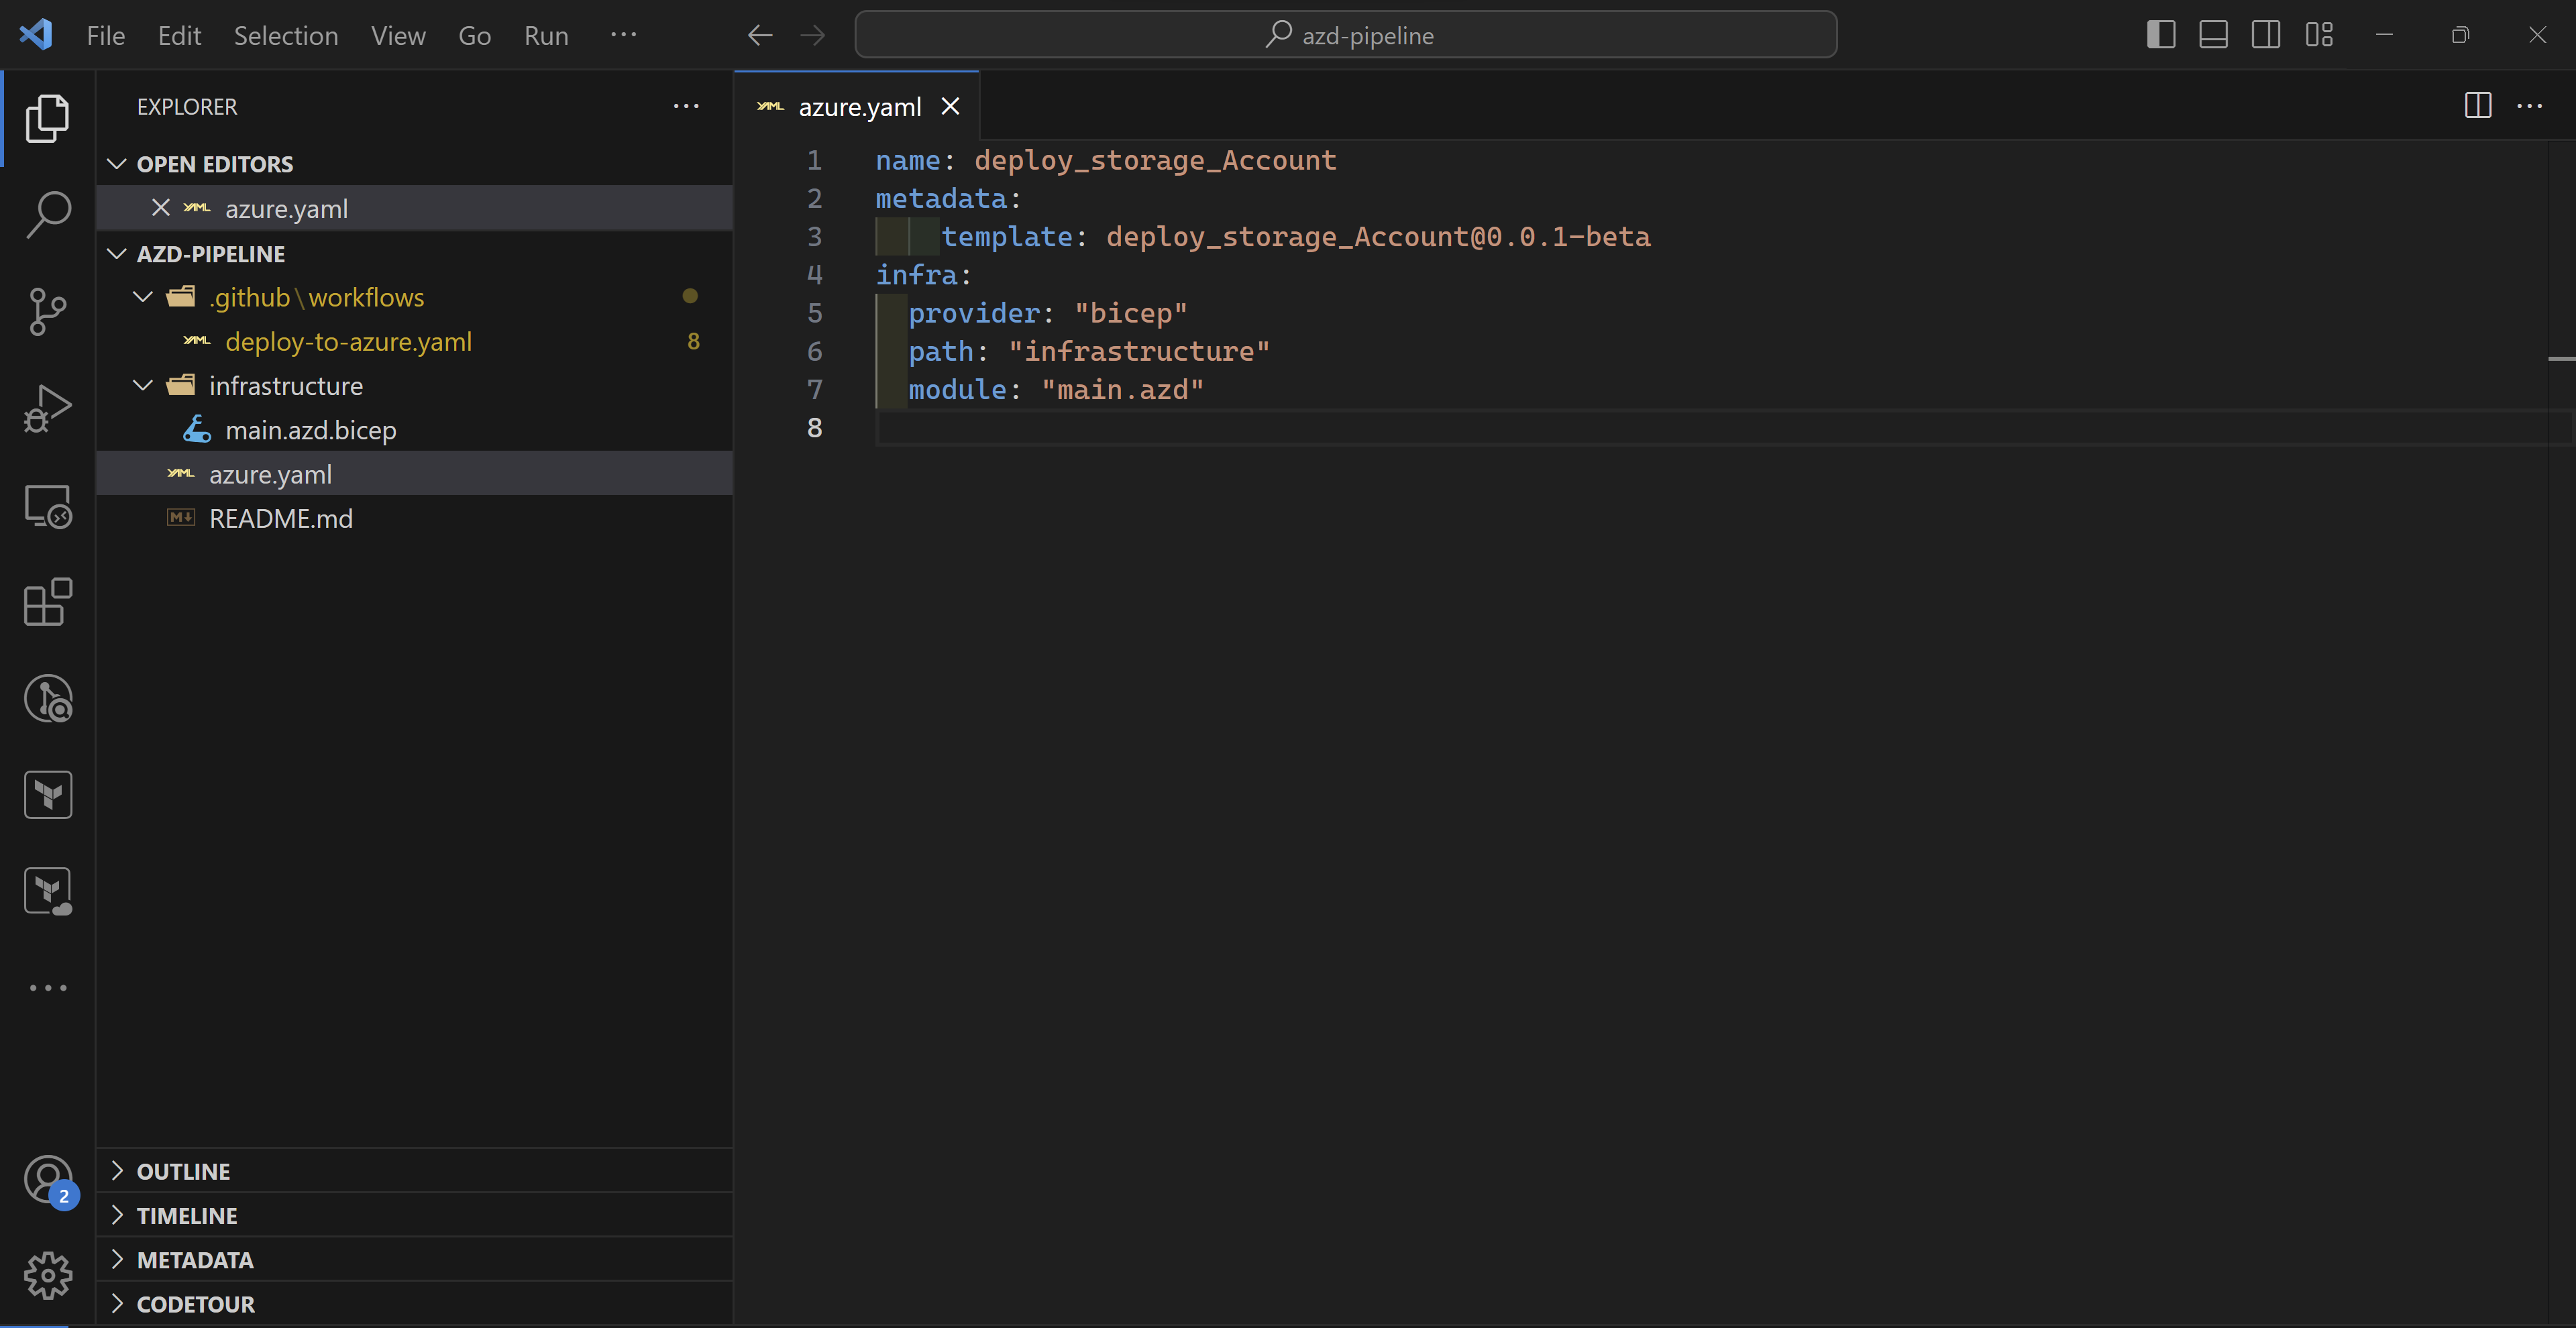
And finally, my azure.yaml file which azd needs to understand my Azure infrastructure and application (if any). As you can see, I only specify where my bicep code is located which is in the infrastructure folder.
NOTE: The bicep folder needs to contain also a parameters file for azd to be able to deploy the infrastructure.
Deployment
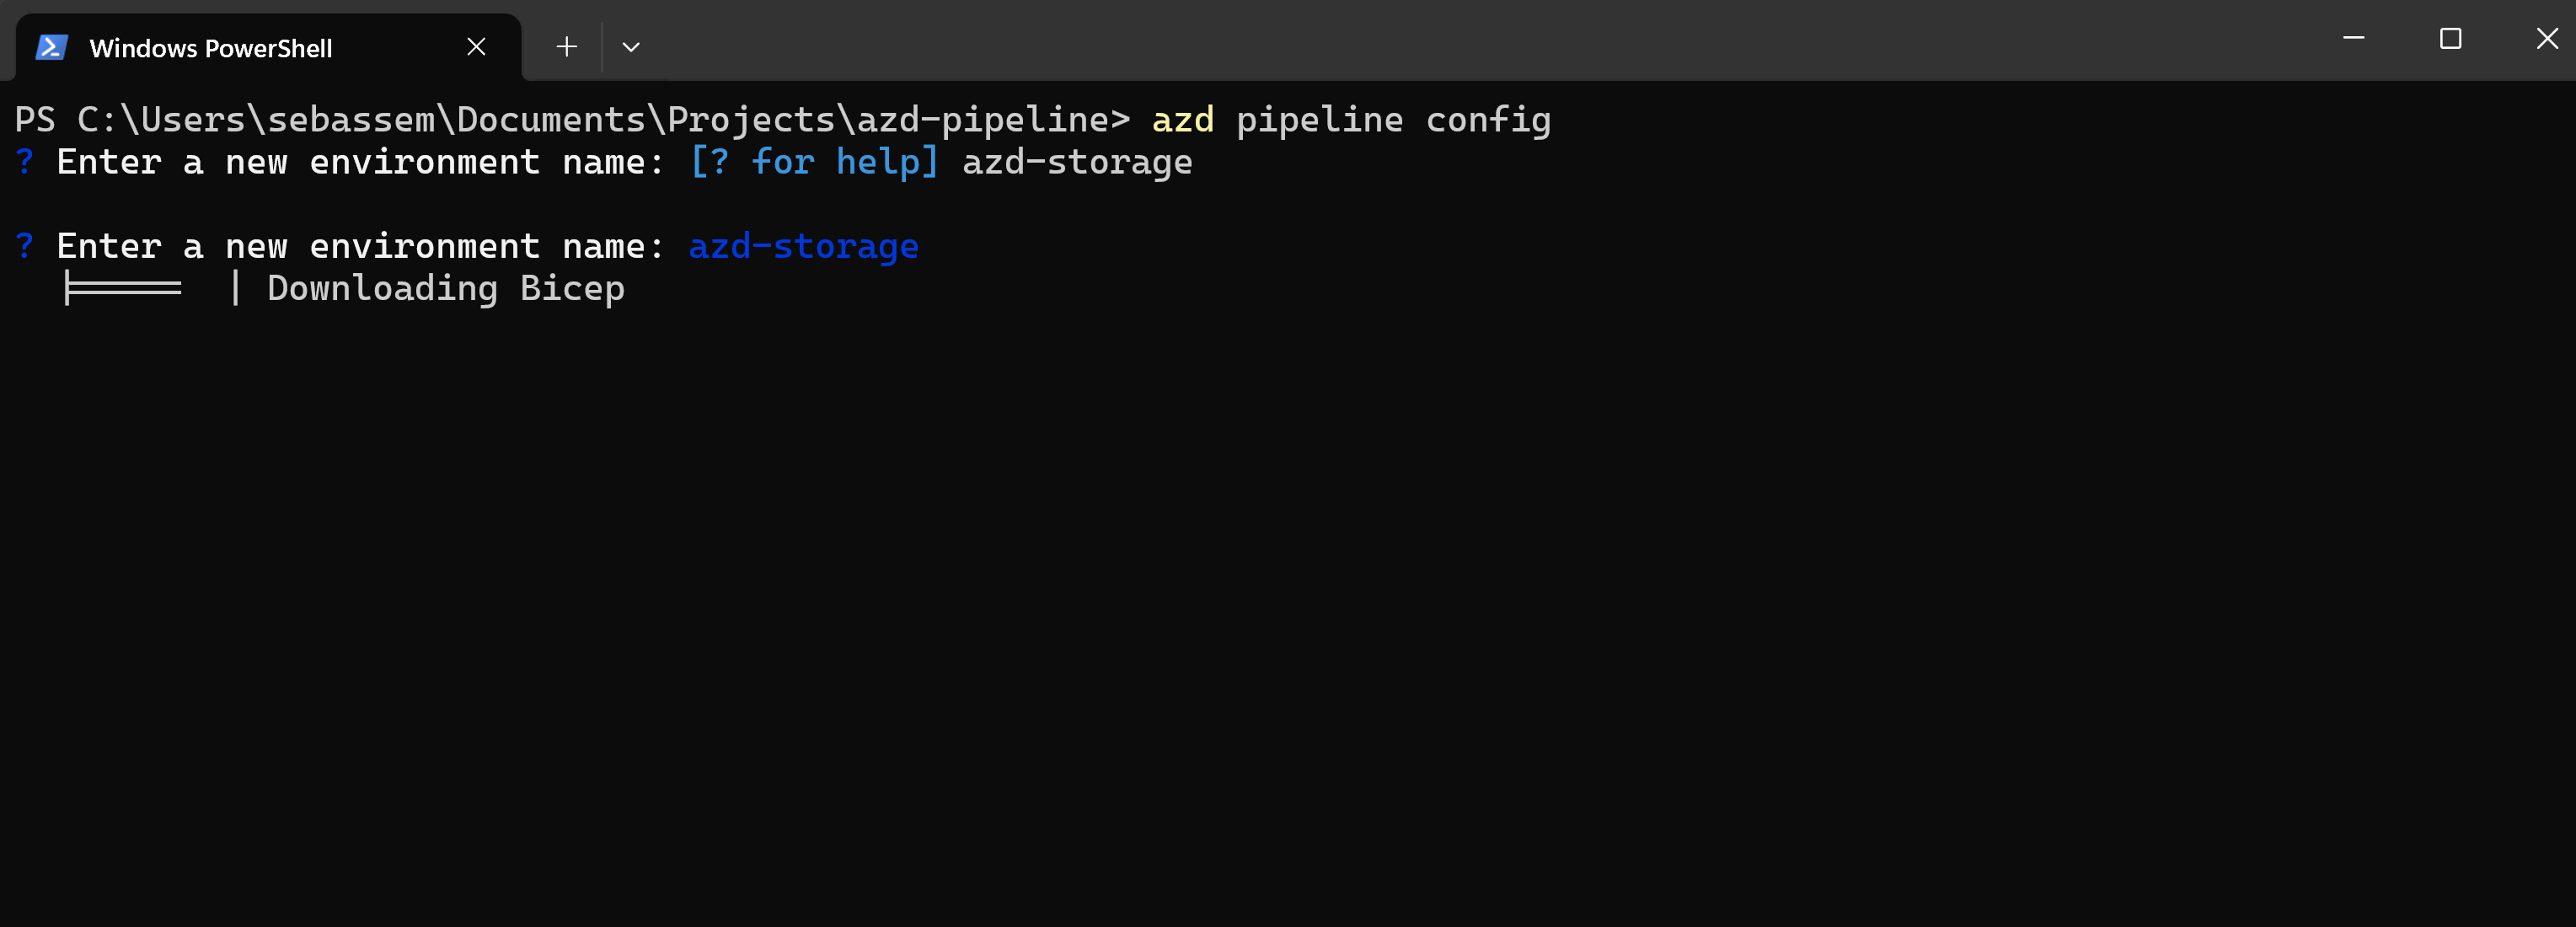
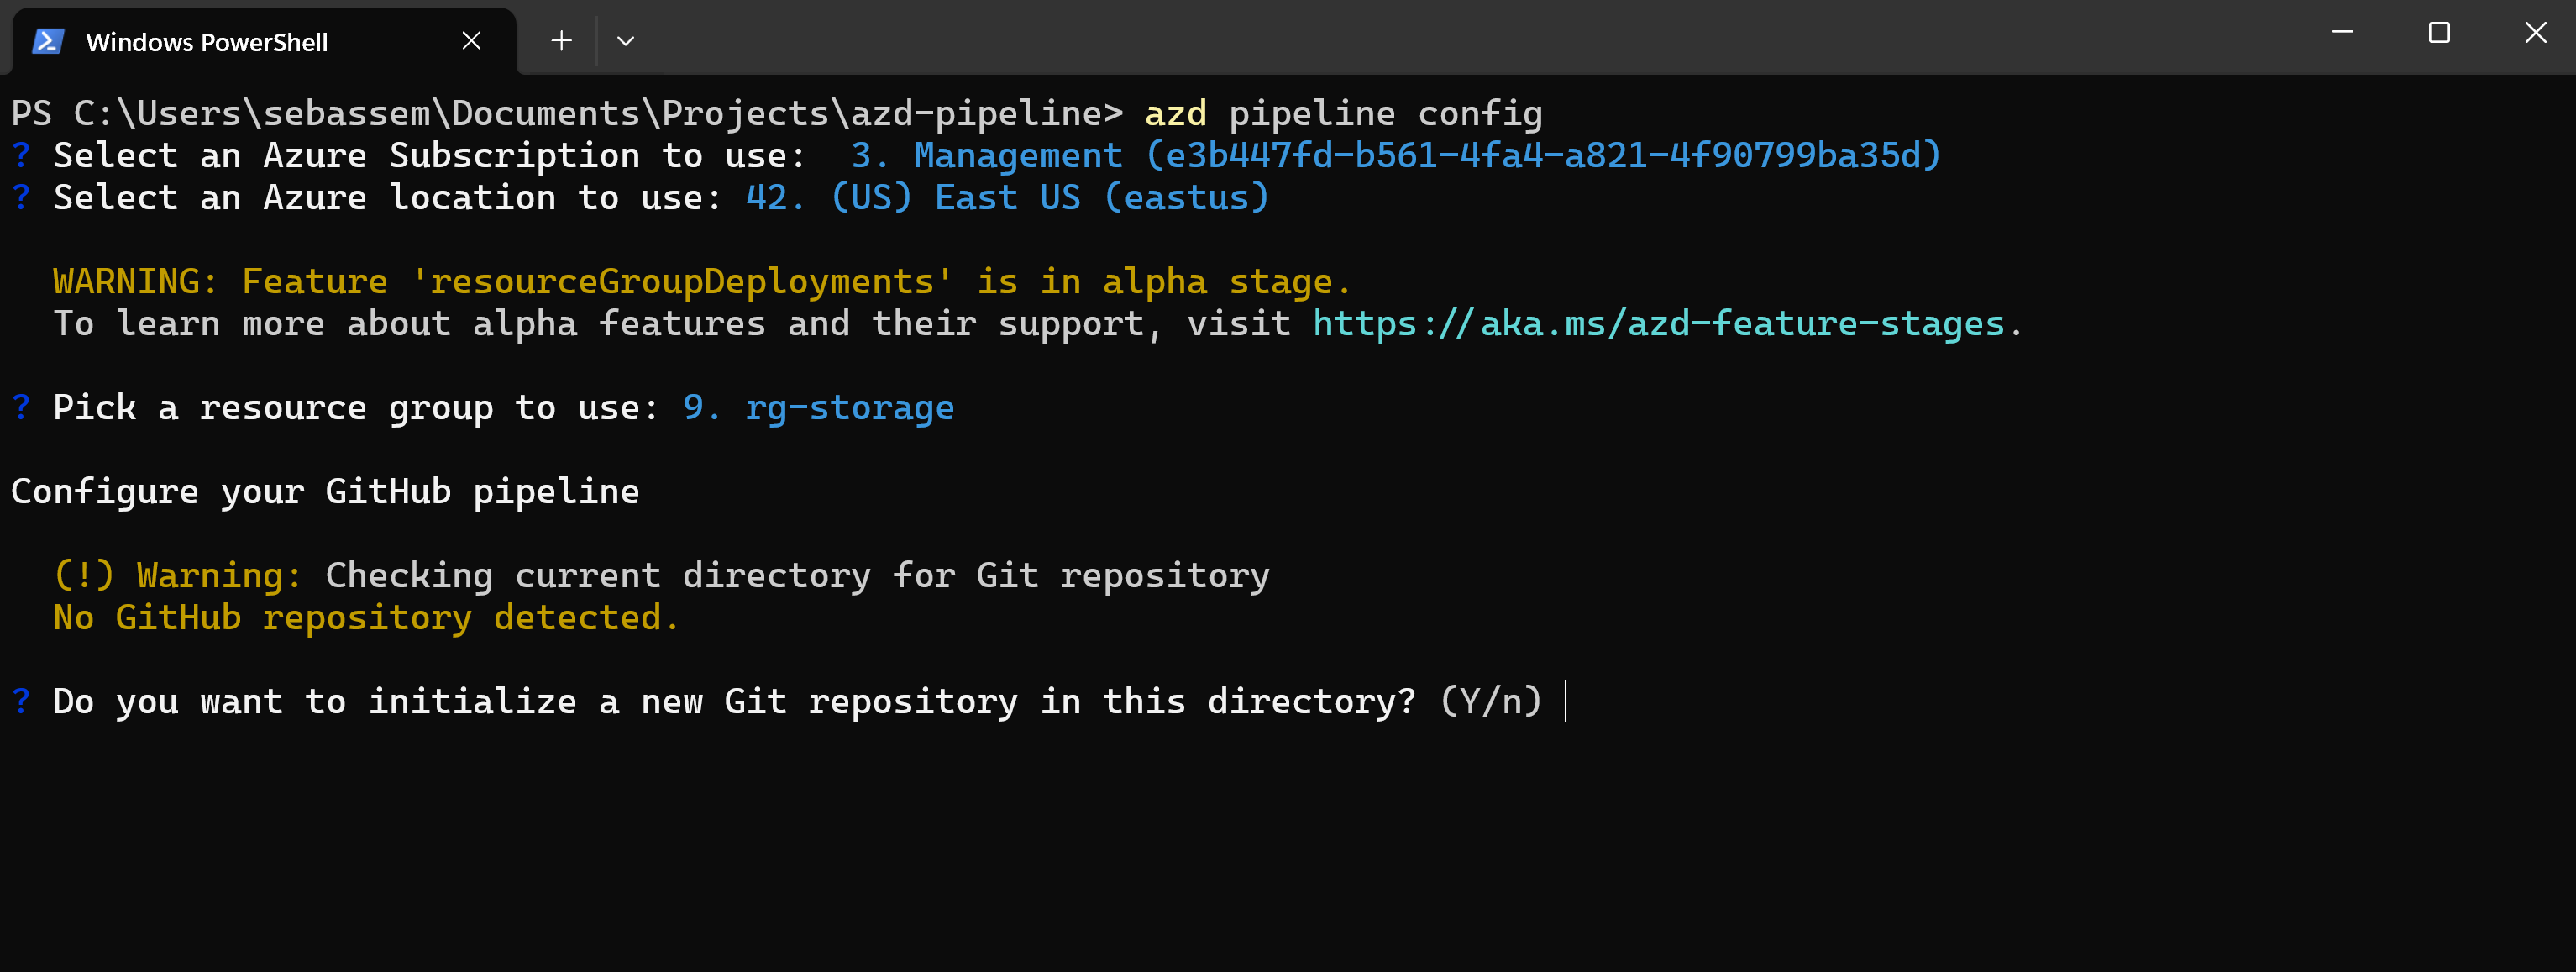
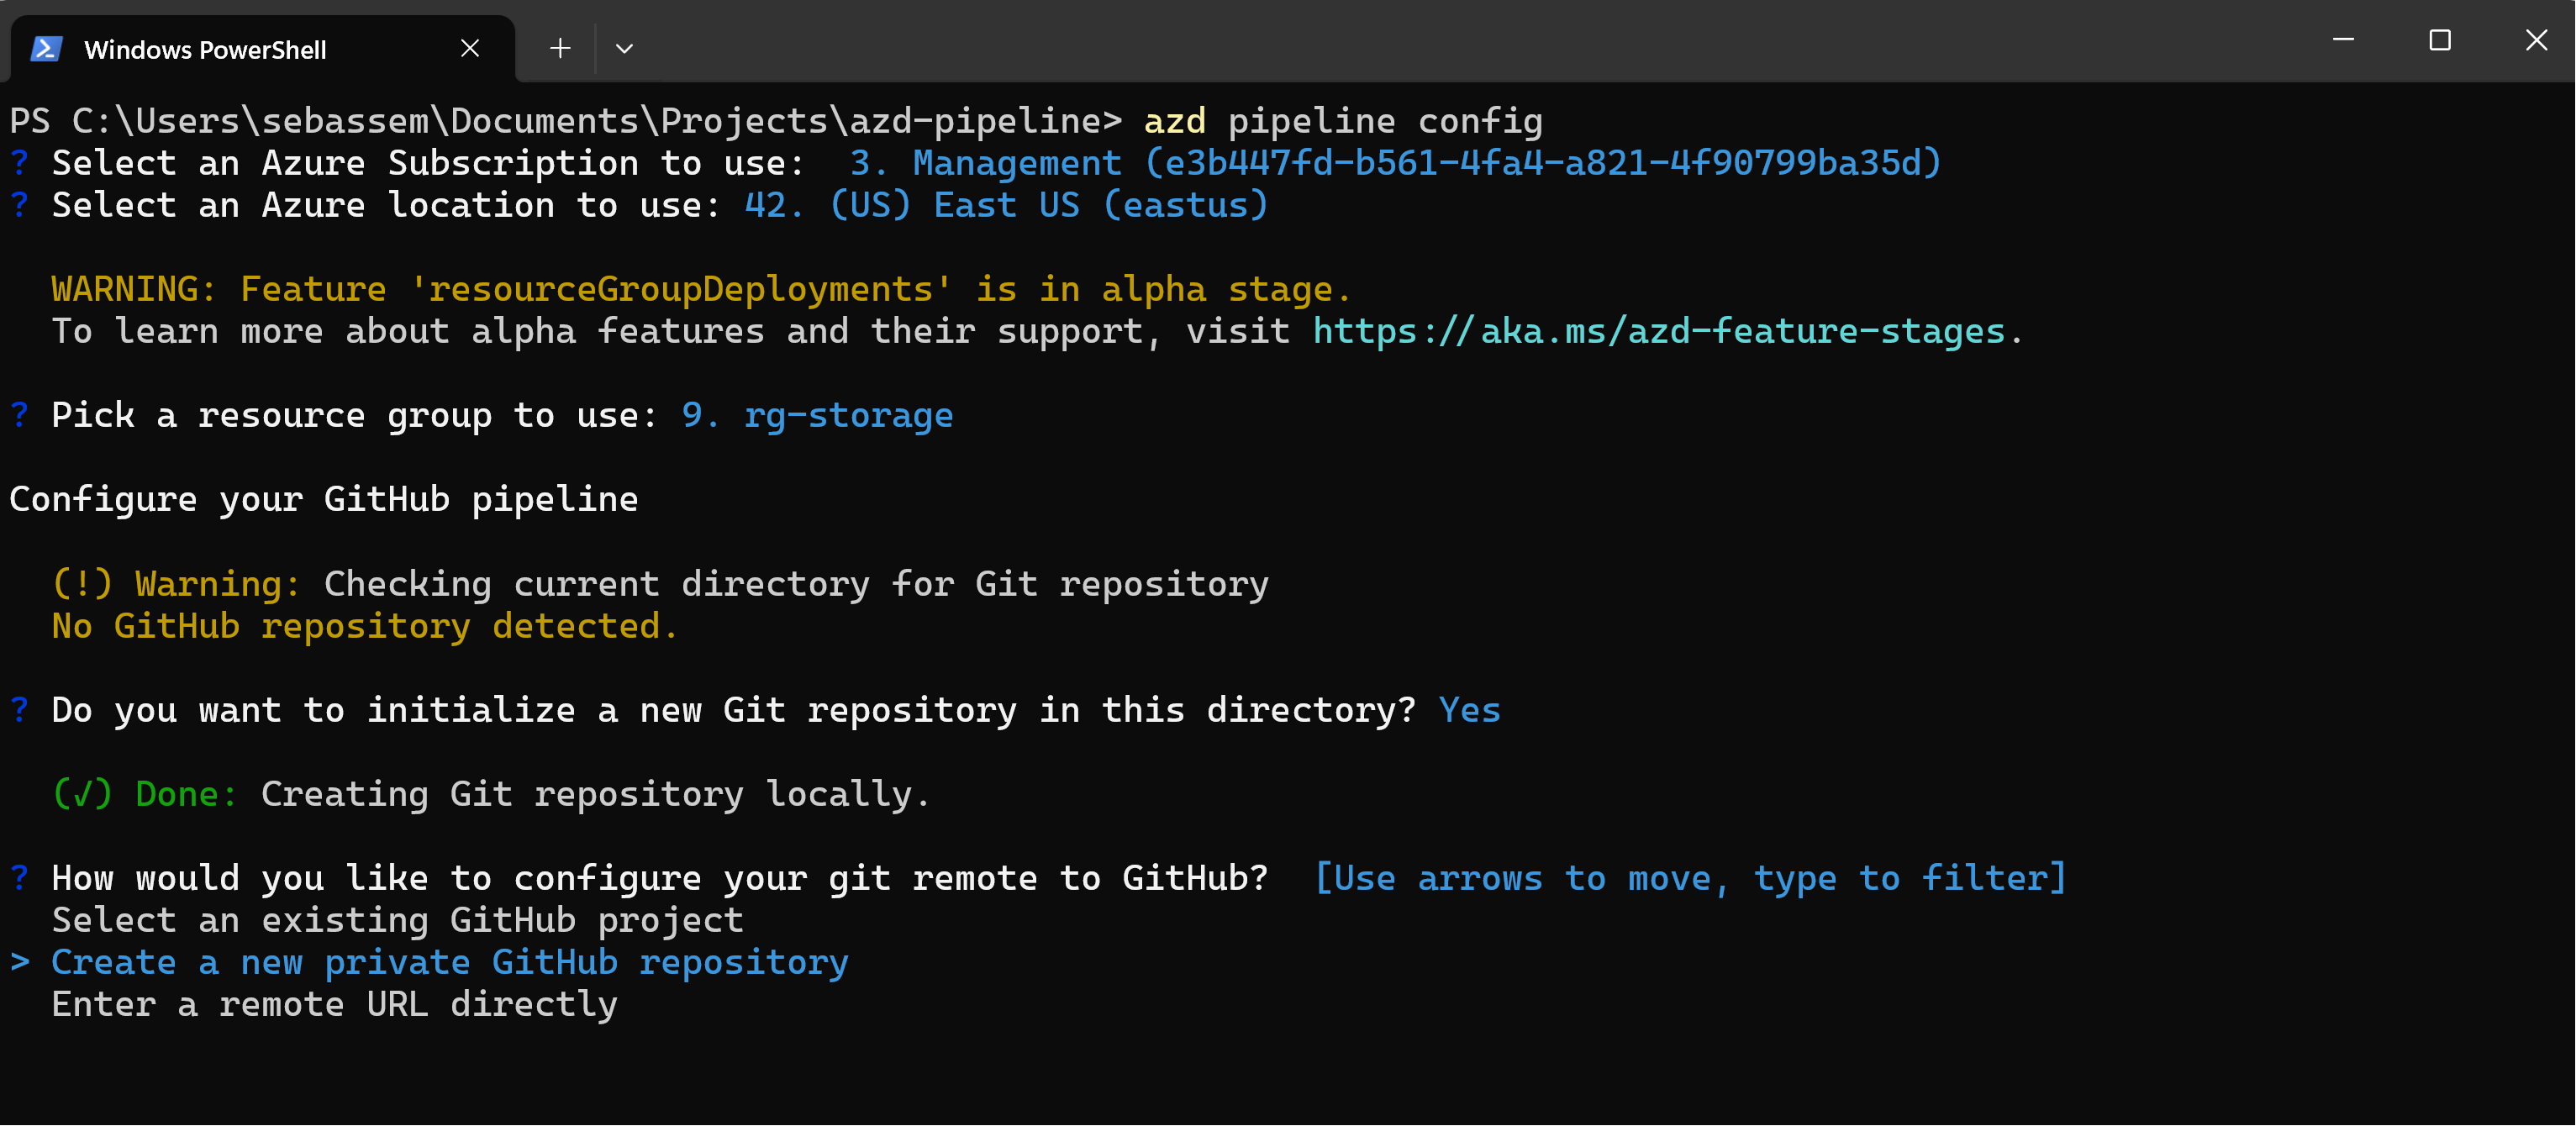
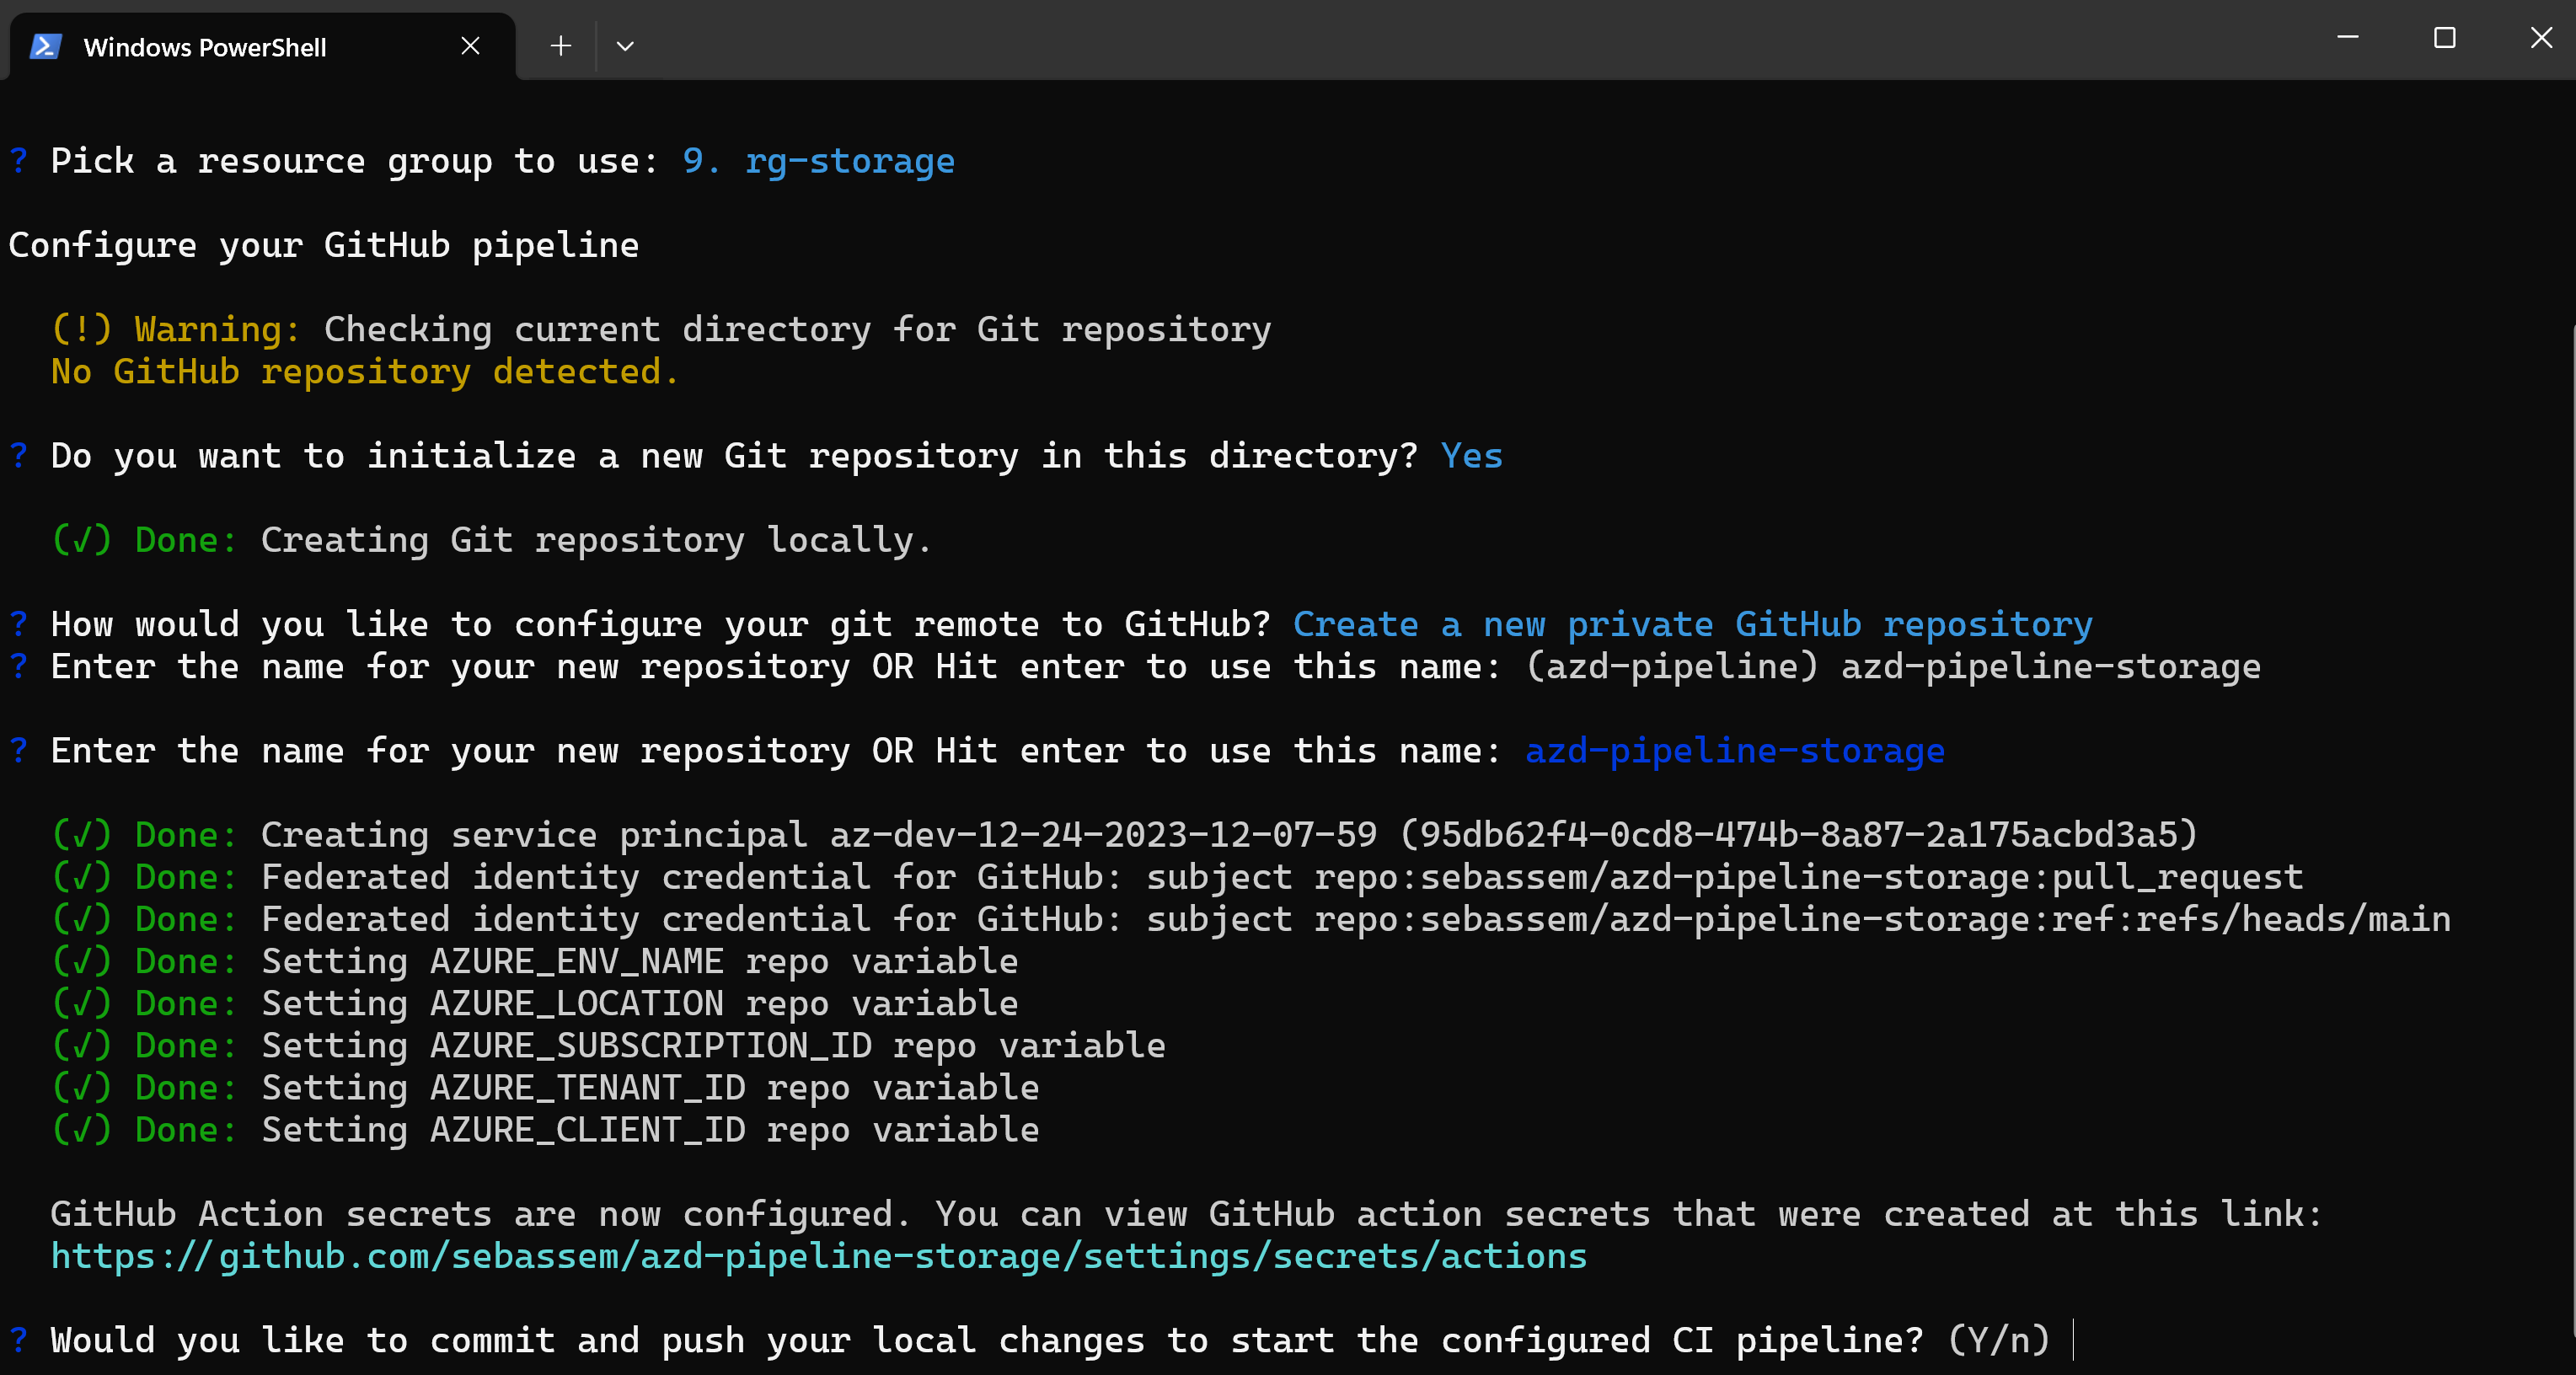
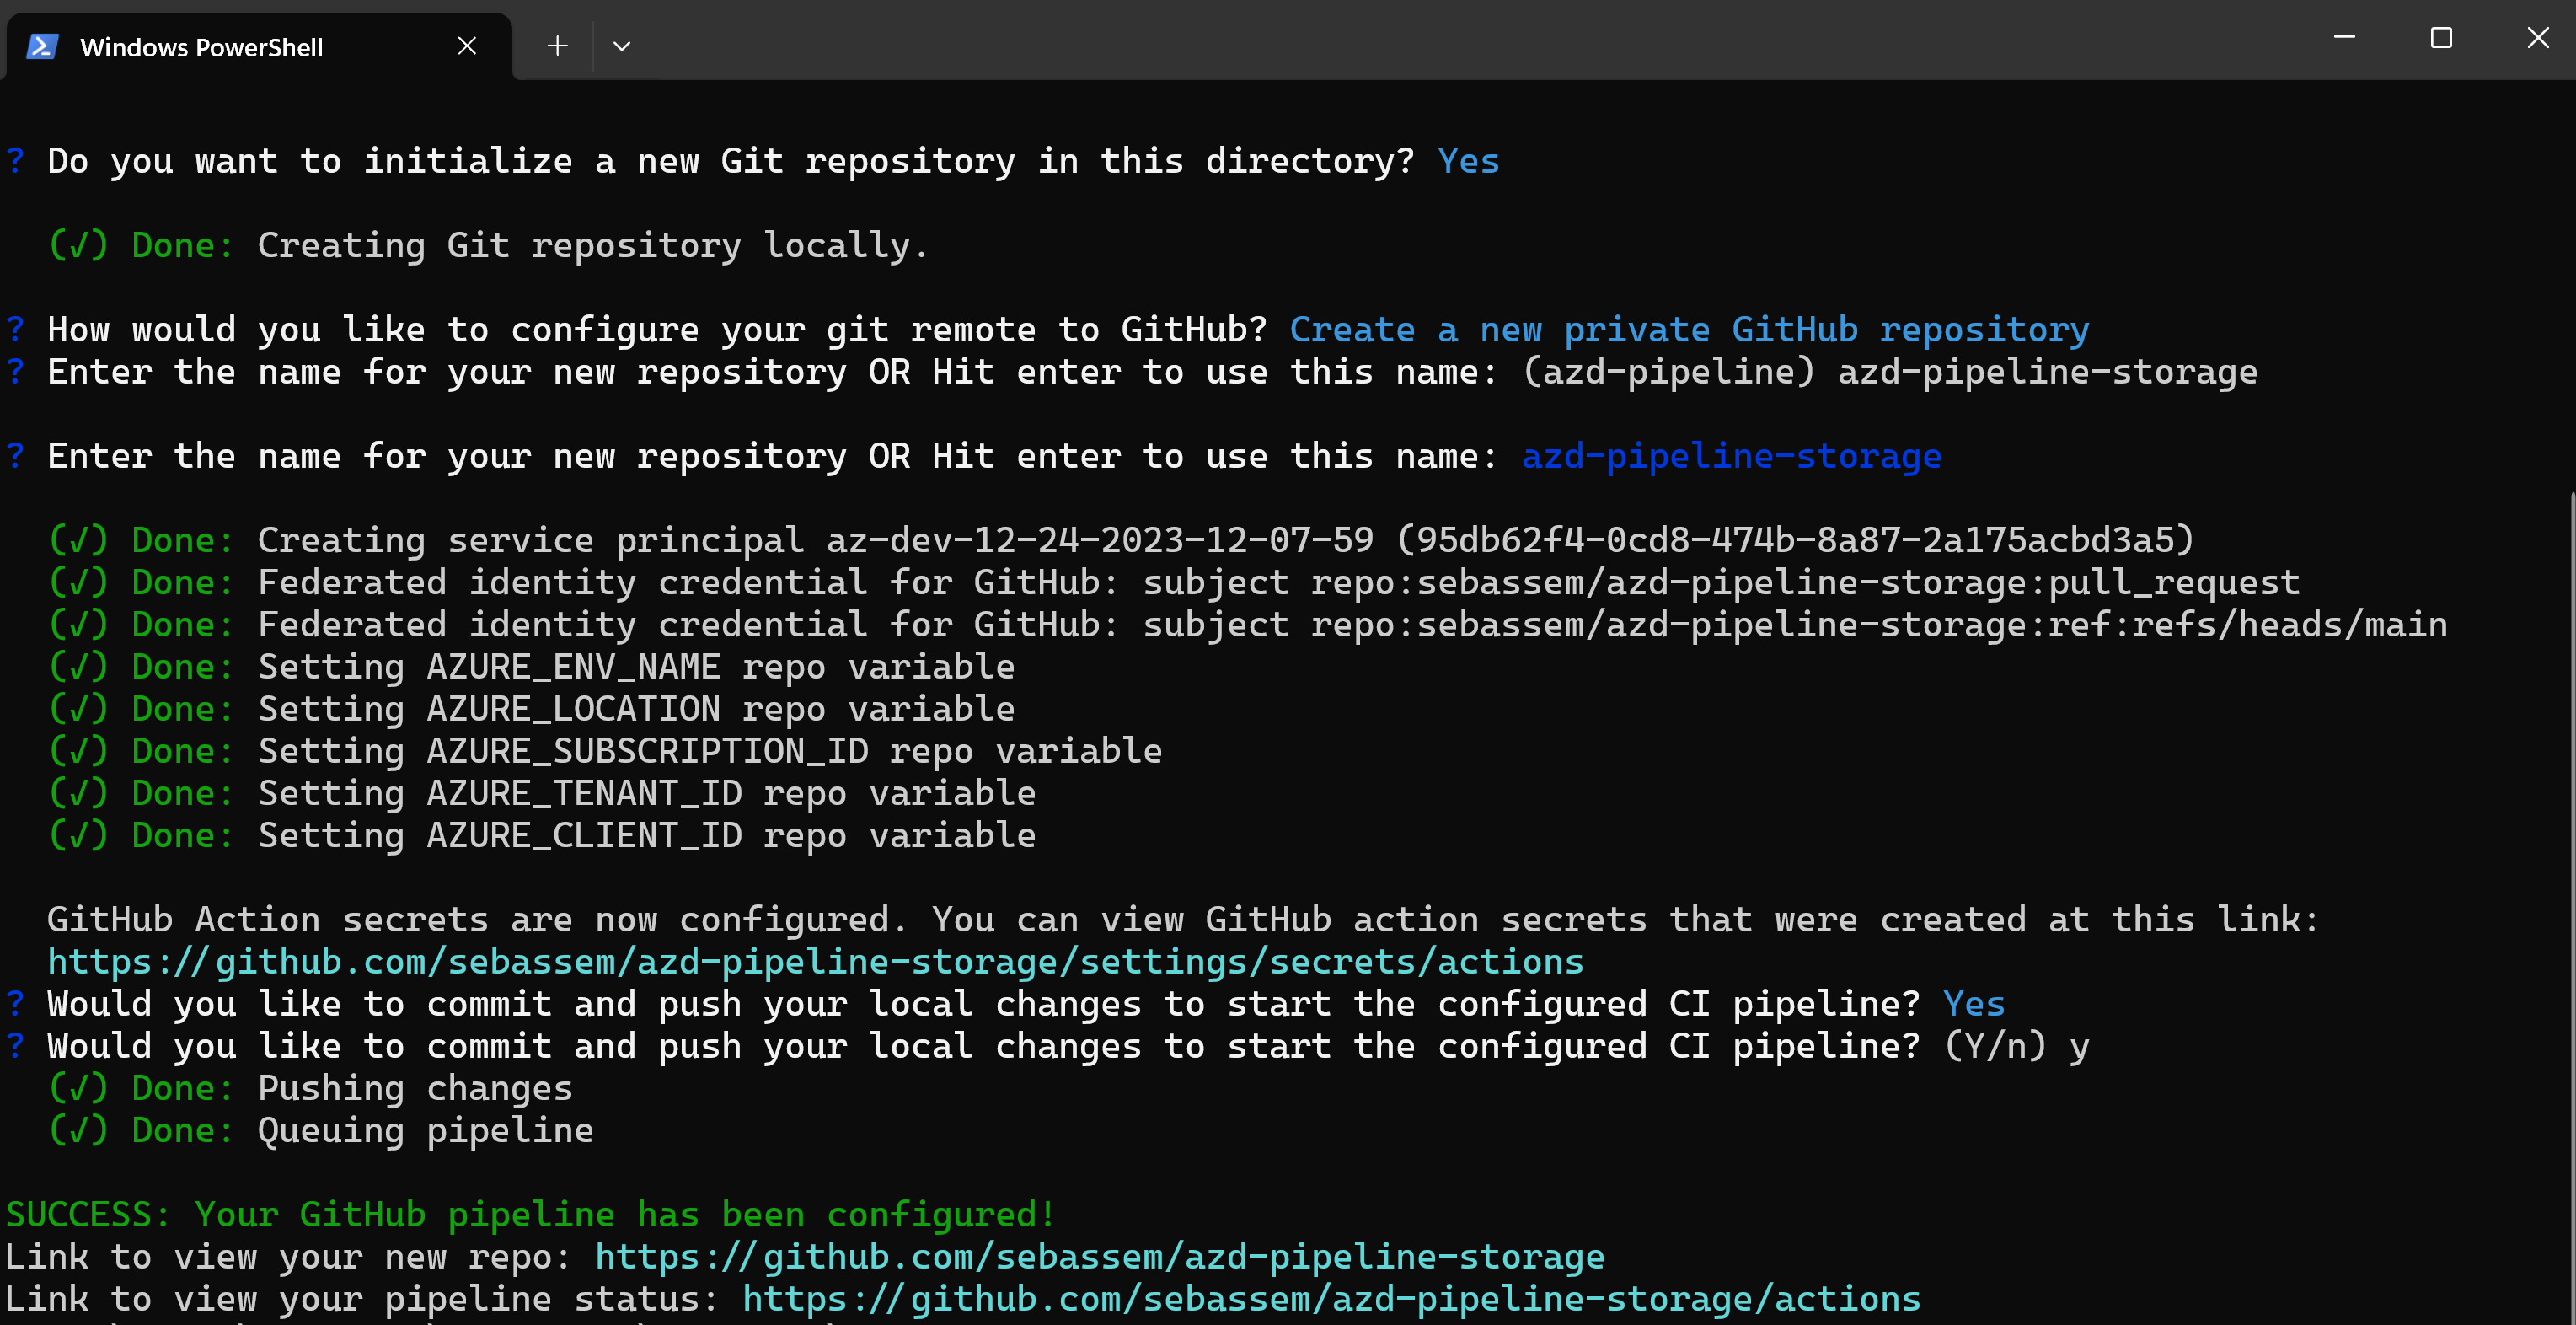
Once everything is in place in my directory. I will only need to run azd pipeline config to do the following:
- Initialize my current directory as a git repository.
- Create or use an existing GitHub remote repository.
- Create an Azure service principal and configure GitHub authentication to be able to deploy to Azure.
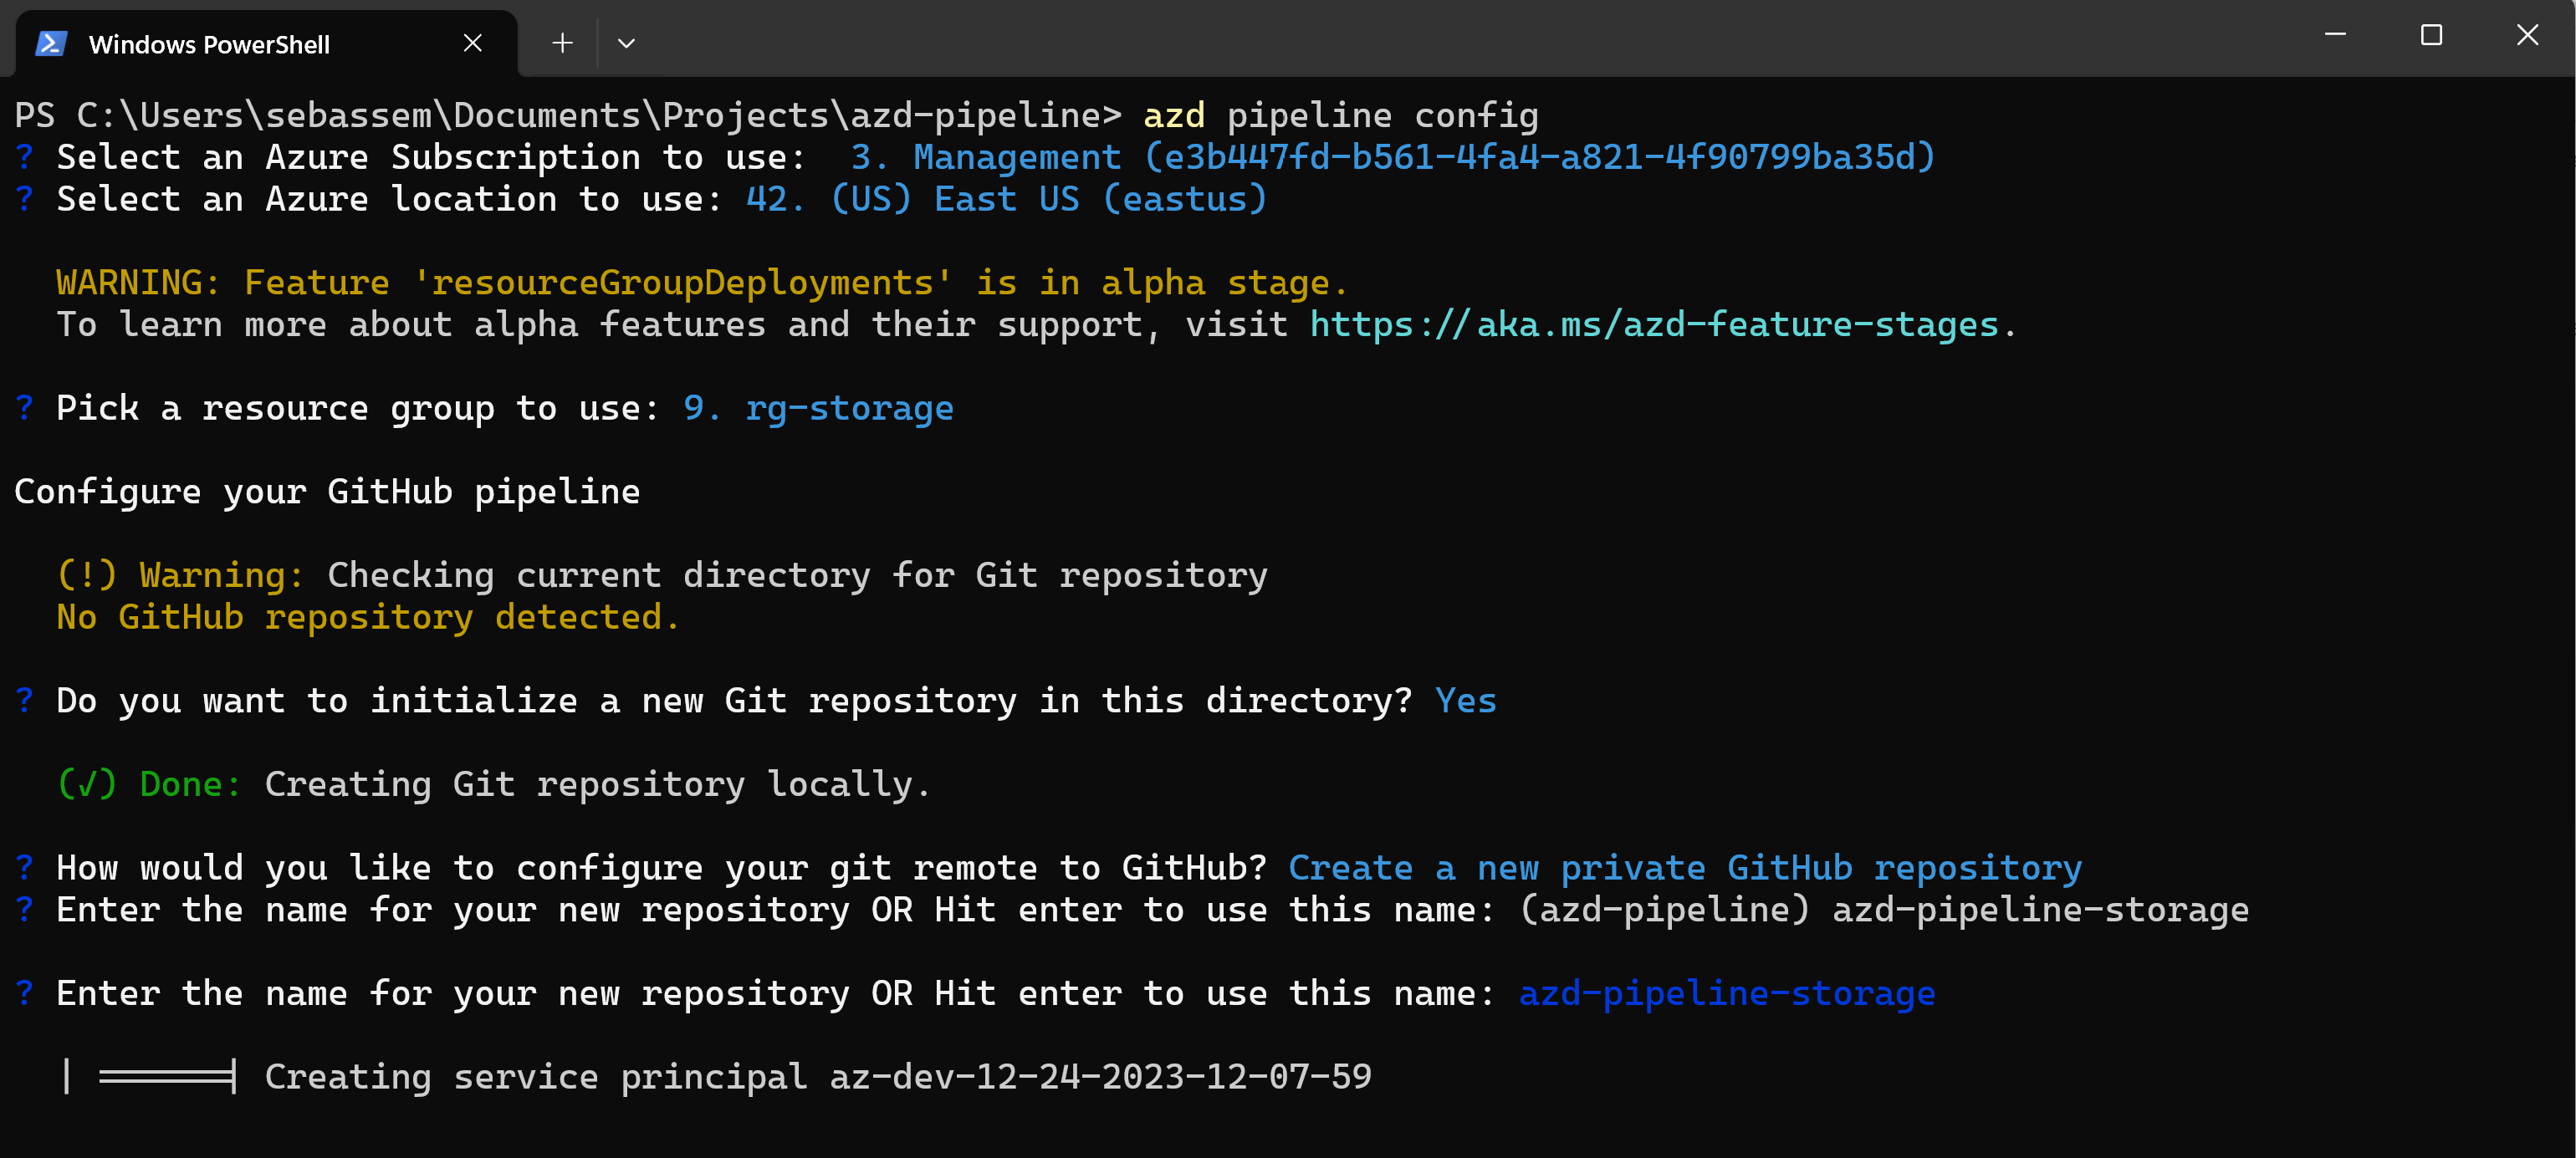
- Configure needed GitHub secrets on the repository.
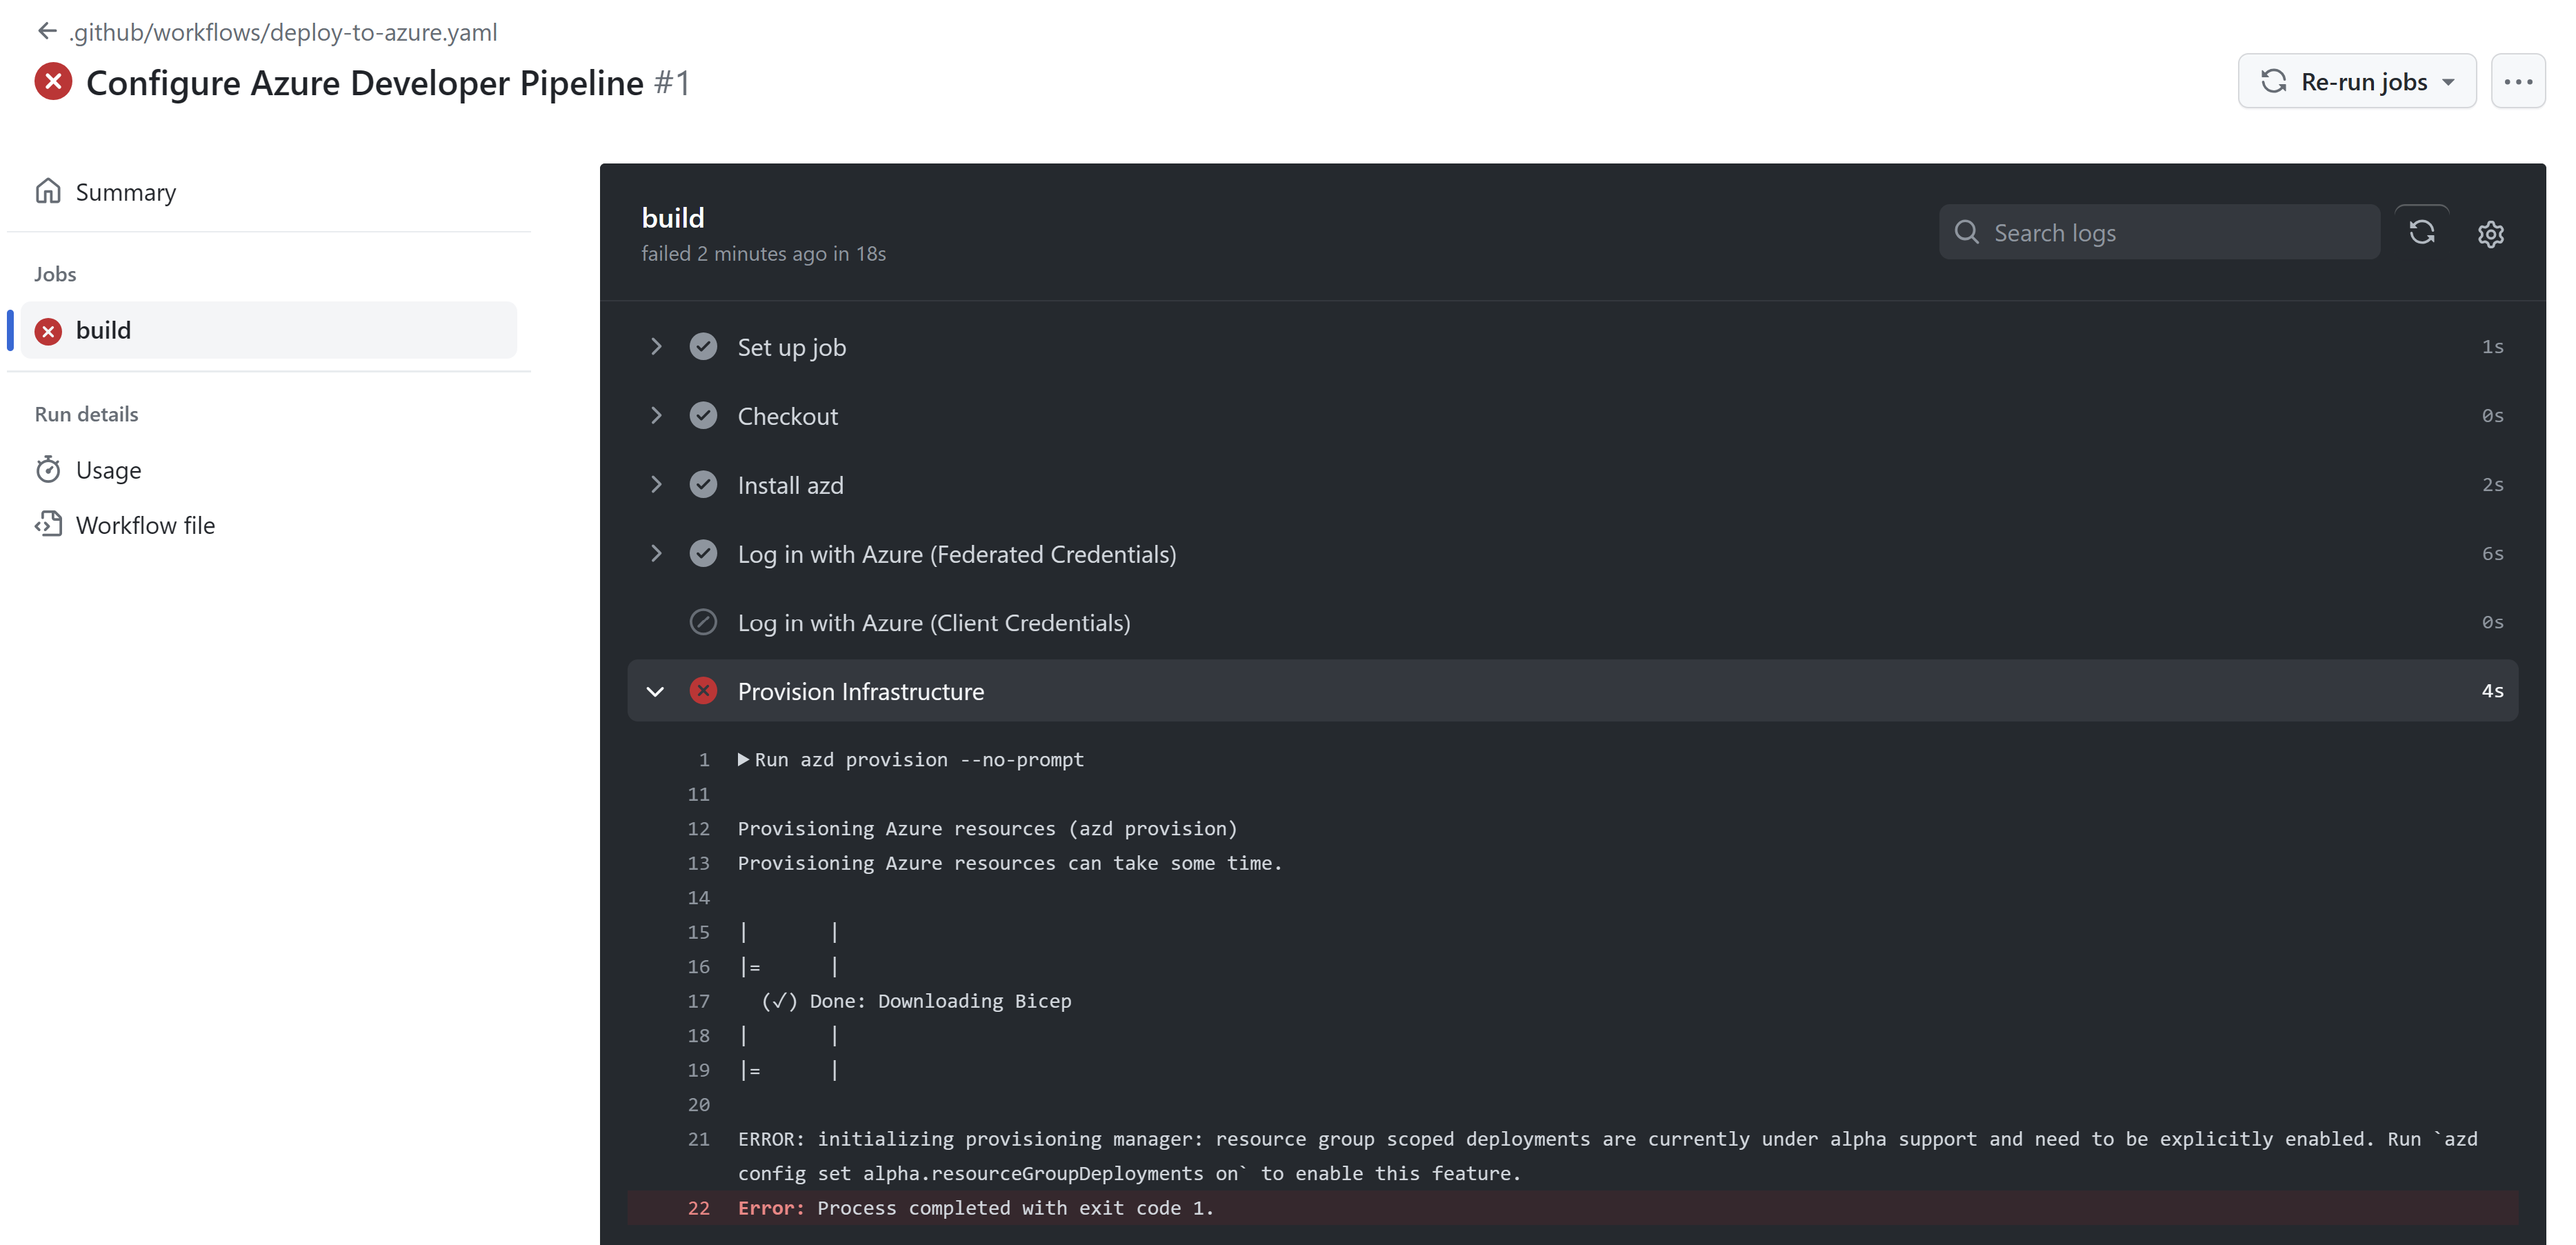
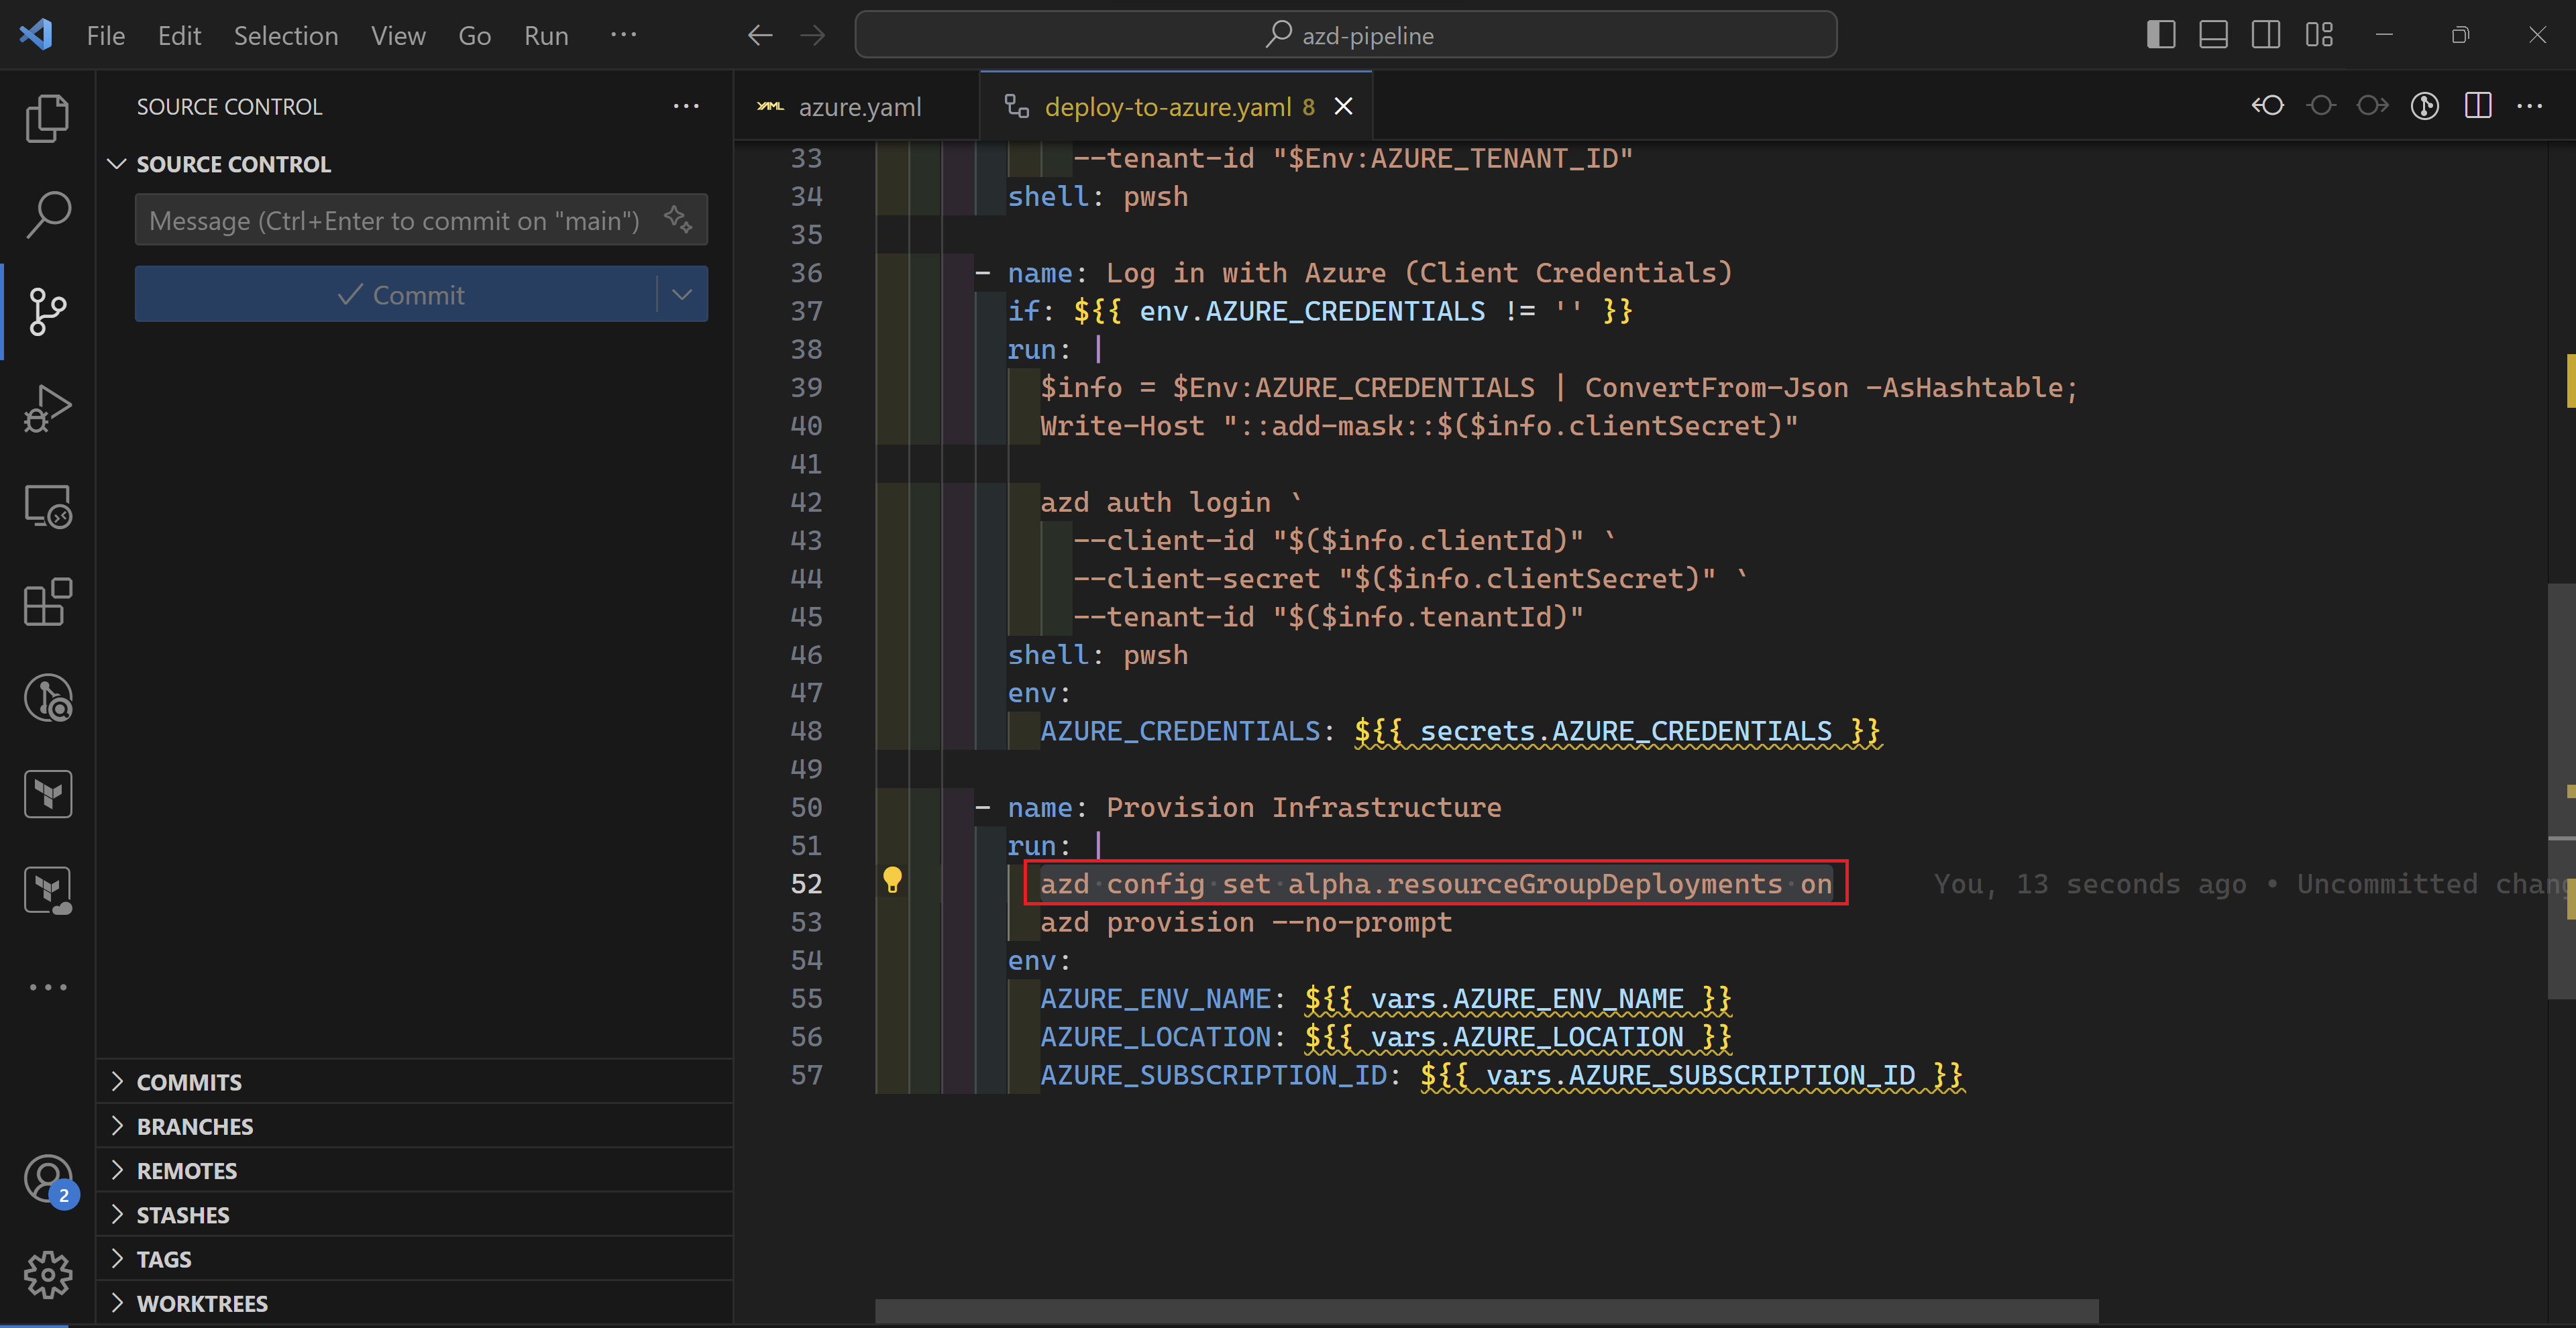
Now, checking my GitHub actions runs, I can see that the workflow has indeed ran but there is an error. I’m using azd to deploy to a resource group which at the time of this post is still a preview feature. To fix that, I had to edit the workflow to enable this feature.
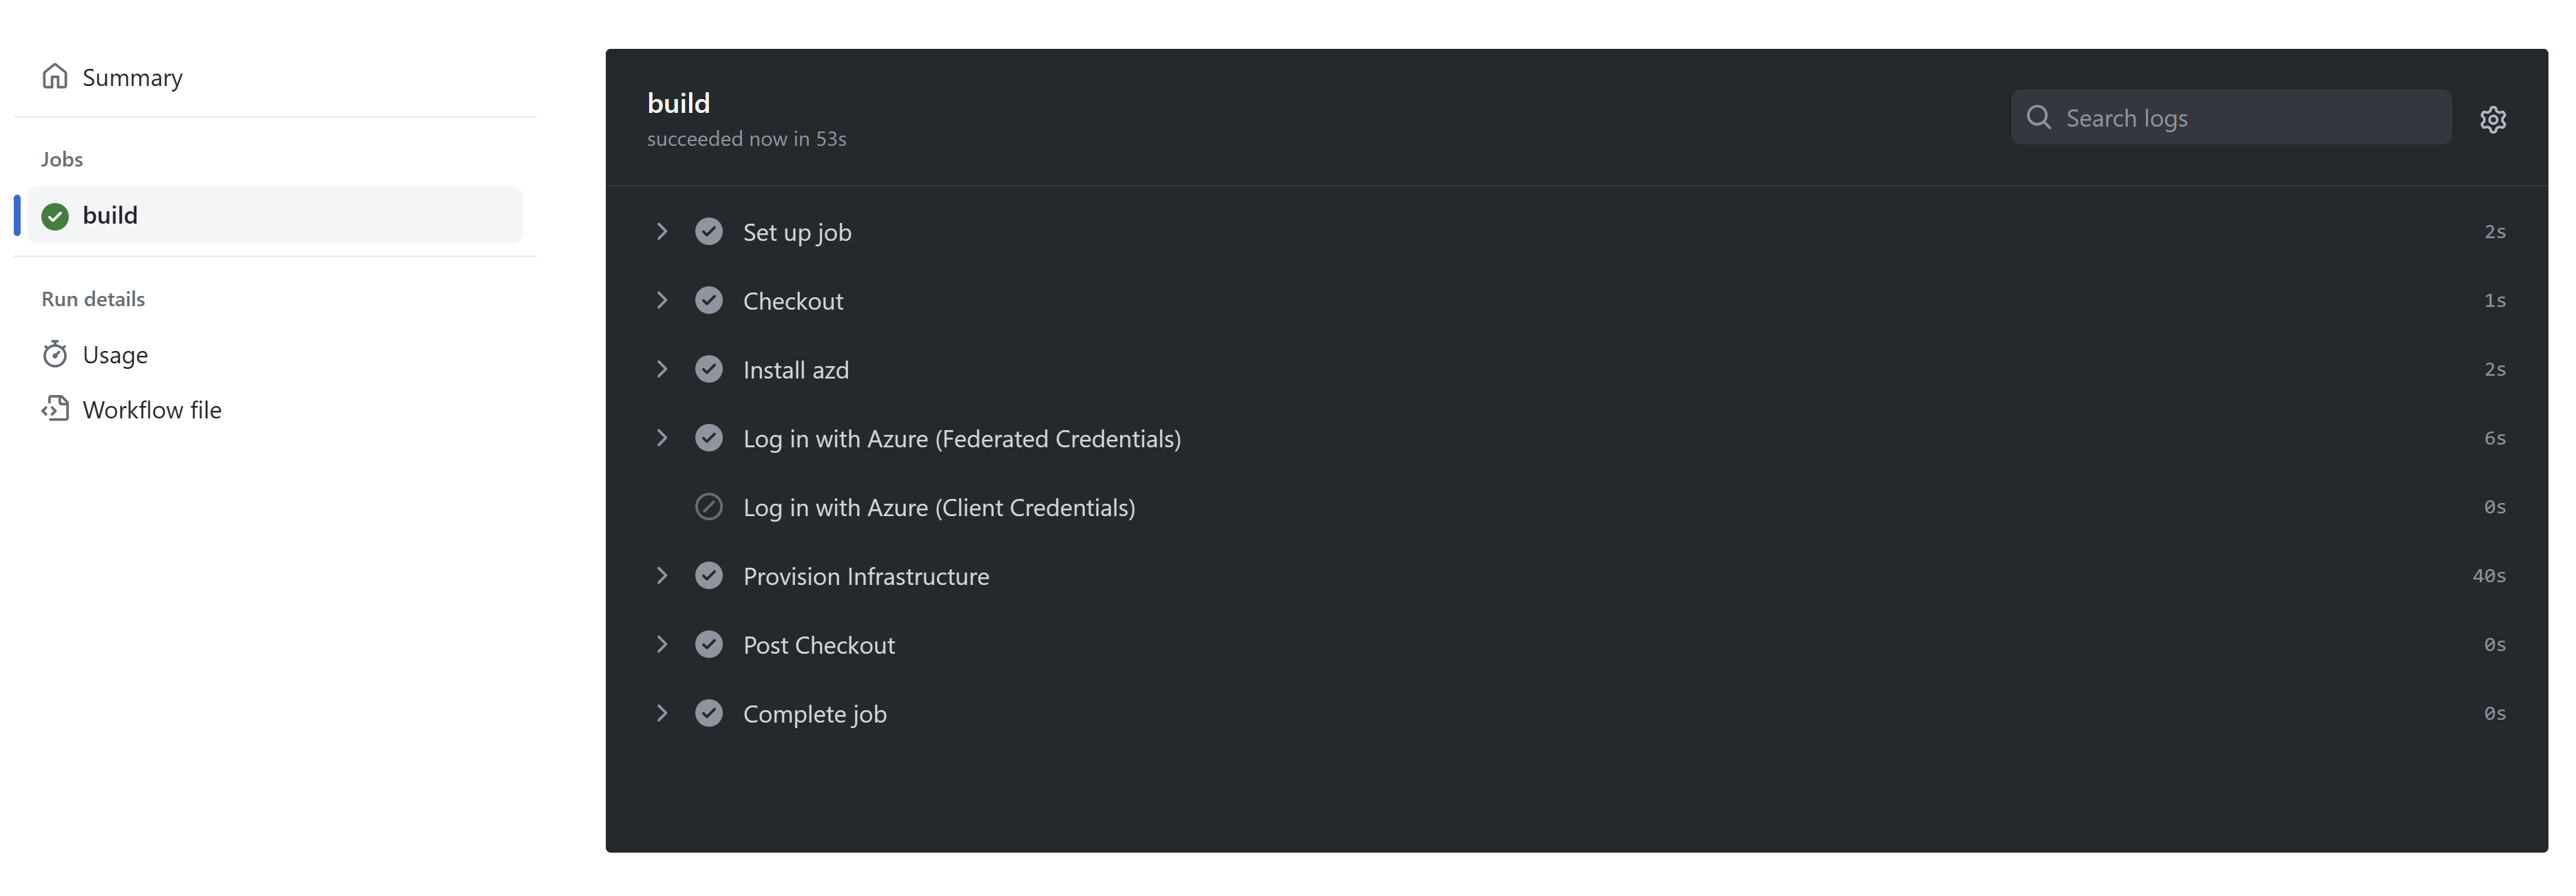
Once fixed, the workflow has executed successfully and my storage account is deployed.
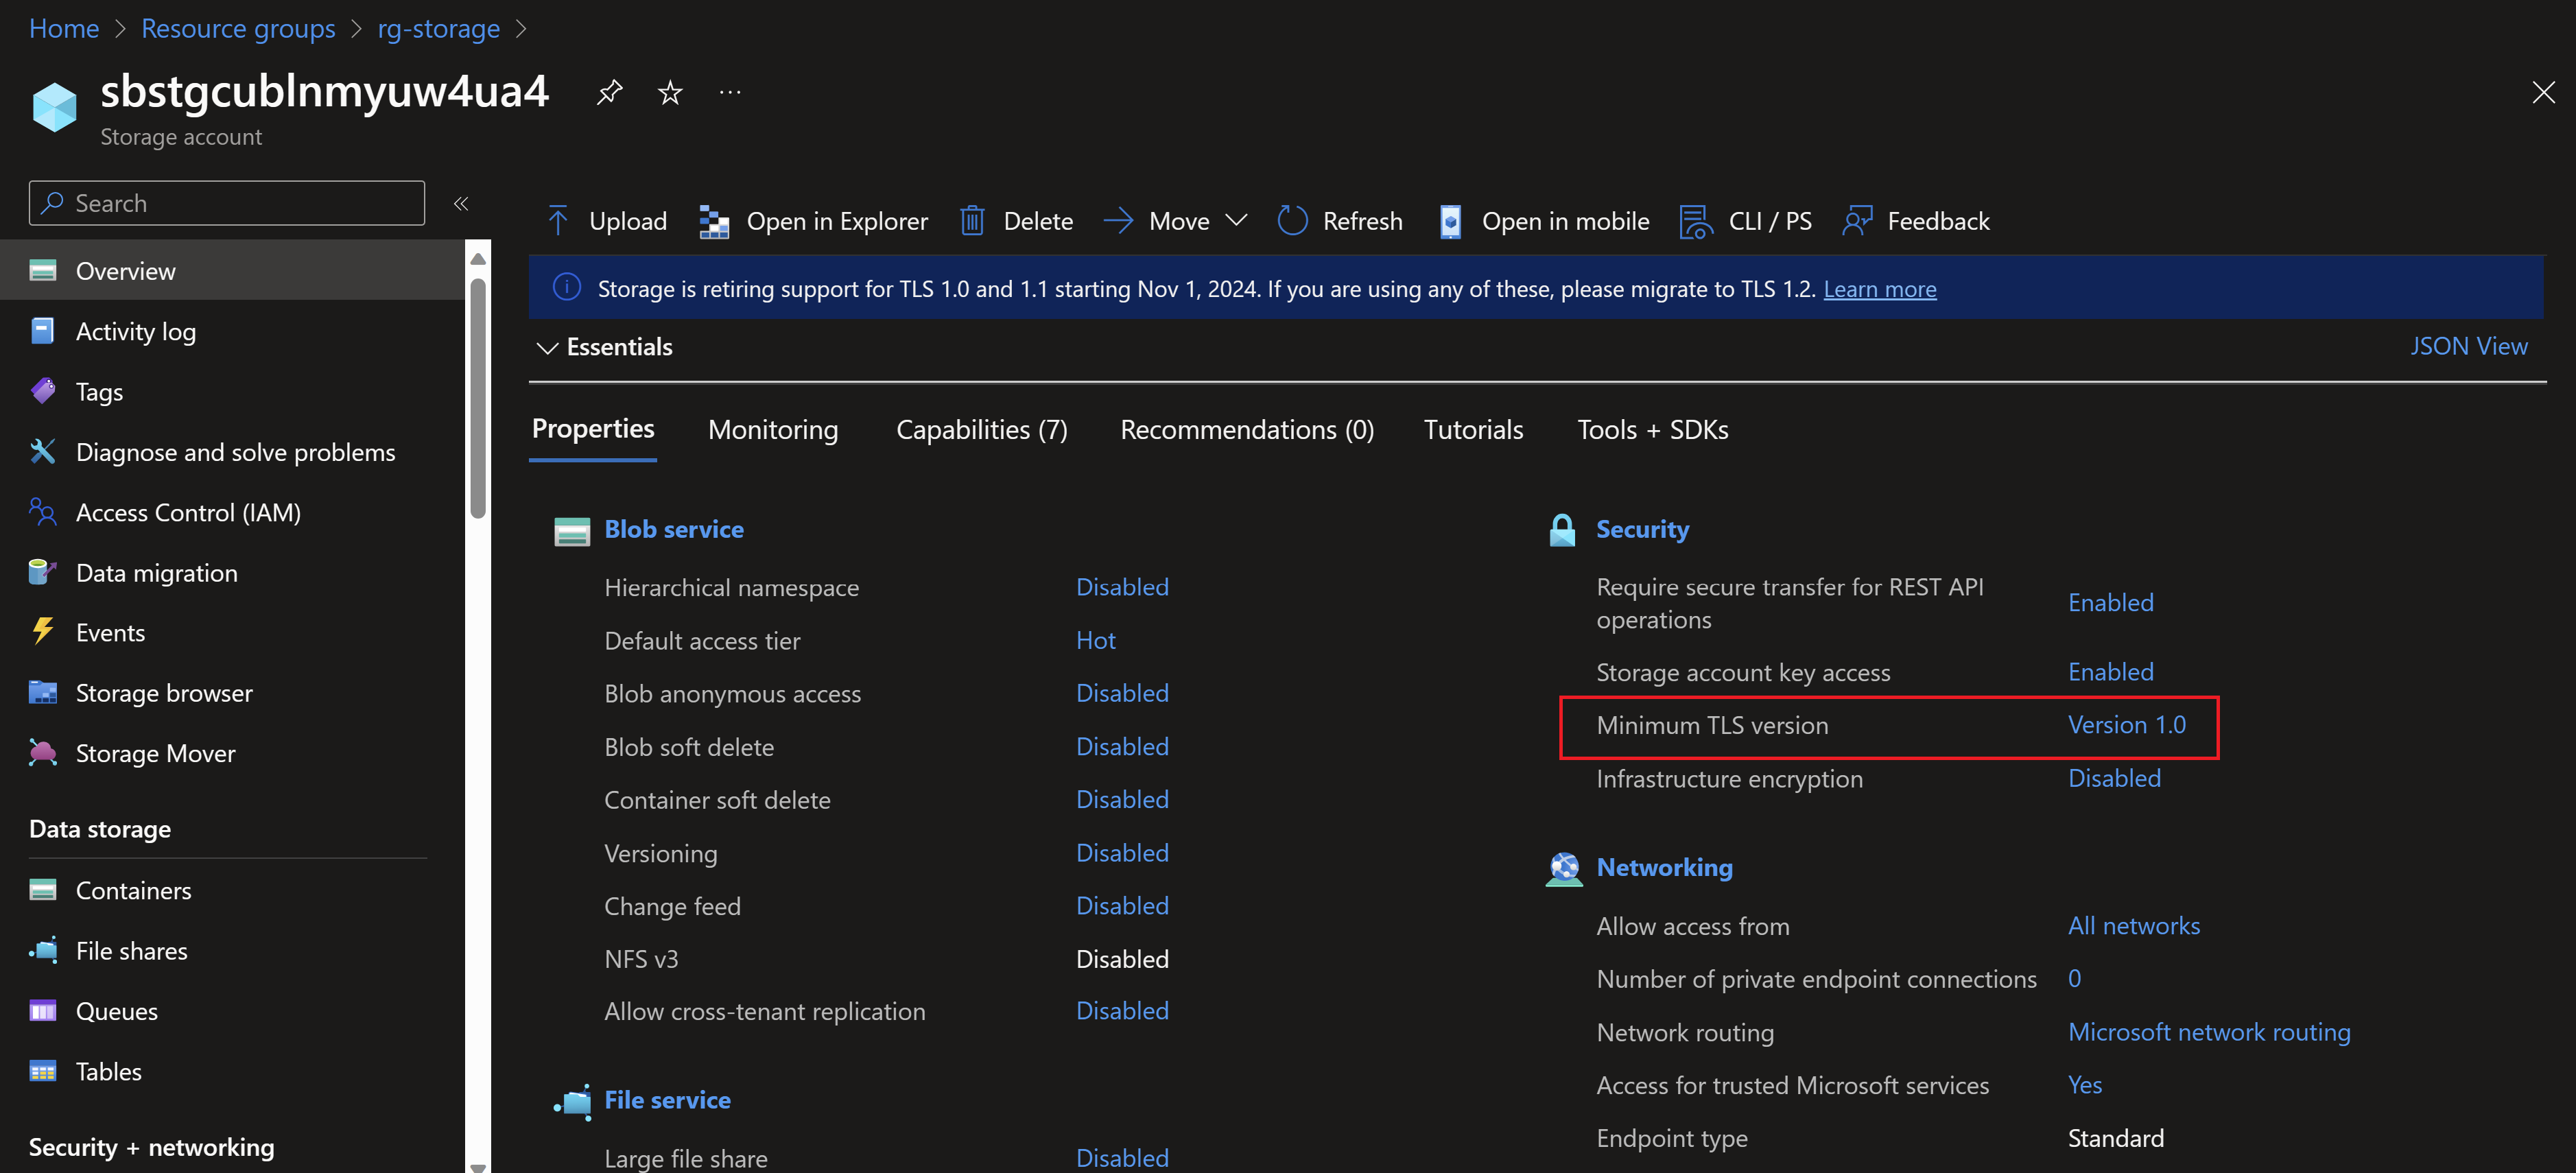
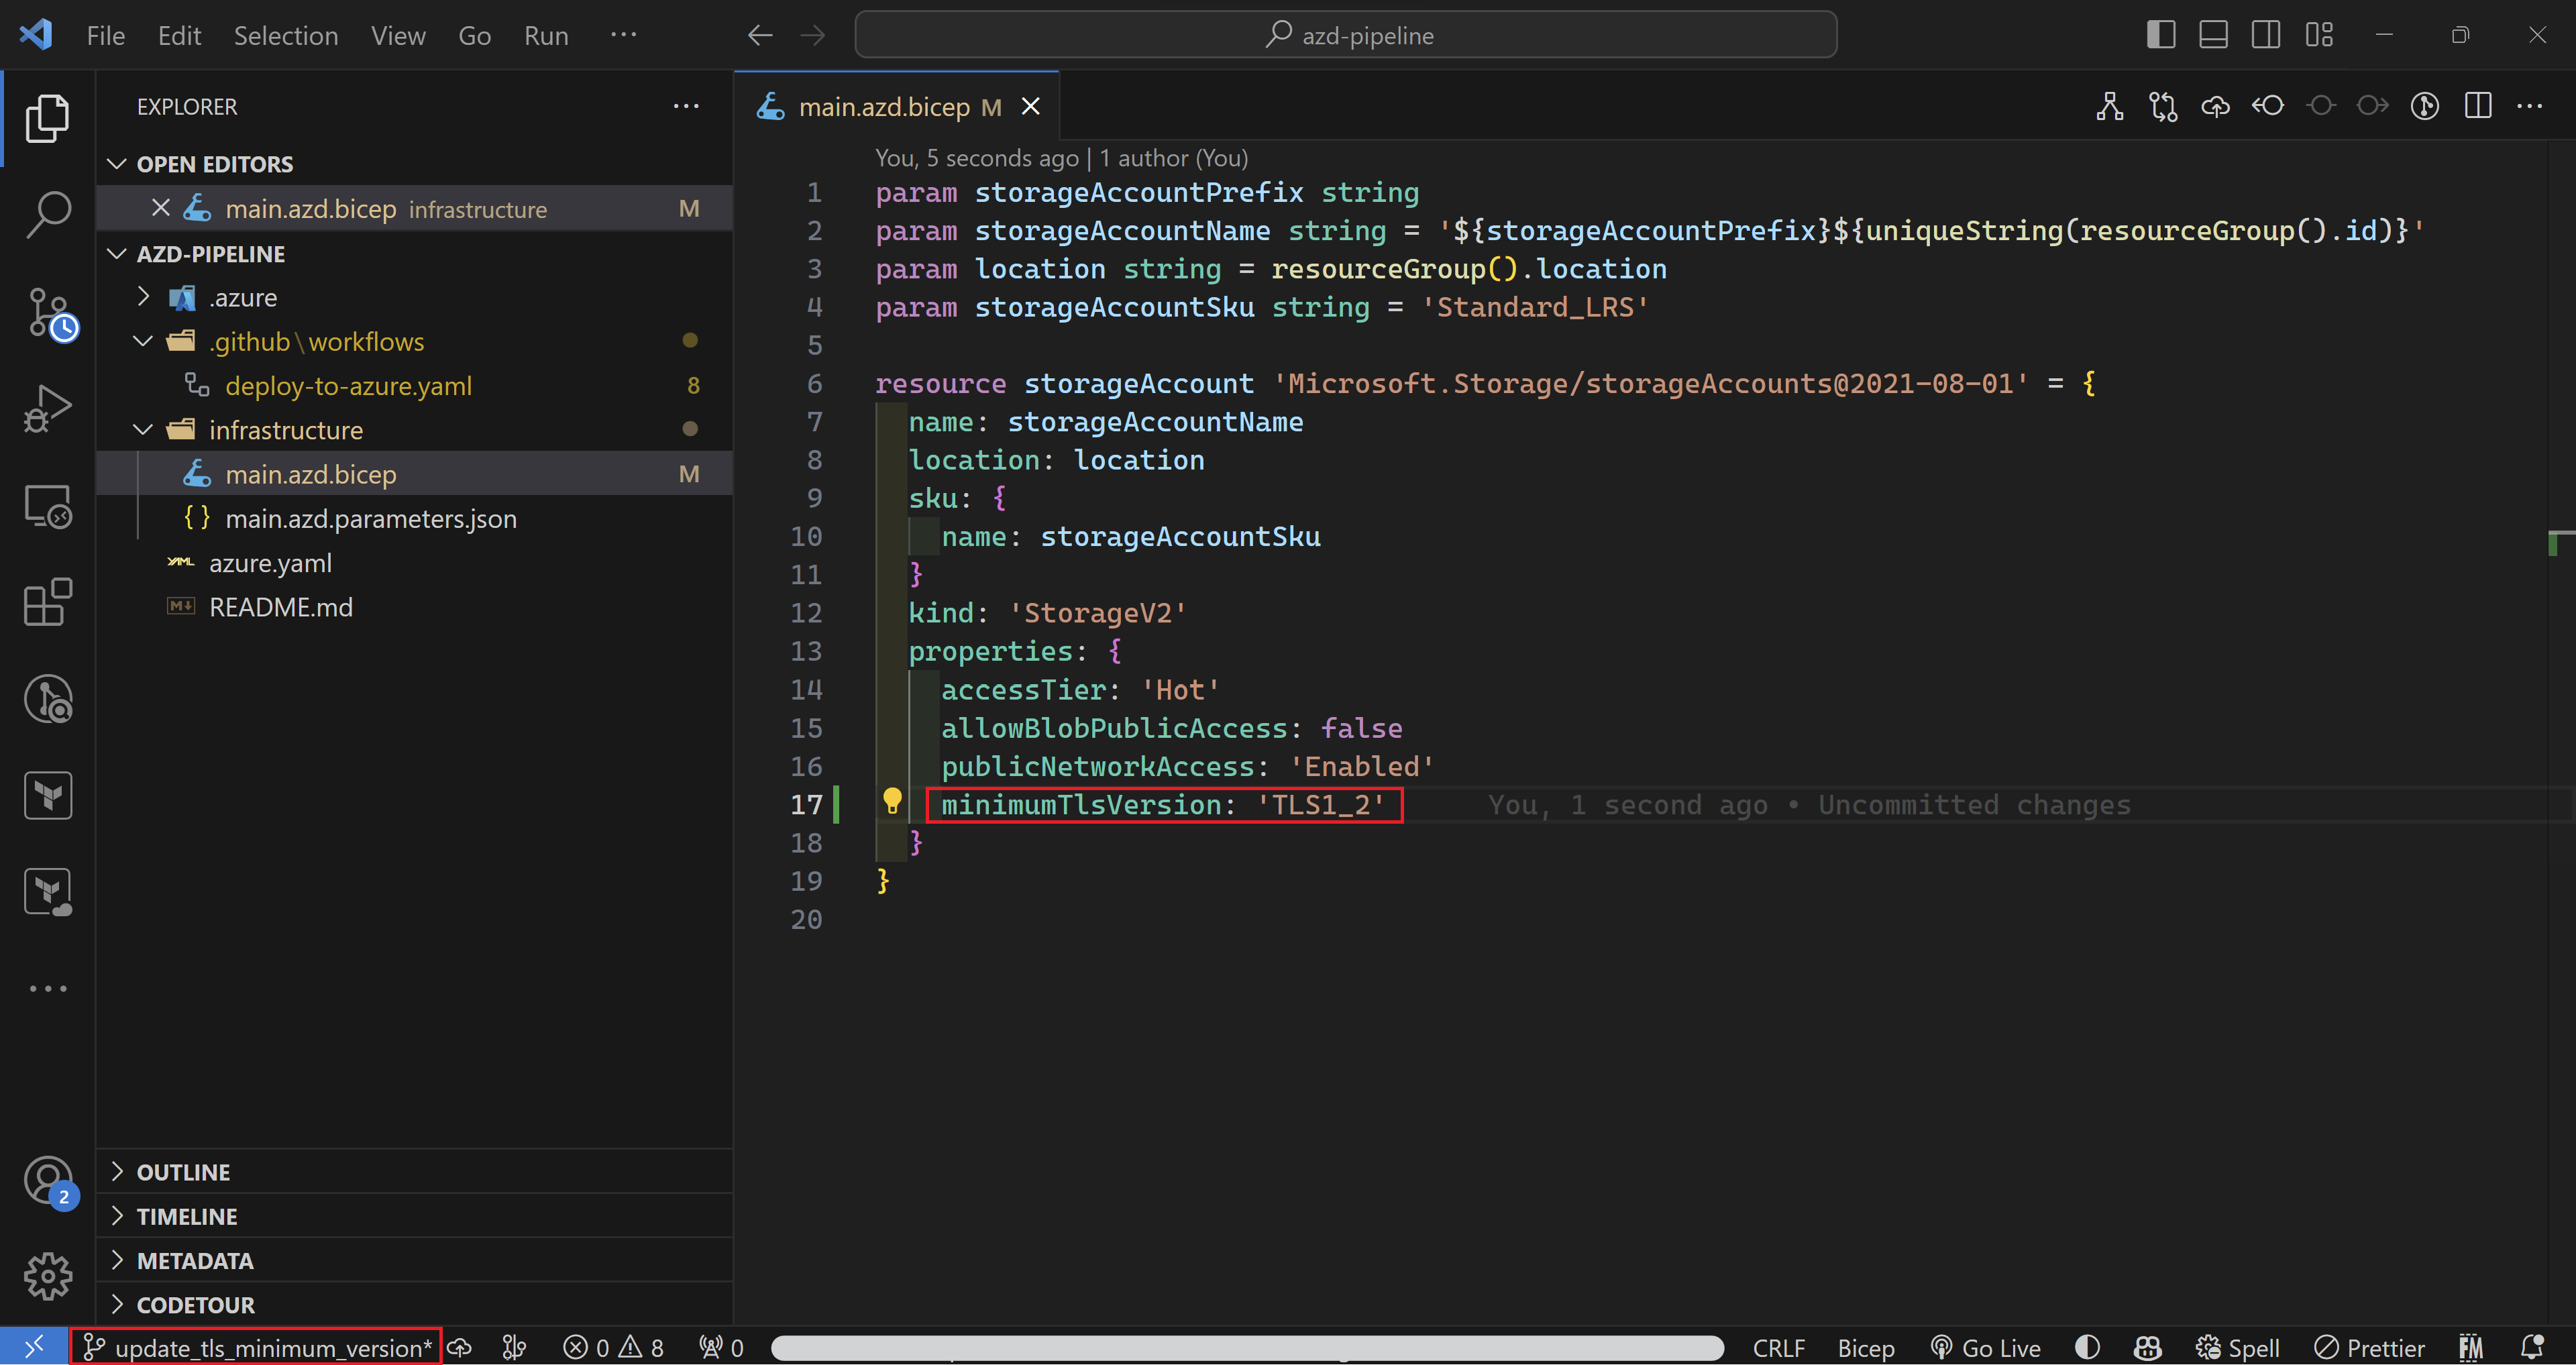
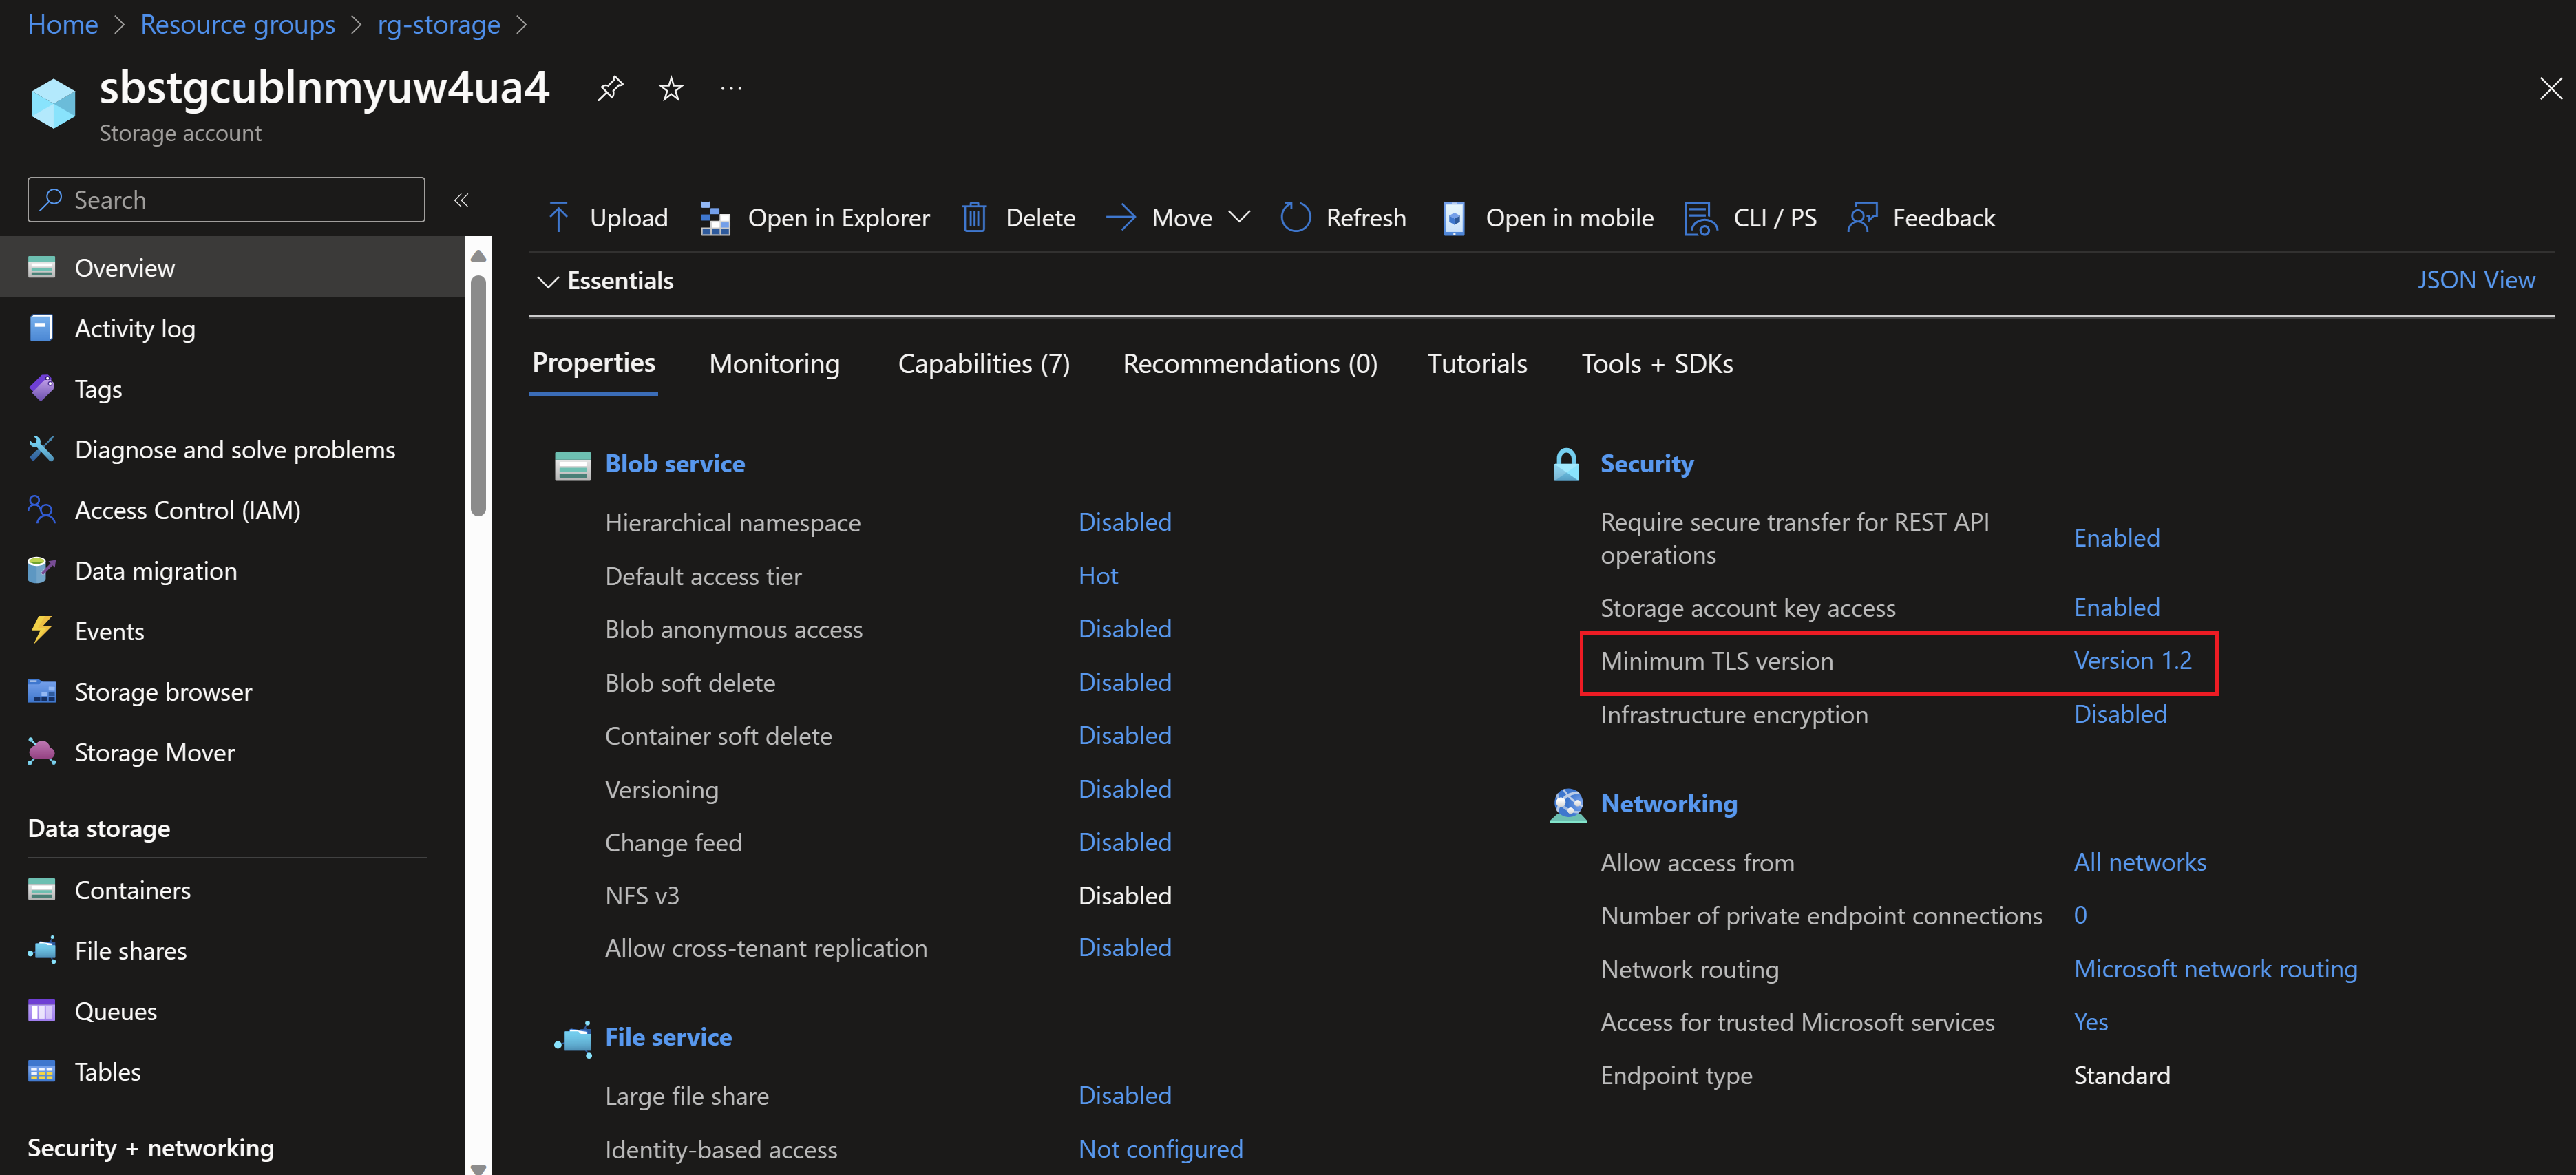
Note that the TLS version used in the storage account is 1.0 which is not the most secure. So let’s use the pipeline created by azd to change that instead of directly going to the portal.
All I need to do is to create a new branch, add the minimumTLSVersion property to my code and push my changes to GitHub and azd auto-magically will take this all the way to Azure.
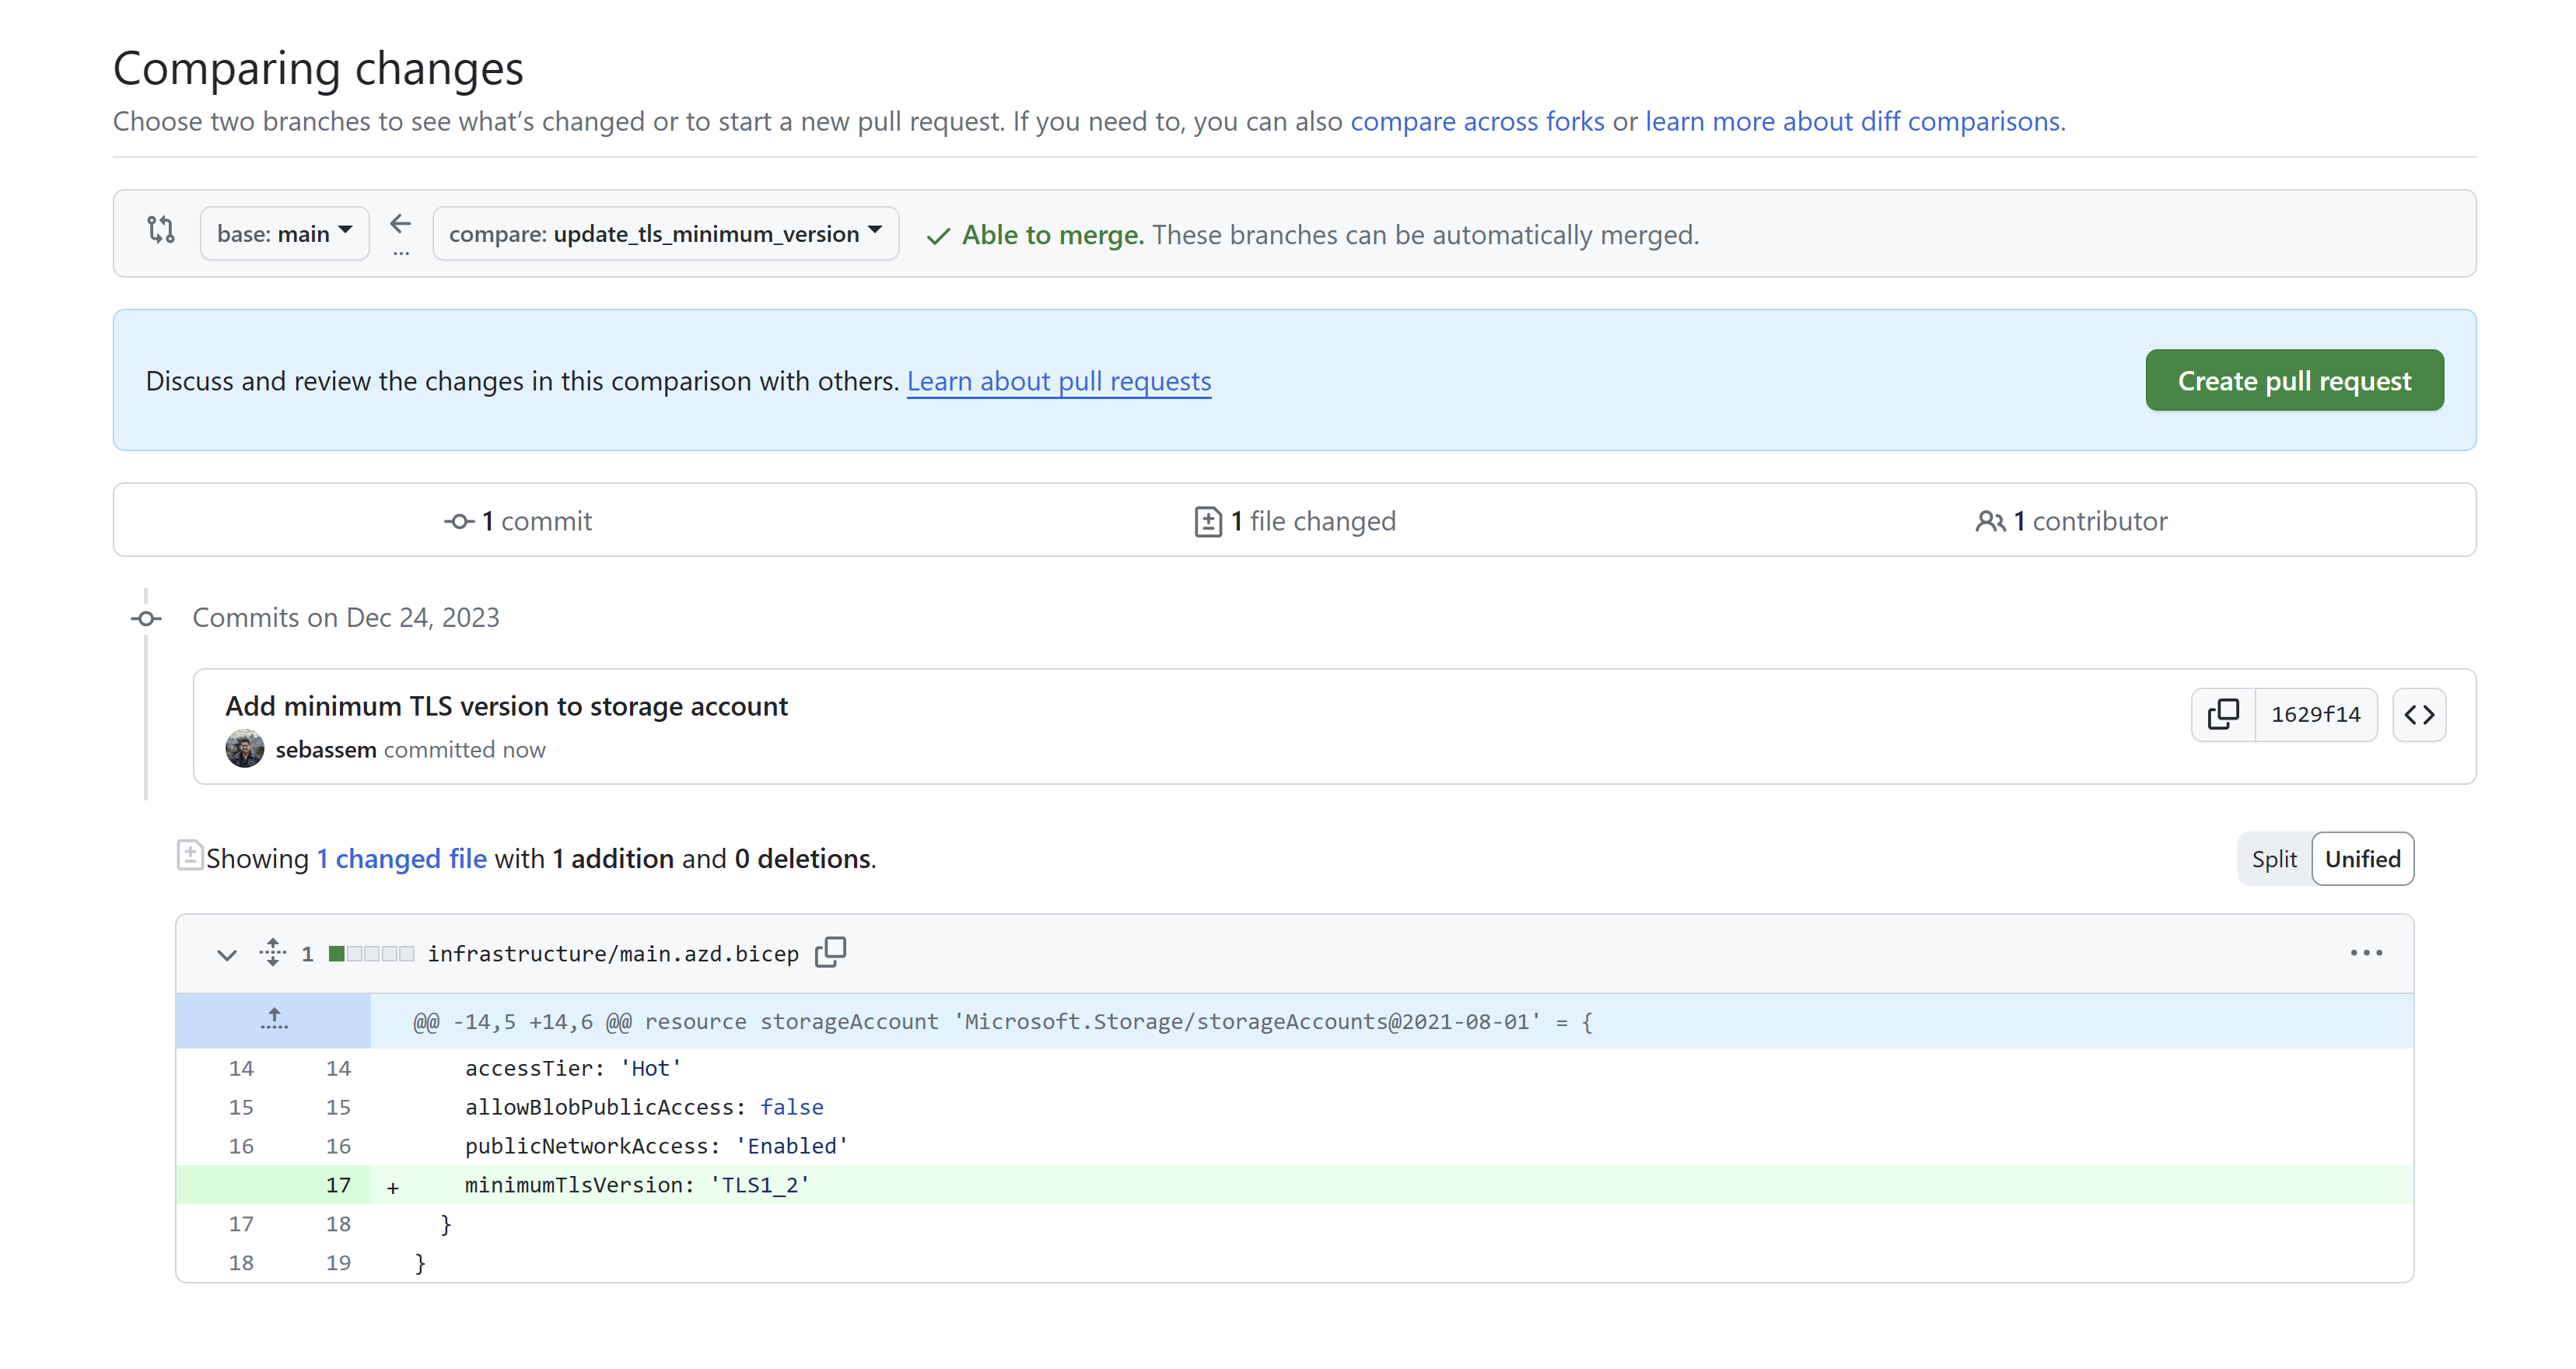
Create a new pull request. Here you can add all kind of checks, scans or tests you would like to have a proper pipeline according to your organization’s policies.
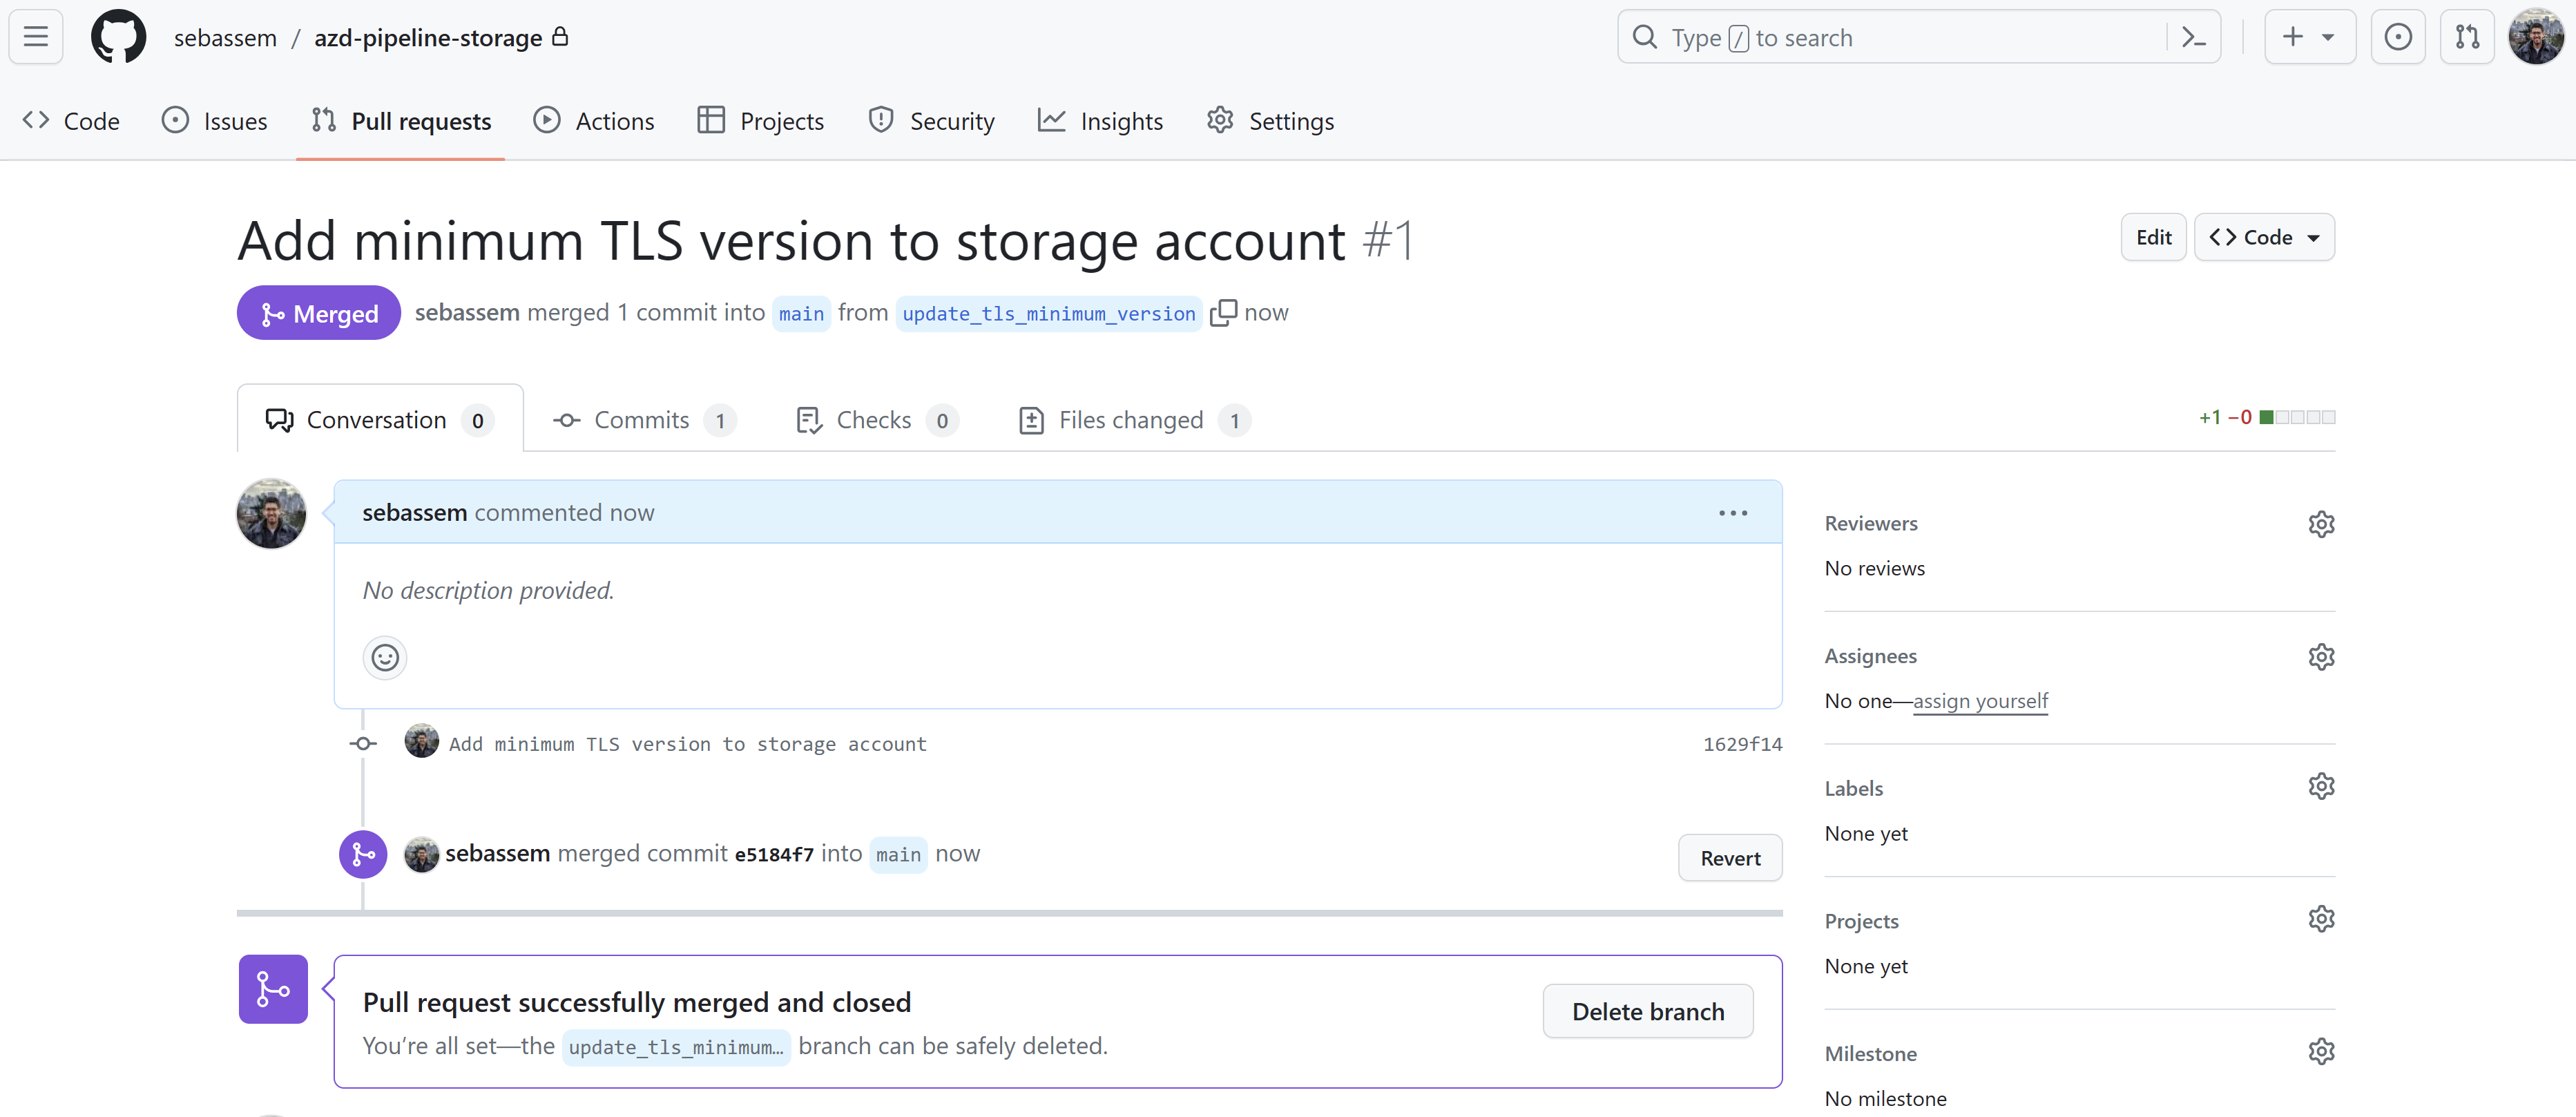
Now, after merging the pull request. I can see my workflow has started to run.
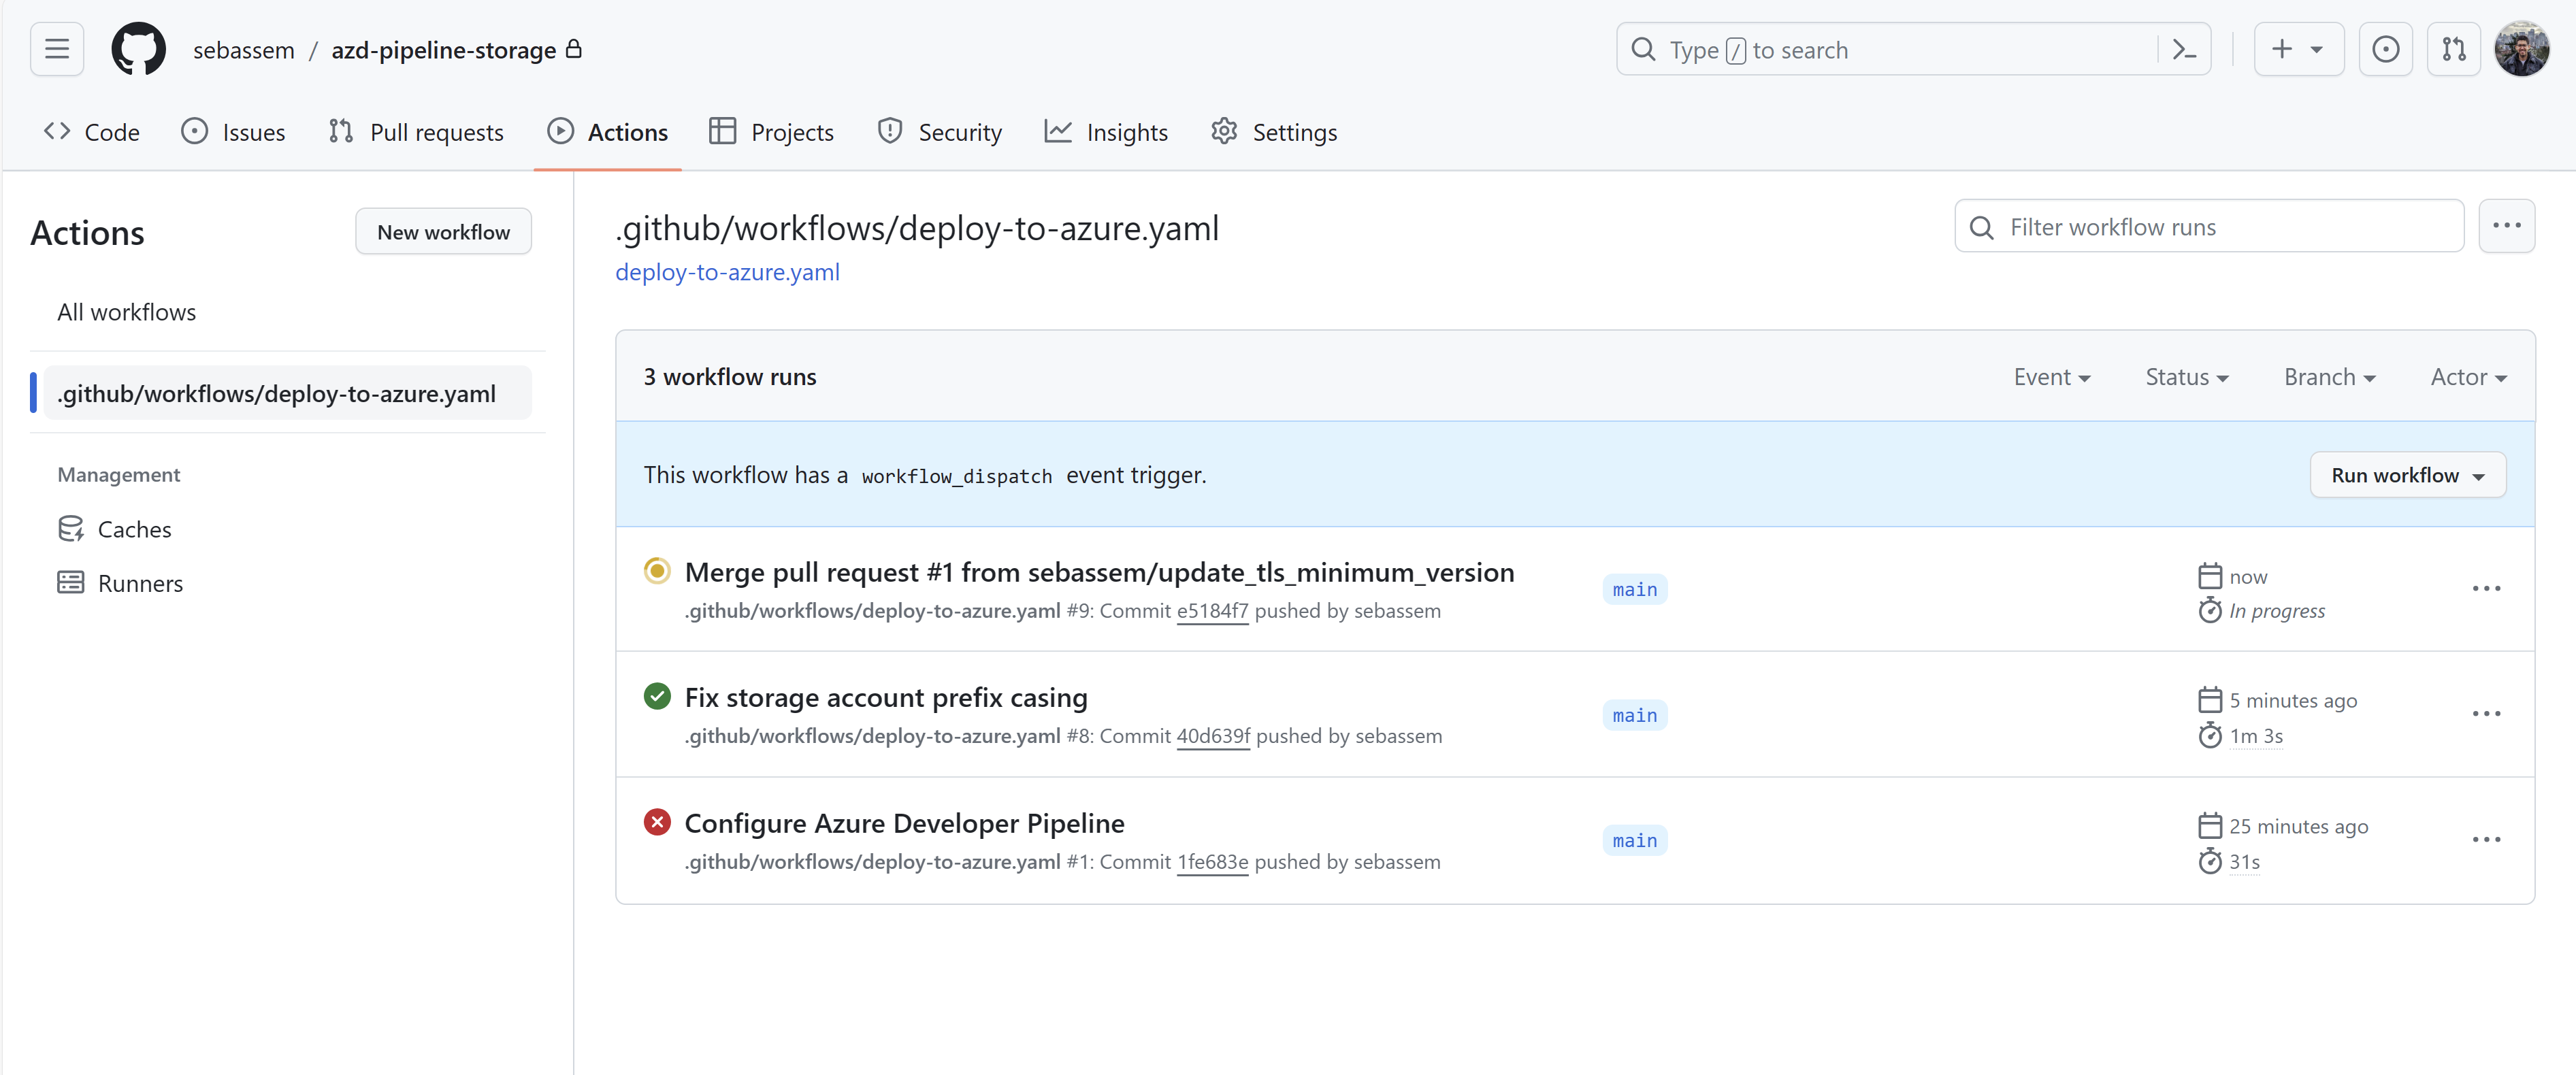
Finally, the storage account has been updated to use the 1.2 TLS version successfully.
References
- Intro to azd

My name is
Seif Bassem
You May Also Like

Azure Bicep - next gen Infrastructure as code
Why consider Infrastructure-as-code? I have always been a huge fan of …
Test your GitHub actions locally on your dev machine
I recently stumbled upon The “Act” project, this is a …
Do more with your Bicep code by using Deployment Scripts
Deployment scripts is a very interesting feature that allows you to …