Do more with your Bicep code by using Deployment Scripts
Deployment scripts is a very interesting feature that allows you to extend your Bicep/ARM deployments to execute actions that neither Bicep/ARM can do. Some examples of what it can enable your deployments to do are :
- Performing data plane operations, such as copying blobs or seeding a database
- Configuring resources after they have been deployed
- Validating inputs or performing other checks before deployment
- Creating or modifying resources that are not supported by Bicep/ARM
- Adding users to a directory
- Creating an object in Azure Active Directory (Entra ID)
Another key benefit is the ability to specify the script language and platform. Currently, deployment scripts support Azure PowerShell and Azure CLI on the Linux environment. This flexibility allows you to leverage your existing knowledge and skills in these scripting languages, enabling a smooth transition to incorporating deployment scripts into your Azure deployments.
By passing command-line arguments to the script, you can easily customize the behavior and functionality of your deployment scripts. Additionally, deployment scripts support script outputs, enabling you to capture and pass back valuable information to the deployment process. This capability enhances the automation and orchestration of complex deployment scenarios, ensuring seamless integration with other Azure services and workflows.
In this blog post, I will use Bicep to create a storage account and then run a deployment script during the deployment to create some containers and uploads blobs to them based on user input.
Bicep code
The Bicep code will look like the following:
- First, define some parameters including an object with the names of the containers to be created and the blobs to upload.
// Parameters
param storageAccountPrefix string = 'stgse'
param storageAccountSku string = 'Standard_LRS'
param storageAccountKind string = 'StorageV2'
param location string = resourceGroup().location
param storageContributorRoleDefinitionId string = '/subscriptions/${subscription().subscriptionId}/providers/Microsoft.Authorization/roleDefinitions/17d1049b-9a84-46fb-8f53-869881c3d3ab'
param containersToCreate object = {
  logs: [ 'sample1.txt', 'sample2.txt', 'sample3.txt' ]
  data: [ 'sample1.txt', 'sample2.txt', 'sample3.txt' ]
}

var storageAccountName = '${storageAccountPrefix}${uniqueString(resourceGroup().id)}'
- To be able to pass the containersToCreate object to a deployment script as an argument, the docs state that we need to double escape it.
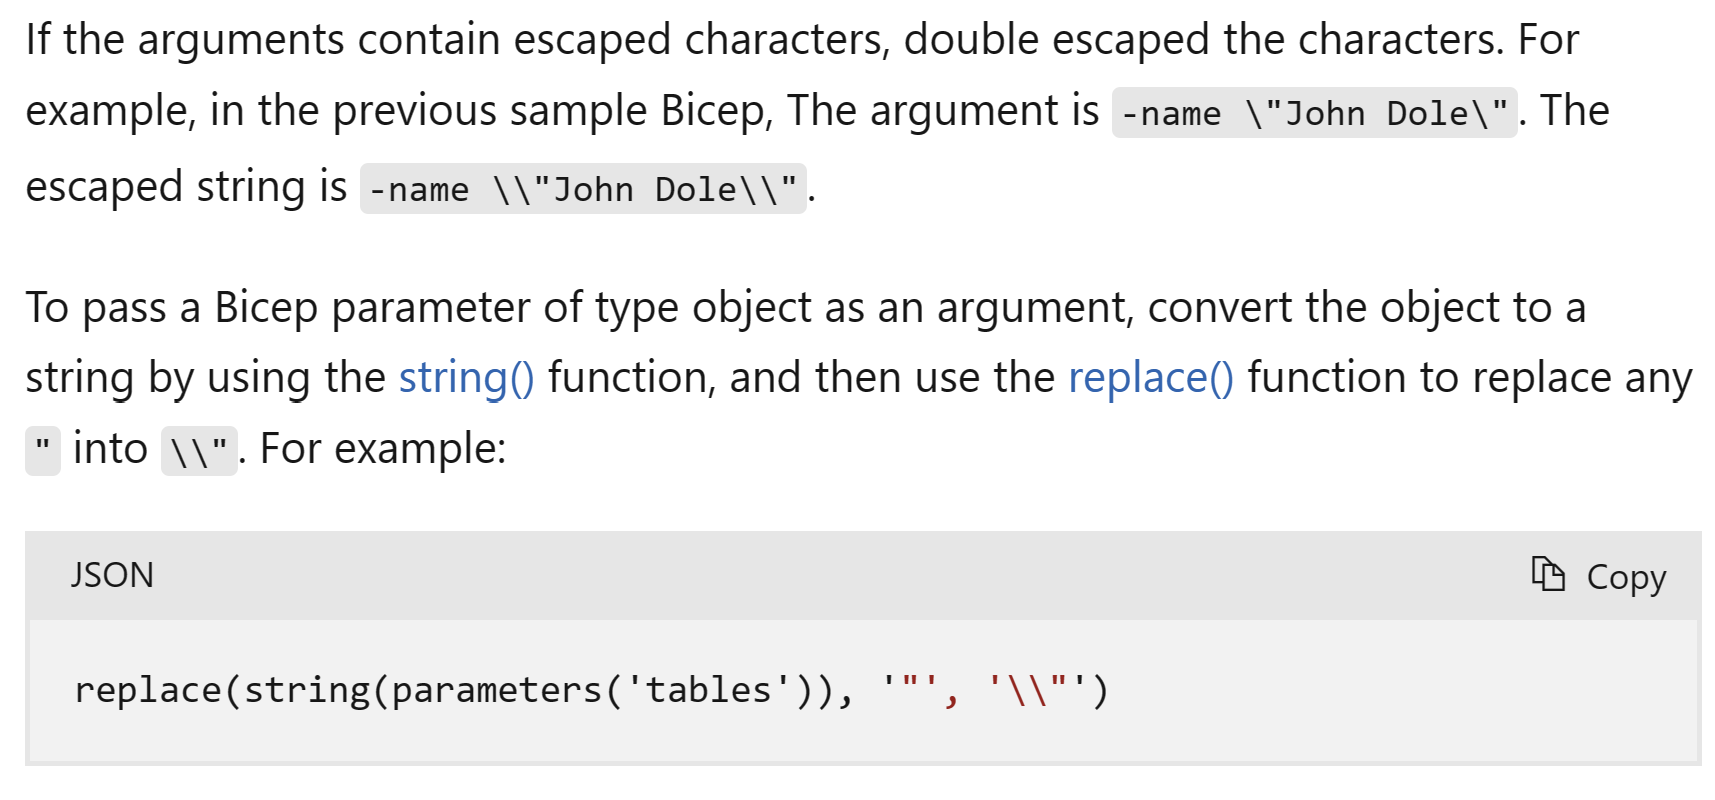
var containersToCreateFormatted = replace(string(containersToCreate), '"', '\\"')
- We will then add the storage account resource.
resource stg 'Microsoft.Storage/storageAccounts@2023-01-01' = {
  name: storageAccountName
  location: location
  sku: {
    name: storageAccountSku
  }
  kind: storageAccountKind
  properties: {
    supportsHttpsTrafficOnly: true
  }
}
- To create a deployment script that interacts with Azure, we need to first create a user-assigned managed identity and grant it the required RBAC role. For this demo, we will create and upload blobs to a storage account so we will use the Storage account contributor role.
resource deploymentScriptIdentity 'Microsoft.ManagedIdentity/userAssignedIdentities@2023-01-31' = {
  name: 'deploymentScriptIdentity'
  location: location
}

resource dsRBAC 'Microsoft.Authorization/roleAssignments@2022-04-01' = {
  name: guid(resourceGroup().id, deploymentScriptIdentity.name, 'dsRBAC')
  scope: resourceGroup()
  properties: {
    principalId: deploymentScriptIdentity.properties.principalId
    roleDefinitionId: storageContributorRoleDefinitionId
    principalType: 'ServicePrincipal'
  }
}
- Finally, we need to create the deployment script itself and pass the storage account name, resource group name, and the containersToCreateFormatted object as arguments.
resource createContainers 'Microsoft.Resources/deploymentScripts@2020-10-01' = {
  kind: 'AzurePowerShell'
  location: location
  name: 'CreateDefaultContainers'
  identity: {
    type: 'UserAssigned'
    userAssignedIdentities: {
      '${deploymentScriptIdentity.id}': {}
    }
  }
  properties: {
    azPowerShellVersion: '3.0'
    retentionInterval: 'PT1H'
    cleanupPreference: 'Always'
    arguments: '-storageAccountName ${storageAccountName} -resourceGroupName ${resourceGroup().name} -containersToCreate \'${containersToCreateFormatted}\''
    scriptContent: loadTextContent('./createBlobStorageContainers.ps1')
  }
}
In this code snippet, there is a couple of things to note:
- We are stating that we are using AzurePowerShell but we can also use Azure CLI.
kind: 'AzurePowerShell'
- We are assigning the user-assigned managed identity to this deployment script.
identity: {
    type: 'UserAssigned'
    userAssignedIdentities: {
      '${deploymentScriptIdentity.id}': {}
    }
  }
- A deployment script creates some supporting resources like a container instance and a storage account, they are by default deleted once the script completes, this is defined by the cleanUpPreference parameter.
cleanupPreference: 'Always'
- We are passing our parameters as arguments to the script by using the arguments property.
arguments: '-storageAccountName ${storageAccountName} -resourceGroupName ${resourceGroup().name} -containersToCreate \'${containersToCreateFormatted}\''
- While we can write the PowerShell script inline, its cleaner to keep it in its own seperate file and use the loadTextContent() function to load the code from the file.
scriptContent: loadTextContent('./createBlobStorageContainers.ps1')
- Full Bicep code:
//Storage account module

param storageAccountPrefix string = 'stgse'
param storageAccountSku string = 'Standard_LRS'
param storageAccountKind string = 'StorageV2'
param location string = resourceGroup().location
param storageContributorRoleDefinitionId string = '/subscriptions/${subscription().subscriptionId}/providers/Microsoft.Authorization/roleDefinitions/17d1049b-9a84-46fb-8f53-869881c3d3ab'
param containersToCreate object = {
  logs: [ 'sample1.txt', 'sample2.txt', 'sample3.txt' ]
  data: [ 'sample1.txt', 'sample2.txt', 'sample3.txt' ]
}

var containersToCreateFormatted = replace(string(containersToCreate), '"', '\\"')

var storageAccountName = '${storageAccountPrefix}${uniqueString(resourceGroup().id)}'

resource stg 'Microsoft.Storage/storageAccounts@2023-01-01' = {
  name: storageAccountName
  location: location
  sku: {
    name: storageAccountSku
  }
  kind: storageAccountKind
  properties: {
    supportsHttpsTrafficOnly: true
  }
}

resource deploymentScriptIdentity 'Microsoft.ManagedIdentity/userAssignedIdentities@2023-01-31' = {
  name: 'deploymentScriptIdentity'
  location: location
}

resource dsRBAC 'Microsoft.Authorization/roleAssignments@2022-04-01' = {
  name: guid(resourceGroup().id, deploymentScriptIdentity.name, 'dsRBAC')
  scope: resourceGroup()
  properties: {
    principalId: deploymentScriptIdentity.properties.principalId
    roleDefinitionId: storageContributorRoleDefinitionId
    principalType: 'ServicePrincipal'
  }
}

resource createContainers 'Microsoft.Resources/deploymentScripts@2020-10-01' = {
  kind: 'AzurePowerShell'
  location: location
  name: 'CreateDefaultContainers'
  identity: {
    type: 'UserAssigned'
    userAssignedIdentities: {
      '${deploymentScriptIdentity.id}': {}
    }
  }
  properties: {
    azPowerShellVersion: '3.0'
    retentionInterval: 'PT1H'
    cleanupPreference: 'Always'
    arguments: '-storageAccountName ${storageAccountName} -resourceGroupName ${resourceGroup().name} -containersToCreate \'${containersToCreateFormatted}\''
    scriptContent: loadTextContent('./createBlobStorageContainers.ps1')
  }
}
Deployment script PowerShell code
To allow the deployment script to interact with the storage account, create containers and upload blobs, we will need to add this logic in PowerShell as follows:
- Define the parameters passed from the Bicep code.
param(
    [string]$storageAccountName,
    [string]$containersToCreate,
    [string]$resourceGroupName
)
- We need to authenticate to Azure using the user-assigned managed identity
Connect-AzAccount -Identity
- Next, we need to parse the passed object to be able to iterate over it and create the containers and blobs. We also need to define the storage account context to be able to interact with it and download some random files to upload them.
$containers = $containersToCreate | ConvertFrom-Json -AsHashtable
$stg = Get-AzStorageAccount -Name $storageAccountName -ResourceGroupName $resourceGroupName
$context = $stg.Context

# Download sample files
Invoke-WebRequest -Uri "https://filesamples.com/samples/document/txt/sample1.txt" -OutFile "sample1.txt"
Invoke-WebRequest -Uri "https://filesamples.com/samples/document/txt/sample2.txt" -OutFile "sample2.txt"
Invoke-WebRequest -Uri "https://filesamples.com/samples/document/txt/sample3.txt" -OutFile "sample3.txt"
- Finally, we need to loop through the containersToCreate object and start creating the containers and uploading blobs.
foreach ($container in $containers.keys) {
    Write-Host "`n Creating container $container"
    New-AzStorageContainer -Name $container -Context $context -Permission Off
    Write-Host "`n Creating blobs in $container container"
    foreach ($blob in $containers[$container]) {
        Write-Host "`n Creating blob $blob"
        $Blob1HT = @{
            File             = "./$blob"
            Container        = $container
            Blob             = $blob
            Context          = $context
            StandardBlobTier = 'Hot'
        }
        Set-AzStorageBlobContent @Blob1HT
    }
}
- Full PowerShell code:
param(
    [string]$storageAccountName,
    [string]$containersToCreate,
    [string]$resourceGroupName
)

Connect-AzAccount -Identity
$containers = $containersToCreate | ConvertFrom-Json -AsHashtable
$stg = Get-AzStorageAccount -Name $storageAccountName -ResourceGroupName $resourceGroupName
$context = $stg.Context

Invoke-WebRequest -Uri "https://filesamples.com/samples/document/txt/sample1.txt" -OutFile "sample1.txt"
Invoke-WebRequest -Uri "https://filesamples.com/samples/document/txt/sample2.txt" -OutFile "sample2.txt"
Invoke-WebRequest -Uri "https://filesamples.com/samples/document/txt/sample3.txt" -OutFile "sample3.txt"


foreach ($container in $containers.keys) {
    Write-Host "`n Creating container $container"
    New-AzStorageContainer -Name $container -Context $context -Permission Off
    Write-Host "`n Creating blobs in $container container"
    foreach ($blob in $containers[$container]) {
        Write-Host "`n Creating blob $blob"
        $Blob1HT = @{
            File             = "./$blob"
            Container        = $container
            Blob             = $blob
            Context          = $context
            StandardBlobTier = 'Hot'
        }
        Set-AzStorageBlobContent @Blob1HT
    }
}
Running the deployment
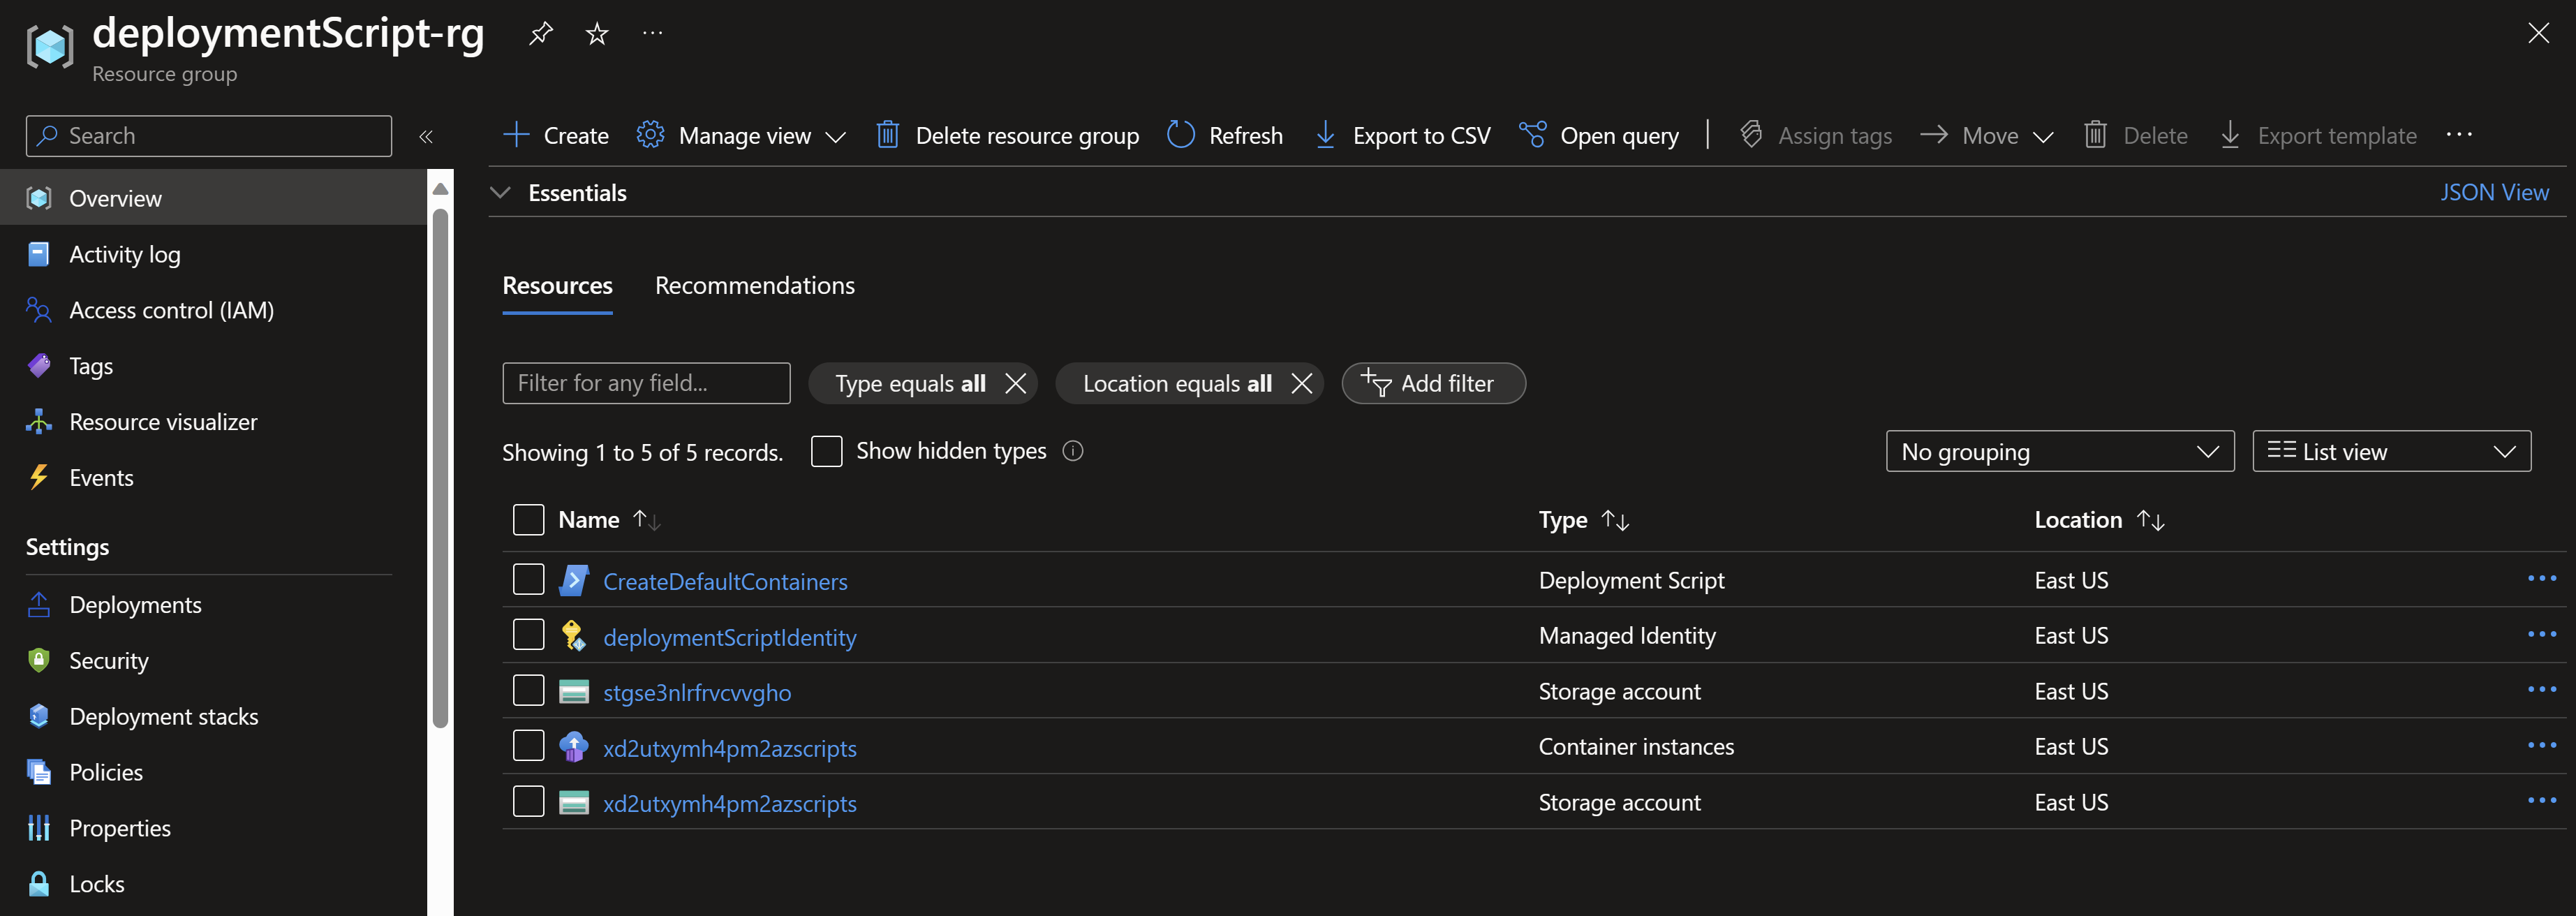
- After running the deployment, we can the deployment script supporting resources being created in the resource group.
- If we navigate to the deployment script resource, we can also see the outputs from the executed script.
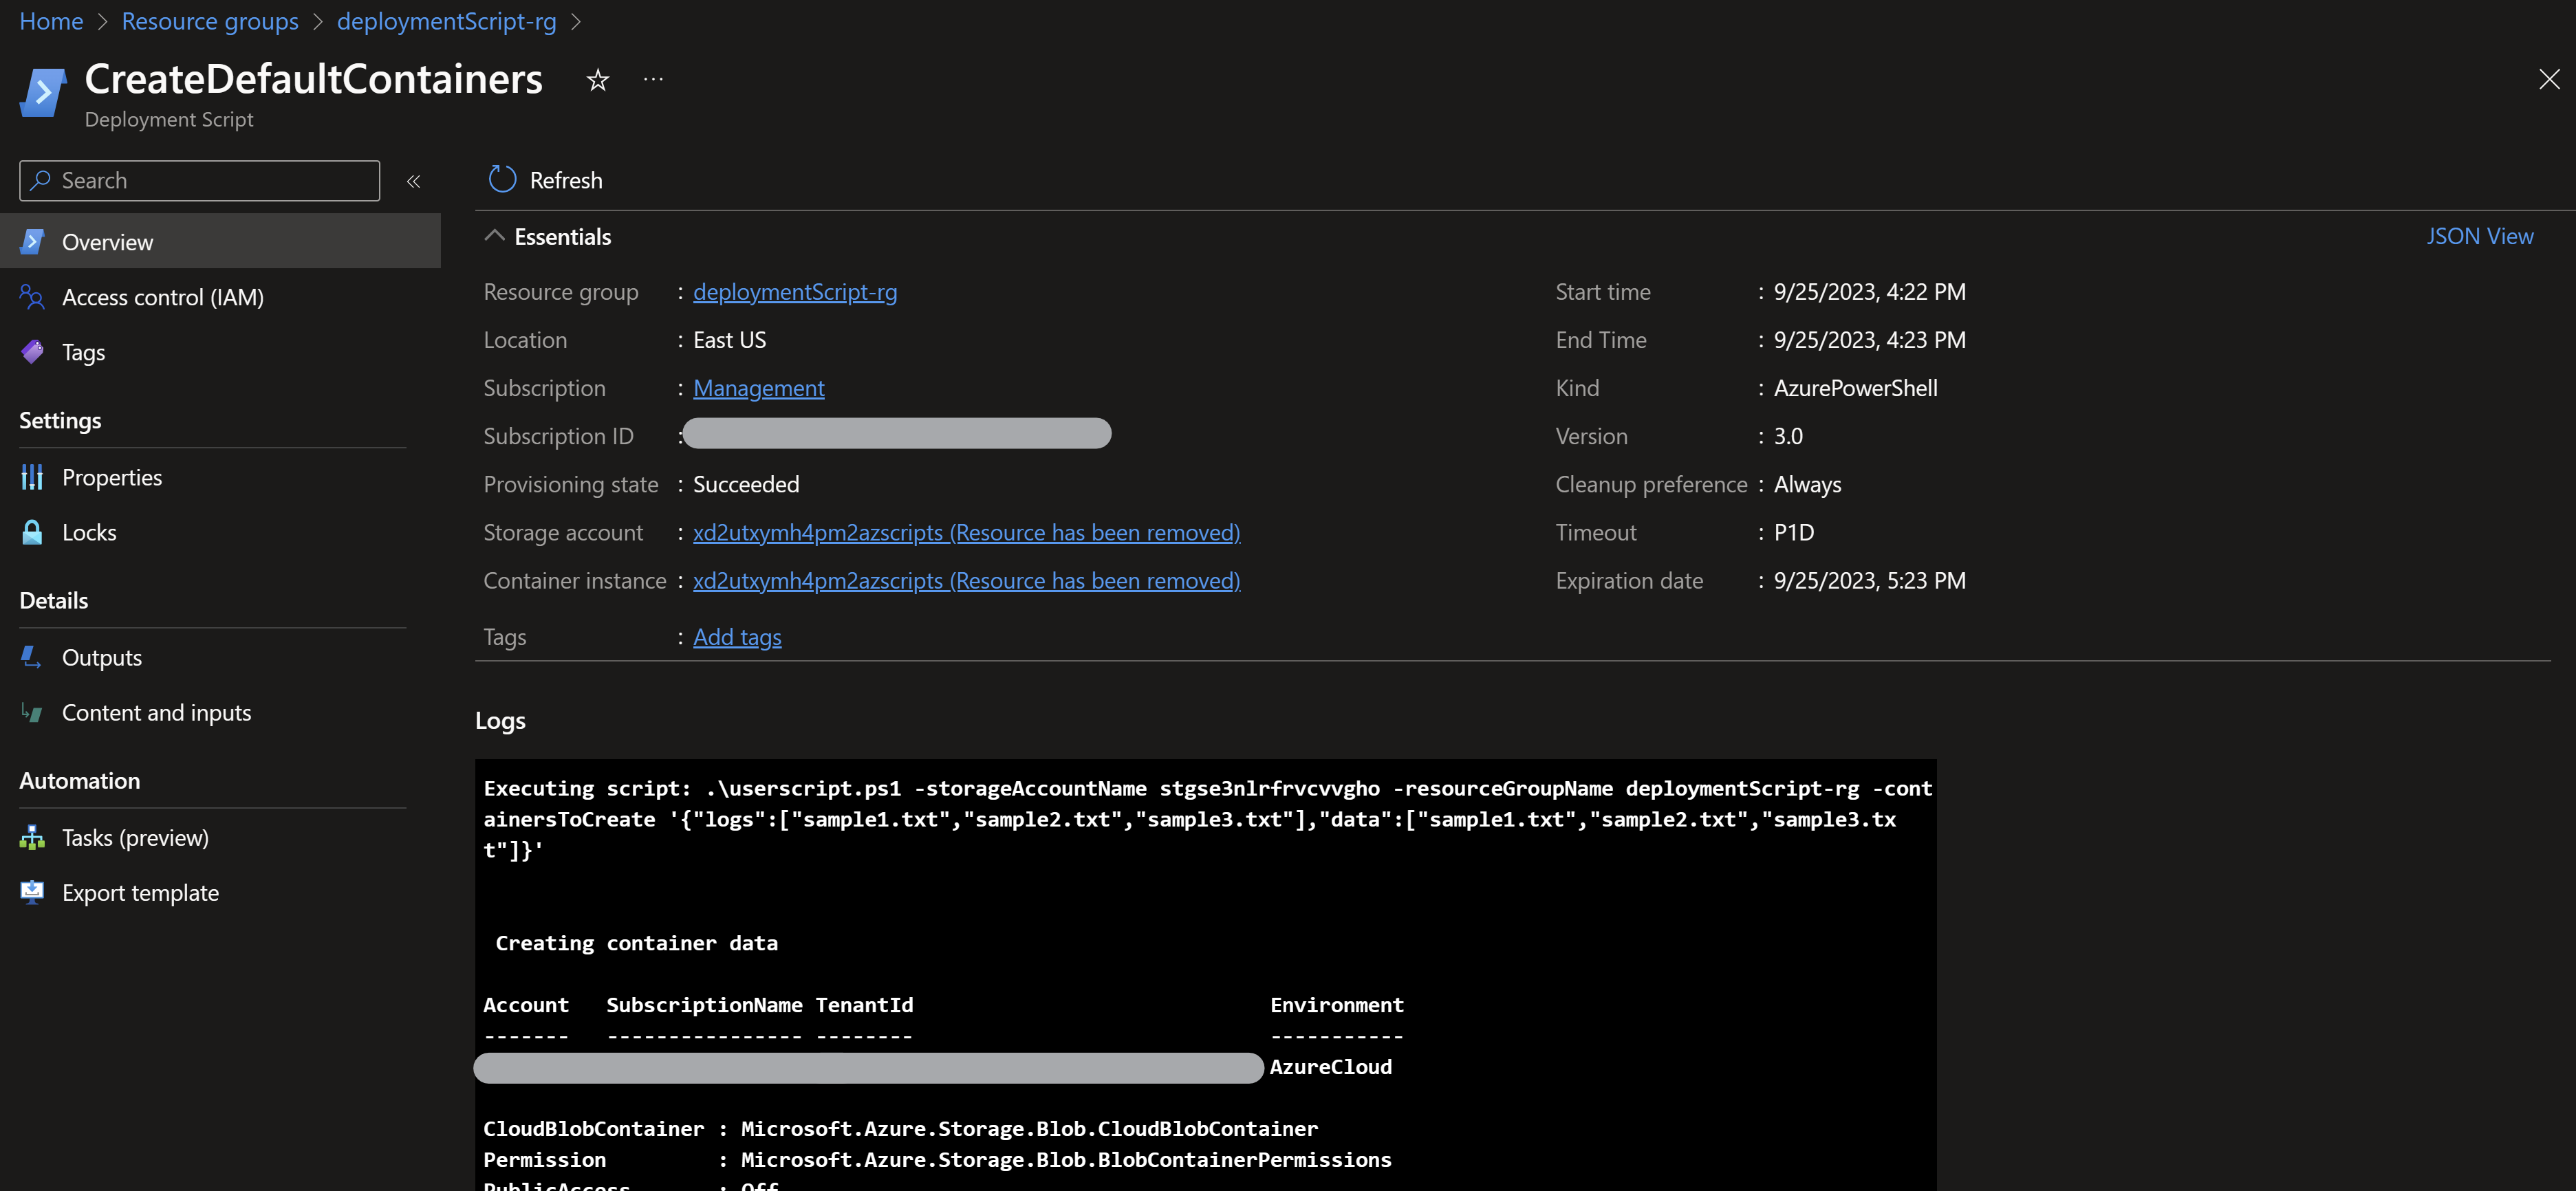
NOTE: You can also define outputs from the deployment script so you can pass those values to the Bicep/ARM code
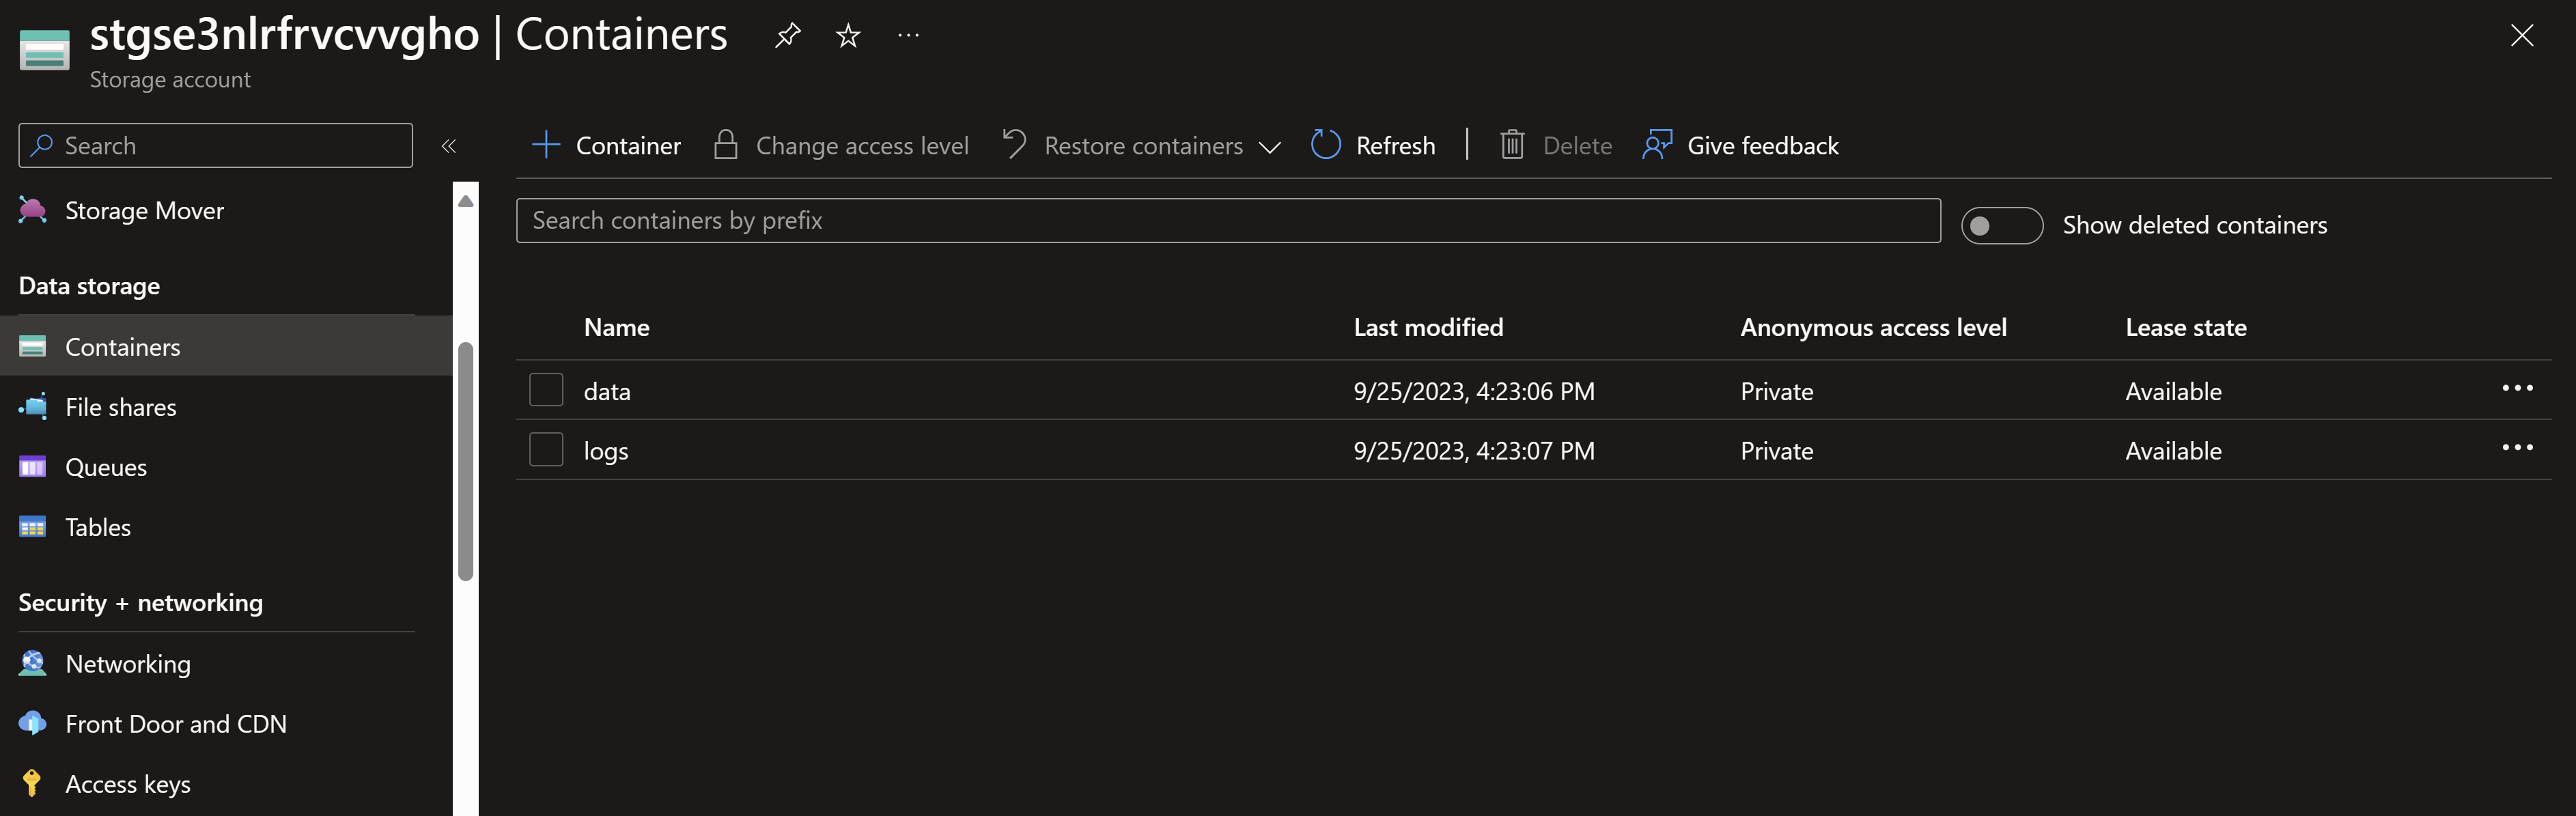
- Navigating to the storage account, we can indeed see the two containers we expect based on our input (data and logs). We can also see the three sample files being uploaded.


My name is
Seif Bassem
You May Also Like
Creating more re-usable bicep code using user-defined types
User-defined types is a new feature that allows you to define custom …
Re-usable Bicep modules using Azure Container Registry
Build re-usable Bicep modules Bicep enables you to organize your …

Continuous delivery to Azure using Bicep and GitHub actions
Infrastructure-as-code with Bicep and GitHub actions Bicep has been a …